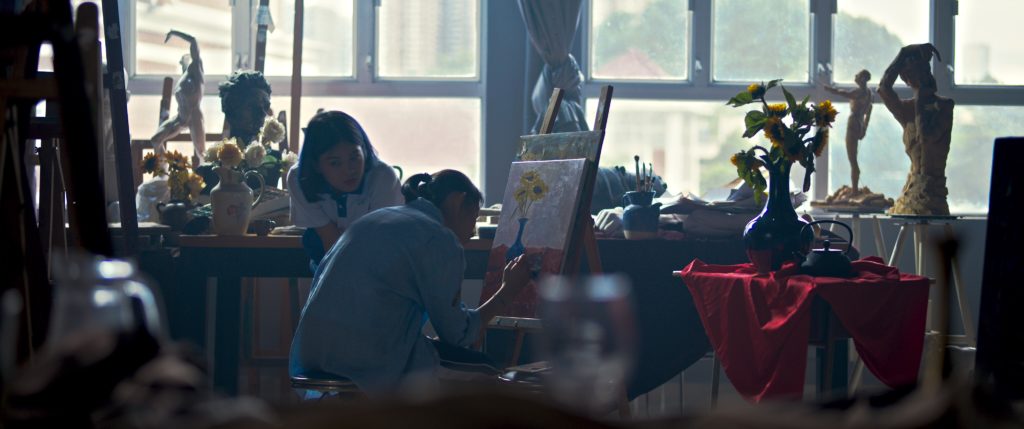
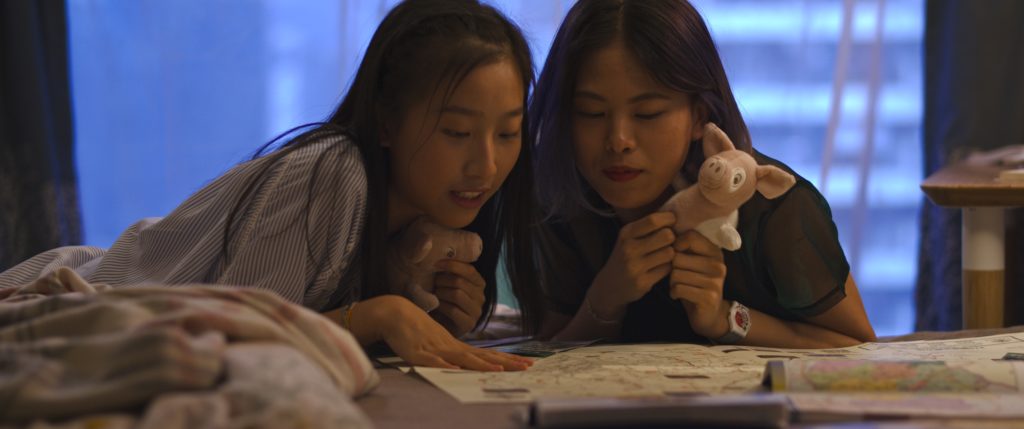
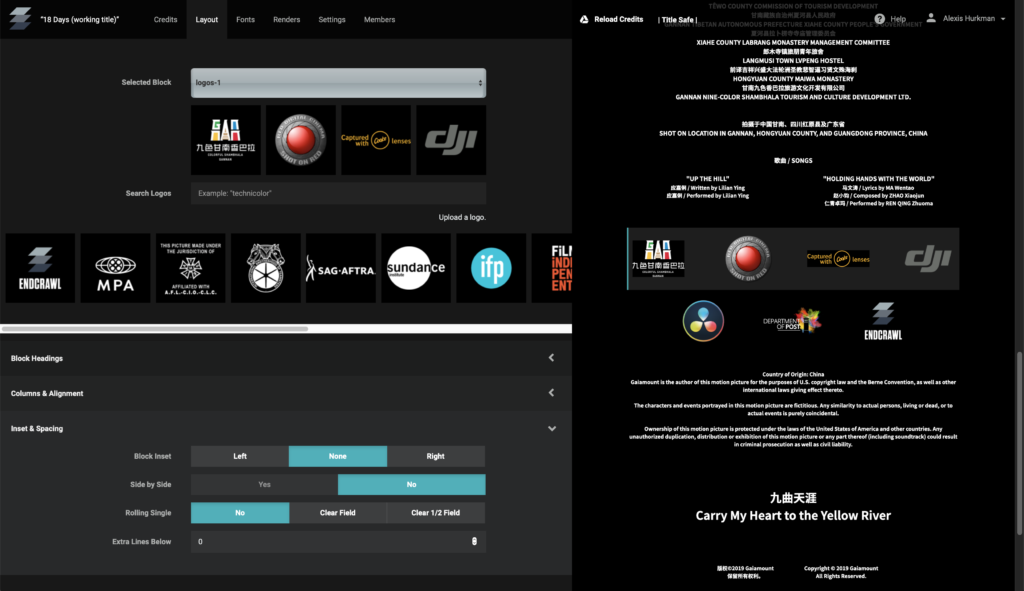
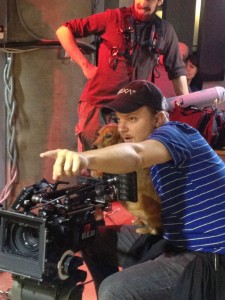
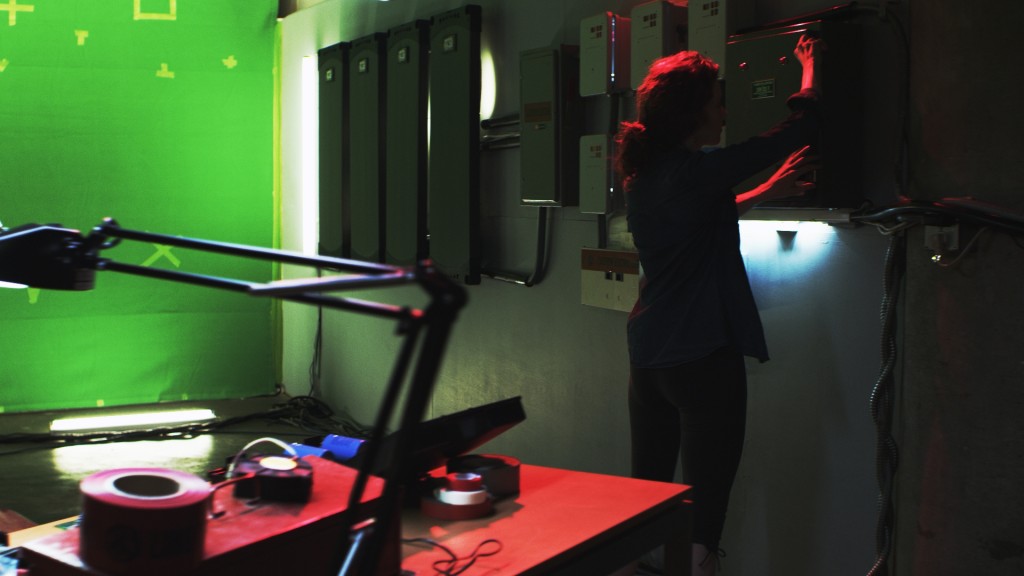
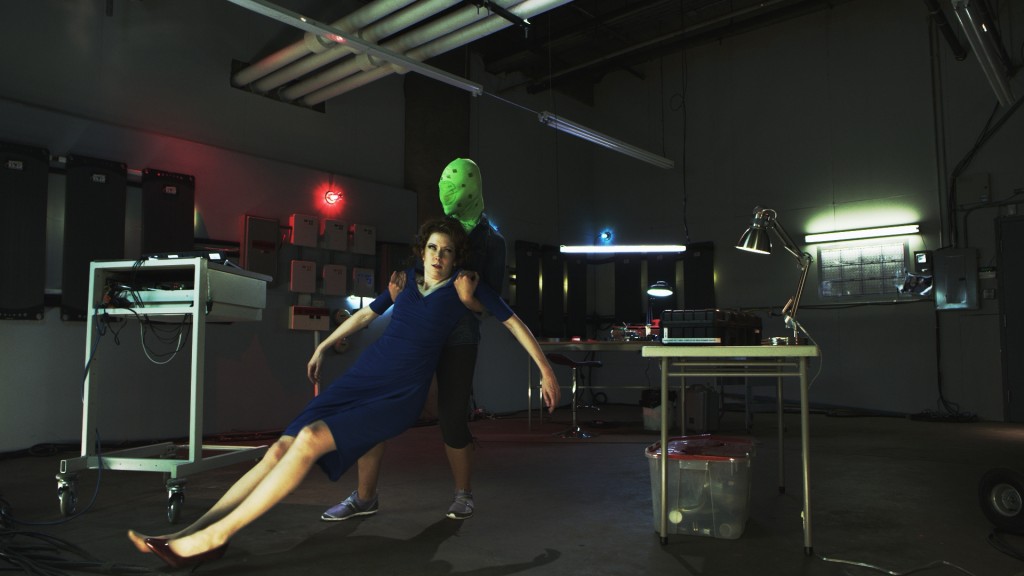
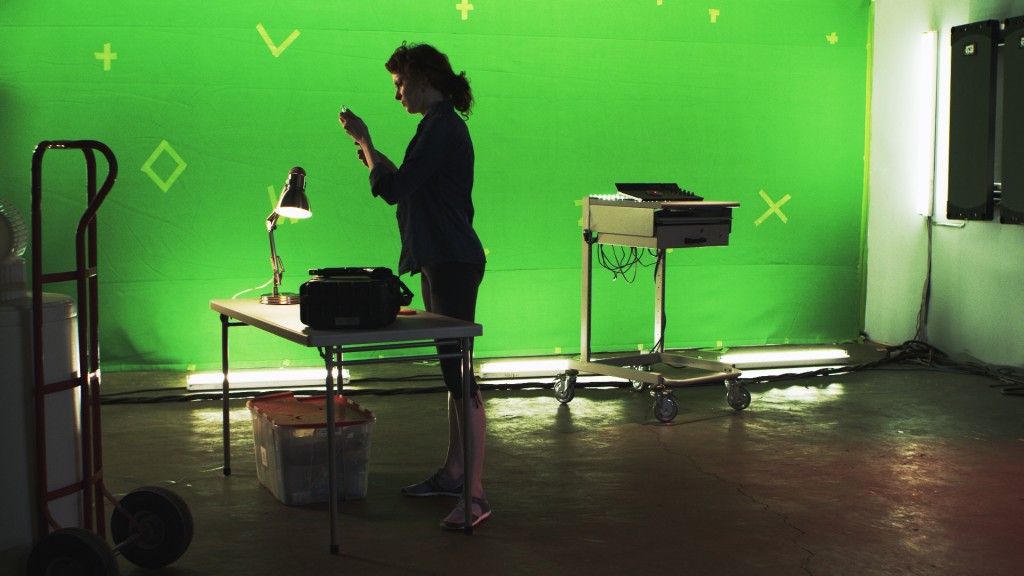
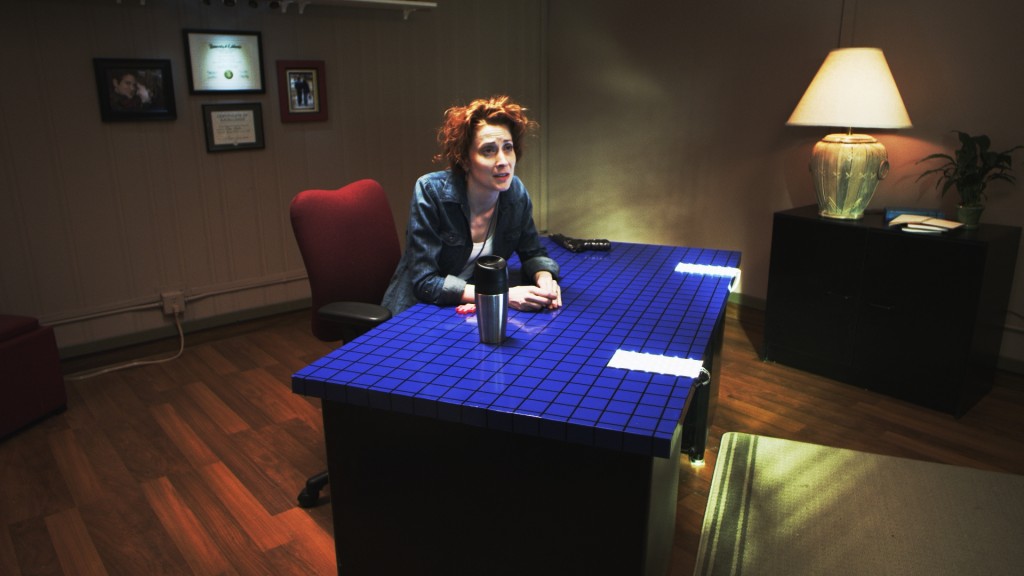
Directing
I’m extremely proud that “Carry My Heart to the Yellow River,” the short I directed and co-wrote in China in the summer of 2018, has found such a global audience on the 2019-2020 film festival circuit. So far, this uplifting story of a high school graduate’s epic journey on behalf of her sick friend has been accepted to 45 Film Festivals among ten countries and territories, including the USA, Guam, Italy, England, India, Ireland, Bhutan, Germany, Australia, and Canada, and we’ve been semi-finalists in an additional six festivals in three more countries.
On top of all this, we’ve won an astounding ten awards, including three best short awards, two audience choice awards, and specific awards for best drama, best director short film, and best cinematography.
In the United States, we’ve had screenings from coast to coast, including but not limited to New York (Syracuse and Williamsburg), Florida (Orlando and Fort Lauderdale), California (Los Angeles, Newport, Ojai, Santa Cruz), Hawaii, Washington, and many states in-between (Mississippi, South Dakota, Iowa, Ohio, Michigan, Illinois, Wisconsin).
Most importantly to me, audience response has been terrific, and I’ve heard from more than one viewer who’s been deeply affected by our story. After all the hard work, it’s enormously gratifying to see the emotional payoff in the faces of viewers.
Film Festivals to which we’ve been accepted:
- 39th Breckinridge Film Festival
- Great Lakes International Film Festival
- Charlotte Film Festival
- South Dakota Film Festival (Winner – Best Family Friendly Short)
- Fayetteville Film Film Festival
- Sioux City International Film Festival
- Santa Cruz Film Festival
- Syracuse International Film Festival (Winner – Short Film Fiction)
- Orlando Film Festival
- Guam International Film Festival
- 70th Montecatini International Short Film Festival
- Liverpool Film Festival
- 20th Ojai Film Festival
- East Lansing Film Festival
- Alexandria Film Festival
- 34th Fort Lauderdale Film Festival
- 39th Hawaii International Film Festival
- Goa Short Film Festival
- Williamsburg Film Festival
- Waterford Film Festival
- Druk International Film Festival (Winner – Short Film: Outstanding Achievement)
- IS Short Film Festival Pune India
- 42nd Big Muddy Film Festival
- Snowdance Independent Film Festival
- 14th Beaufort International Film Festival
- Green Bay Film Festival (Winner – Titletown Award for Best Short, Audience Choice Best Short)
- Children’s Film Festival Seattle (Winner – Best Live Action Short)
- 20th FirstGlance Los Angeles (Winner – Best Drama, Audience Choice Short Film, Best Director, Best Cinematography)
- 14th Taos Shortz (Postponed)
- Beeston Film Festival in Nottingham, UK (limited online exhibition)
- Cleveland International Film Festival (in the Filmslam program) (limited online exhibition)
- Australian Inspirational Film Festival (Postponed)
- 17th Tupelo Film Festival (Postponed)
- Tallahassee Film Festival (Cancelled)
- Tiburon International Film Festival (Postponed)
- 39th Minneapolis Saint Paul International Film Festival (limited online exhibition)
- Julien Dubuque International Film Festival (limited online exhibition)
- Newport Beach Film Festival (Postponed)
- XXI Festival Internazionale Corti da Sogni Antonio Ricci (Postponed)
- 15th European Independent Film Festival (ECU) (limited online exhibition)
- Riverside International Film Festival (limited online exhibition)
- 39th Minneapolis St. Paul International Film Festival (limited online exhibition)
- Julien Dubuque International Film Festival (limited online exhibition)
- 62nd Rochester International Film Festival (limited online exhibition)
- 16th ReelHeart Film Festival (Toronto, Canada) (limited online exhibition)
Film festivals at which we’ve been shortlisted, but not accepted:
- Sapporo International Short Film Festival & Market (Programmer’s Delight Shortlist)
- Thessaloniki (Semi-finalist)
- Short to the Point Awards (Semi-finalist)
- Dublin International Film Festival (Shortlist)
- Asia South East (Highest Commendation)
- Dances With Films (Second Round Selection)
Additional Note – At this point, given the worldwide pandemic with which we’re faced, film festivals are either postponing screenings, or moving to one of several online exhibition models for limited time screenings. We fully support both decisions, and I’ll post updates for whenever online screenings are scheduled. It’s been a fantastic run so far, and we’ll see it through to the very end. I’m hoping we can find a willing streaming distributor who can provide this project with a more permanent home!
Having labored in various corners of the moving images industry for most of my adult life, I continue to be surprised at the number of people I meet who are under the impression that yelling at people who aren’t doing what you want is somehow productive. Anger is a powerful tool and an all too common stress reaction, but it’s also the least effective means of motivating people to be creative that I can think of. That said, long hours, frayed tempers, and willful lack of compliance with critical tasks can bring out the worst in all of us, and I’m no exception. But that doesn’t change the fact that anger is seldom a productive strategy, particularly in one-on-one interactions.
In my own experience as a director, the very worst thing you can do when working with an actor who isn’t giving you the performance you want is to yell. Giving in to anger and saying anything along the lines of “that was terrible,” “you’ve got it all wrong,” “what were you thinking,” “that’s not what I wanted,” etcetera, is invariably a mistake. While I’m sure there are thick-skinned actors out there who may have no problem with this kind of spirited feedback, I strongly suspect they’re in the minority, because most will take this with as much of a poker-face as they can muster, and then quietly shut down, fighting feelings of shame, insecurity, and anger of their own. Consequently, you’ve just eliminated any chance you had of getting a nuanced performance or having an open and honest conversation about the performance that you do want.
One would think this would be obvious, but apparently it’s not.
Impatience, anger, and shame are counterproductive when the objective is to communicate creative ideas, and to influence the behavior of others to make positive contributions to the needs of a project. You may think you’re delivering “tough love,” but in reality you’re filling the mind of the other person with a multitude of unhelpful feelings, defensiveness chief among them, that will crowd out actual creativity or the ability to suss out how to achieve the actual goals you have for the scene.
In short, creative projects work best when you’ve got people trying to figure out how to help you, rather then trying to figure out what they’ve done wrong. The two are not the same.
This is just as true when working with the rest of your crew on set, or with your collaborators in post production.
DPs, Production Designers, Editors, VFX artists, Motion Graphics Designers, and Colorists are all artists who, if you’ve hired well, are in the game to give you their best work. They’re also people who will get just as defensive, insecure, angry, and ashamed as any actor if you allow yourself the luxury of belting out negative, brusque, or abusive feedback in moments of frustration, particularly as your first means of communication.
I’ve said for years that there’s no better way to learn how to work with people then to make a movie with volunteers who have no reason to show up other then to help you out, because the minute you become angry or tyrannical, they’re gone. When working with people who are doing you a favor, no matter how impatient or irritable you feel, you need to take a deep breath and learn to initiate a dialog based on more positive ways of communicating, or you’ll be working alone.
This all assumes, of course, that you’re working with someone who’s as genuinely interested in a positive outcome as you are, which is a minimum requirement for creative collaboration. If this is true, I’ve always felt it’s important to extend the benefit of the doubt to the other person’s motives. They did what they did because they were trying to help, but it just didn’t happen to be what I had in mind. No harm, no foul, it’s time to go back and try to communicate better. The flip side of this is that the person you’re communicating with needs to make the effort to listen, to not be defensive, and to make an effort to take the note, correct the situation, or communicate whatever problem is impeding progress.
Assuming I have motivated collaborators, I’ve almost always found that cheerful communication has gotten me better and more immediate results, and it’s a lot more satisfying to work with a collection of happy people who feel safe in the creative environment you carve out for your team. When making my way though any disagreement in which I’ve a vested interest in a positive outcome, I really try to keep the following in mind—is my goal to make the other person feel bad, or is it to give them a reason to change what they’re doing? These are very different objectives, and require different strategies of communication.
Of course, there are always going to be situations where this kind of management fails to provide the outcome you need. In these situations, I find it’s usually because either (a) there wasn’t enough planning to enable the thing you now want to happen, or (b) the person who was hired for a particular position wasn’t the right fit in terms of experience or temperament.
Alternately, if you’re finding that nobody ever does anything right and you’re constantly at odds with everyone you’re working with, it’s entirely possible that the problem is you. To be blunt, a lack of preparation, undeveloped communication skills, or being so stressed that every reaction you have is fight or flight are all factors that contribute to anger management issues on projects. The solution in all of these cases is to step back and take the time to figure out what you need to do to chill out, because none of this is actually your crew’s problem.
Take five minutes. Drink some water. Eat a healthy snack (especially eat a snack, low blood sugar is the enemy of chill). Take a few deep breaths, and focus on clarifying what the real problem is – the thing that’s causing your frustrations – in your own mind. Only then are you in a position to address the issue and communicate the beginnings of a solution.
Again, I understand. Deeply. Filmmaking is an inherently stressful occupation. Deadlines, weather, unexpected costs, equipment problems, software issues, location troubles, and myriad other factors conspire to make problem-solving an ongoing part of each person’s job. These frustrations pile up, and if you’re not careful you can end up being a powder-keg of agitation without even realizing it. So part of your job, if you exercise any creative leadership in any part of the filmmaking process, is to be aware of what your mood is, and to control yourself. The more you can address issues in a calm and methodical manner, the better your communication will be, and the better your collaborators will be able to help resolve problems in the spirit of genuine teamwork.
Keep in mind that most projects are marathons, not sprints. Anger is the enemy of long-term productivity.
By now, I imagine most people who know me via social media are abundantly aware that I directed a movie in China, Carry My Heart to the Yellow River, in the summer of 2018 that was finished in March of 2019. It has since played its way through (to date) 24 film festivals in seven countries around the world, winning two awards in the process. Audiences have responded enthusiastically, shedding not a few tears over this heartfelt drama of a high school graduate undertaking an arduous bike trip on behalf of her cancer-embattled friend.
I wanted to share a bit of how this movie was made, because it’s been the closest I’ve come to doing a bit of big feature filmmaking, even within the confines of a 21-minute short. We shot amazing locations in large-format 8K with a great camera and state-of-the-art cinema lenses, the editor and I had months to refine the edit properly, and I got the chance to do postproduction right, grading and mastering carefully considered SDR and HDR versions of the movie, with a wonderful original orchestral score, and a surround mix accomplished in a Dolby Atmos theater.
How Did This Happen?
But before all that, the first question I invariably get at every screening is, how on earth did I, an American living in Saint Paul, Minnesota, get the opportunity to make a sprawling epic short movie in China without speaking Chinese?
The answer is producer Zunzheng Wang, principal at Gaiamount in Shenzhen China, who’s the owner of Zuzheng Digital Video Co, which is the research and manufacturing partner to Flanders Scientific, a company I’m intimately familiar with since (a) I’m friends with American CEO Bram Desmet, (b) I use their displays as a colorist, and (c) they sponsored a previous project I directed. Zunzheng Wang is a formidable hardware and software engineer, an entrepreneur in video technology education, and now head of an emerging media production company, and I’m honored that he approached me to direct his first produced movie.
Since 2013, I’ve been doing presentations on color grading, directing, and screenwriting for Zunzheng at BIRTV in Beijing (China’s version of NAB), even having a screening of my previous short film “The Place Where You Live” as a prelude to a lecture series on directing there. Early in 2018 he approached me about directing a project to be set in Gānnán, in China’s Gansu Province. His interest was in pairing American and Chinese film workers together to learn from one another, while creating an ambitious project with which to introduce his companies’ capabilities. It was an offer I couldn’t refuse, and I immediately got Director of Photography Bo Hakala on board, with whom I’ve collaborated on two prior projects (the science-fiction short The Place Where You Live and the as yet unproduced scripted series Hidden Among Us), which began a two month whirlwind of development and preproduction.

Producer Zunzheng Wang is third from the right, and story author and Screenwriter Kenjing Xiong is second from the right
Writing the Script
Zunzheng introduced me to Kenjing Xiong, who had written an absolutely charming one-page story summary (loosely based on his own experiences). I had already been wanting to do a more emotional drama as my next project, so I was immediately intrigued by this story of two friends, one undertaking an epic journey filled with difficulties in order to send photos to the other, isolated in the hospital fighting an insidious illness. With our combined efforts, him writing three drafts and me doing another two, a shooting script was arrived at with which to begin preproduction.
Kenjing wrote his drafts in Chinese, and these were then translated into English by translator Phillip Yan for my review. I gave notes, which Kenjing implemented in his version, which were then re-translated for me back into English. Once I entered the writing process, I worked from an updated English translation to make my revisions, passing drafts to my inner circle of trusted script readers for feedback as I usually do. Once that was complete, Phillip translated my final draft back into Chinese so it could be used for preproduction in China.
Once I had a chance to do my preparations and make my notes for directing the actors, I sat down again with Phillip and went through the dialog of the script line by line, discussing the intention of each piece of dialog as I would later with the actors. Based on this in-depth discussion, Phillip carefully revised the spoken lines yet again to more accurately reflect the beats of each scene, and the colloquialisms that would be most natural. This was a fantastic process, because it meant that Phillip, who was also my translator throughout the shoot, knew exactly what I wanted in every scene as I gave direction, and I had him on headphones during every take to listen for language details that I wouldn’t be able to discern.

(Front left to right) Translator Phillip Yan, Actress Box He, Director Alexis Van Hurkman, Assistant Director Huan Yang
Producer Zunzheng is a practicing Buddhist who’s been to the region many times and has personal ties there, and he made it clear in discussion that it was vital for us to both show the culture, and portray it accurately. He wanted to make sure we gave the audience many opportunities to discover this region right alongside the main character, a goal I absolutely shared.
I’d spent the immediately previous three years visiting different cities in China while developing a scripted urban fantasy television series with the intention that it be shot in China, so between my expanding Kindle library on Chinese history and culture, and my growing network of friends and acquaintances in Beijing, Nanjing, and Shenzhen, I’d already been cramming both ancient and recent Chinese history and culture, folklore, Taoism, and Buddhism, in preparation for being able to create the Chinese characters of my project. This gave me an adequate foundation to be able to learn more as I worked through what this new project would demand of me.
One of the attractions of this bicycling story is the lead character’s insistence on doing this trip despite her inexperience and the trip’s daunting scale (it’s an overwhelming ride for someone who’s not a committed bicyclist), simply because of her dedication to doing this for her friend. It struck me as a sentiment rooted in the quintessentially Confucian definition of righteousness, “doing for nothing,” or doing something simply because you know it to be right, particularly when you know you may not succeed. Coupled with the Confucian concept of “knowing Ming” (translatable to accepting fate, destiny, or simply the way things are going), this story struck me as a great way to explore a character trying her best knowing full well she might fail to reach the destination in time, as her friend’s condition is completely out of her control. Nor is this simply some narrative conceit; “I’ll try my best” is a phrase and attitude I hear in China a lot, in movies and from friends and colleagues. And so, these concepts drove my evolution of the story in the final draft, and were very much ideas I tried to incorporate into Box’s portrayal of the character.
Narratively, it was the lead character’s status as a tourist herself that gave me the means with which to engage with the culture of Gānnán, despite having been given only two months to give myself a crash course on all things Gānnán-esque. The actress I cast in the lead, Box He, was an 18-year-old native of Shenzhen, which is one of China’s largest and newest cities, and at the time she was between high school and college, just like the character in the story. The Gānnán region was as remote to both the character and the actress as it was to me, so we were both able to share the newness and wonder the character felt traveling through the region, and incorporate it into the project. In a way, it was almost like shooting a documentary, albeit with an emotional narrative driving the journey.

Bicycling scene from Carry My Heart to the Yellow River
The Crew and the Gear
I have to give Line Producer Jianlan Li massive credit for pulling together a crew in record time for the two separate regions we’d be shooting. We had four shooting days on stage and on location in Shenzhen with a larger crew to cover actress Linaixuan Wang’s hospital scenes the backstory of the relationship between the two girls. Then we’d have one travel day to fly up and drive over to Gānnán, with an additional twelve days on location in Gansu and Szechuan provinces with a smaller crew to shoot the bicycle trip itself. This may seem like a princely amount of time for a short subject, but as you’ll soon see there were a lot of company moves; we were covering many different geographical locations over a wide area, in extremely remote locales. Time went fast.

(Left) Line Producer Jianlan Li
Producer Zunzheng wanted to have this project shot in 8K, and chose the RED Monstro camera system for us by virtue of buying a pair for his company. DP Bo Hakala, who’s had a lot of experience shooting RED, was more than fine with this camera system’s vista vision-esque sensor size, resolution (8192×4320), and improved low-light performance. After some discussion, I was persuaded by Bo’s suggestion we shoot full sensor and crop towards the top of the frame for the 2.39 aspect ratio I wanted to use, rather then shooting anamorphic. We were going to be shooting in a variety of conditions, and this approach was deemed both more flexible, and more conducive to being able to shoot handheld given the size of the lenses under consideration, not to mention being a better match for the drone footage we knew we were going to be shooting. I ended up being very happy with this decision later in post.

RED Monstro in standard configuration
When it comes to lenses, my philosophy as a Director is to let the DP choose once I’ve communicated the vibe I want from the image. At Bo’s recommendation, we used a set of Cooke S7 primes, both for the “Cooke look” and for their full sensor coverage. The resulting combination was absolutely magic, allowing Bo to create some truly stunning photography on this project. I believe we also had one exceptionally wide Sigma lens, which we used for certain interiors where we really wanted to give a sense of the space.

Cooke S7 prime lenses
I love working with Bo, he’s a creative DP and impeccable photographer who’s also a wonderfully accommodating collaborator. He’s always able to bring the coverage I request to its best visual potential, and he’s always quick to suggest a better angle or approach when he sees it (usually he’s right), but he’s also able to let go when I need something different. And he’s been able to deal with the fact that I’m a colorist in addition to director, with opinions that occasionally infringe on his world (he did say once that it was bizarre working for a colorist/director). In particular, this project was always intended to be mastered in HDR, so we had a lot of discussion as the shoot went on about what that would mean, which definitely affected the coverage I went for in many situations since we were shooting available light for most of the on-location exteriors. However, it was in these situations where Bo’s photographic ability shined, as he always had a great sense of how to use the best light in every situation. In the end, all of these combined efforts made this project a pleasure to grade, and the fact that he and I had discussed the intention for the images in such detail made it easy for me to put all that thought into the final finish at the end.

Director Alexis Van Hurkman and DP Bo Hakala taking a moment to discuss coverage
I would be remiss if I didn’t mention First AC Eoin McGuigan‘s masterful camera builds and focus pulling. For various reasons we only ended up having one camera body available to us for the shoot, and since we were constantly bouncing among standard configuration, hand-held, Easy-rig, and a stripped down Ronin configuration used both for hand-held and a variety of vehicle mounts, Eoin had his hands full building and re-building the camera multiple times over the course of each packed day of shooting. We tried to be strategic about covering each scene to avoid unnecessary torture for him, but it was still an enormous amount of work.

(Left) Translator Phillip Yan, (Right) 1st AC Eoin McGuigan
While on location in Gānnán, Bo had a veritable one-man lighting and grip crew in Beijing film industry veteran Li Xin. Whether it was setting up lighting on an adjacent rooftop, building a variety of automotive rigs, or attaching lighting or camera to god-knows-what, Li Xin figured it out and executed everything swiftly and safely.

(Left) DP Bo Hakala, (Right) Gaffer Li Xin
The other image maker was Yiyuan (Evan) Feng, the drone pilot who flew the DJI Inspire 2 with Zenmuse X5S camera we used for the shoot. Shooting raw CinemaDNG with a 5K sensor and interchangeable Micro 4/3 sensor and lenses, the resulting footage intercut and graded to match the Monstro footage amazingly well. Evan was a terrific pilot with great instincts, and when he wasn’t working solo shooting B-roll or using the drone to get us ahead with our scouting, he worked well flying the drone in tandem with Bo operating the camera to get us some really great aerial photography.

(Center front) Evan Feng piloting the DJI Inspire 2 drone
My Production Designer for this project was Kaylynn Raschke, with whom I’ve worked on every narrative movie I’ve made in the last twenty years. I never tire of saying that her work is one of the primary reasons my films look so good. Kaylynn was, as always, in charge of all wardrobe, makeup, set design, and set dressing decisions, working with Bo and I to harmonize what needs to go in front of the camera. Working with her team, she then put together looks for every scene with a flawless sense of style, coupled with a keen sense of narrative. A talented writer and photographer in her own right, Kaylynn carefully selects each garment and object on screen, to help tell the story in ways both subtle and clear.
An example she likes to use to illustrate this point is the paint-covered blue shirt worn by the character of Yu Xuan (the sick friend) in the art room scene. It’s actually a duplicate of the shirt worn by the mother later in the hospital, a fact nobody will consciously notice, but that builds a subliminal association between the two characters (one might assume the daughter is using one of the mother’s old shirts as a painting smock).
The movie is filled with examples of this kind of thinking, each decision carefully made to reinforce who the characters are, what’s happening in the story, or giving us clues about what’s important in the frame. Since Kaylynn and I are married, we always have ample time to discuss the project at hand, both in advance and during the shoot, so communication is never a problem. And on set, she’s a tireless organizer who’s not afraid to get hands-on with any issue that comes up. I’m lucky to have her.

(Right) Kaylynn Raschke, Production Designer
On this movie, Kaylynn’s department included Bozhao Dou as Set Dresser and Lillian Fu as Makeup Artist and Costume Supervisor. They all had their hands full coordinating props and wardrobe to match the relentless continuity shifts from one set of shots to the next. There are many time shifts from scene to scene, and a lot of montages, so making sure the character was wearing the correct clothes for the right moment of the film was a challenge, especially with the locations changing as much as they did.
Shooting in Shenzhen
Since Gaiamount is located in Shenzhen, we did that part of the shoot first, with Linaixuan Wang playing Yu Xuan (the sick friend), and Box He playing Jing Yi (the bicyclist). All hospital scenes were shot over two days on a standing set two hours outside of Shenzhen, which Production Designer Kaylynn Raschke dressed to be a modern Chinese hospital. An unexpected power outage in the suburb we were shooting the afternoon of the first day led to delays, but we were able to get back on track that afternoon, and make up for lost time on the second day.

Behind the scenes on the Hospital set (Photo: Eoin McGuigan)
The third day we were able to shoot classroom scenes on location at a Shenzhen college, with a class of film students on hand to be extras. The location was fantastic, and the hallway and classroom scenes went smoothly. As an aside, I learned that all students in Shenzhen city schools wear the same unisex school uniform that consists of mix and match track suits, shorts, and polo shirts, so that made wardrobe easy…

Classroom scene, all city school students wear uniforms
Production Designer Kaylynn Raschke had a bit of excitement when it came to the art room scene, however. Kaylynn and Bo had scouted that location without me (I was hung up in Singapore on business when that particular scout happened, so I approved it based on photos), and the art room they found was perfect as it was with layers and layers of art, models, sculptures, and stuff, so that Kaylynn simply requested the room be left alone. Unbeknownst to anyone on the crew, however, a broken water pipe days earlier flooded the room and it had to be completely emptied out, to the bare walls.

DP Bo Hakala and Production Designer Kaylynn Raschke finessing the art room set
Kaylynn only found this out a half-hour before we starting moving out of the classroom, but she’s a pro and in a whirlwind of activity she and her crew dressed that location back into an even greater multi-layered glory, which with Bo’s finishing suggestions and lighting ended up being one of the most beautiful interiors in the movie. This scene is also one of my favorites in the HDR-graded version, given the rich colors and interesting range of tonality at play. I wanted the scene to be a still life of a still life, and it was perfect.

Art room scene from Carry My Heart to the Yellow River
This location also ended up providing one of the biggest cultural lessons I received during the shoot. I tried really hard to avoid directing the characters to behave with “Americanisms,” and I felt fairly confident that my experience in China thus far, coupled with the fact that I cast actors who were exactly the right age and experience for their characters and whom I could rely on to “be themselves,” would help me avoid any obvious issues. Furthermore, I relied greatly on my growing rapport with Box to communicate with me whenever she felt what I wanted was at odds with the naturalism of the situation. I primarily saw my job as protecting the actors enough from the external stresses of the shoot to feel emotionally comfortable working through each scene without artifice, and as time went on I ended up putting more and more of what I saw in Box into the character she portrayed.
However, during the rehearsal for the art room scene, a woman on set who’s my age came to me and quietly suggested that perhaps the girls were being a bit too emotional, suggesting that Chinese women were typically more reserved than I was portraying. It’s my policy to always make myself open to suggestions from any crew member, so I thanked her for her input, and gave it a moment’s thought. I was basing my direction on people I knew and current events literature I’d been reading, could I have gotten the characters so wrong? We still had a few of the film student extras available for background, so I walked over to one of the young women who was watching the proceedings and casually asked what she thought of how the scene was playing, whether she could relate to how the characters were behaving. She replied, “she’s fine, she seems like any of my friends at school.”

Trip planning scene from Carry My Heart to the Yellow River
It occurred to me at that moment that, given the explosive changes in China that have been happening in the last 20 years, the generation gap between the life experiences of people in their twenties and those in their forties is unimaginably huge. People in their forties remembered the very the tail end of the cultural revolution, and grew up in a more isolated China evolving from the economic policies of decades prior. Meanwhile, urban people in their twenties have grown up knowing nothing but a strong, more western-facing China, with endlessly growing cities and nonstop economic growth. Of course there would be a difference of opinion on character attitudes, but I knew I was on the right track following my actors instincts, reflective of a younger generation’s more casual openness. This could be seen in abundance once the camera stopped and the young people on the crew went back to being themselves in-between setups, so I breathed a sigh of relief and carried on.
The fourth day we shot in a rented bedroom, for the after-school scenes between the two friends. We rented an Airbnb room for the day to do the shoot, which I hesitantly agreed to. We got the perfect location, but I was constantly worried that we would be shut down, either by neighbors or the building owner whom it was impossible to contact in advance. Happily, my concerns were unfounded as we were able to keep enough out of the way for nobody to care, and we ended up simply being another curiosity over the course of the other residents day.

Shooting in cramped quarters in a rented one-bedroom apartment
Shooting in Gānnán
When it came to shooting in Gansu and Szechuan provinces, our schedule was bound by a logistical window within which we could shoot in the second half of July. There was no way to schedule Bo and I doing a preliminary scout, so a scouting team went up to Gansu first, searching for the locations we needed and taking photos and VR videos as they went (the VR was legitimately helpful). Based on this information, a route was planned, but this was only a basic framework for what scenes would be shot where.
The reality was that each area was so rich in location possibilities, in many instances it wasn’t until I could see each place for myself that I was able to make sensible scene assignments. Coupled with being at the whims of weather, trying to find places that weren’t only appropriate for the story but safe for the talent to bicycle on, and having a lot of territory to travel which impacted the number of shooting hours we had in any single day, I ended up doing a lot of schedule rearrangements as we went.
Furthermore, we had local representatives from various tourism boards with us as advisors showing us additional locations that were nearly always extraordinary, giving me an overabundance of choice. All of this reinforced the pseudo-documentary approach I took to this project, with nightly script polishes and rewrites to account for all the new geographical and cultural information I was receiving. Funnily enough, the process wasn’t that different to how I approached my feature “Four Weeks, Four Hours” fourteen years earlier, which also had frequent location changes that influenced that script’s evolution as we shot.
Flying into Lanzhou, which was the nearest major airport, we drove across Gansu Province to the city of Hezuo, the capital of the Gānnán Tibetan Autonomous Prefecture, which is an ethnically Tibetan region of Gansu province. It’s an area that’s remote even for most Chinese, and while not in Tibet itself, the gradients of overlapping populations in that area of the world mean that Tibetan culture is everywhere you look, from the language, to the attire of people in the street, to the monasteries, to the Yak herders throughout the grasslands and mountains, through whose herds our production vehicles had to thread as we made our way from location to location.

I’m not kidding, traffic driving through yet another herd of Yak
To American eyes, there’s a distinctly cowboy vibe to the region, with horse and cattle culture everywhere you look. Cowboy hats and bluejeans are mixed with Tibetan long-sleeved garments, local dresses with aprons, and other traditional styles; leather boots and sneakers could be seen in equal measure. You can see people herding cattle from horseback all over the region, although there are also many who use motorcycles (often with a riding blanket over the seat). Yak herds are seen grazing everywhere, while the mountains also have terraced farming communities.

A mother and son we met at the flower park location
Yak milk, meat, and jerky are ubiquitous to the visitor, and coffee in hotels is virtually non-existent in favor of “Yak butter tea” which I learned online is black tea made with a large amount of Yak butter, toasted barley powder, and milk curds. It’s good and I availed myself of it, but if you’re a coffee-in-the-morning person like me, it’s not nearly enough caffeine. I was extremely grateful for Kaylynn’s decision to bring a big bag of instant coffee packets (Starbucks) to keep me on the level every morning.

I found Bruce
Yurts can be seen outside of town, often in use as weekend cabin getaways. Prayer flags stream here and there across the countryside, and buddhist monasteries large and small are evenly distributed from community to community. In town, red-clad monks are ubiquitous. Wherever you go, there’s no mistaking that you’re not in the eastern part of China any more, even linguistically. There were several small communities we shot in where some residents only spoke Tibetan, and our local drivers needed to interpret for our Shenzhen-based translation team. In town, signs were mostly bi-lingual, with both Chinese and Tibetan characters.
China’s a big, ethnically diverse place, and while I had grown reasonably familiar with the culture in eastern China’s larger cities of Beijing, Shanghai, and Shenzhen, Gānnán was an entirely different setting. I have to give enormous thanks to our advisors on the project, notably Xaobing (Shirley) Han (who also plays the woman at the Monestary), a practicing Buddhist who answered each of my thousand and one questions about the regional practices and locations, to make sure we were using each place appropriately and that we were behaving appropriately in more sensitive locations. She was an infinite wellspring of knowledge about the culture and customs we were putting before the lens as we shot locations that had never appeared in a narrative movie before. She was only supposed to be with use for a few days, but she generously extended her time to include nearly the entire shoot, and her help was invaluable.

Xiaobing Han at the Labrang Monestary
One of my many goals for the story was to show the everyday modern life of the region and people as honestly as possible. Happily, the vast majority of local residents we engaged with, many of whom we ended up using as actors or extras, were interested in the project and couldn’t have been more helpful, which was great as we ended up shooting in some extremely remote communities. Most places, there was time to have a chat with local folks, which I always treasured. And there were constant requests for photos. Production Designer Kaylynn Raschke ended up being an ambassador for we four Americans on the crew much of the time, since once she was done coordinating wardrobe, props, and whatever location-dressing was necessary, she had time to meet bystanders while Bo, Eoin, and I were immersed in getting each scene in the can.


In fact, we often ended up being a tourist attraction for the locals. Apparently we were the most Hollywood thing to ever appear in those parts. We were given great welcomes from most of the cities and towns we visited, which was wonderful if a bit confusing to an indie crew like us, but the real fun was when we shot in really small villages and towns.

Being given a welcome at the Gānnán border
In Ga’ermacun, a tiny, nondescript town in Szechuan province, my translator took me aside to communicate something an old woman was telling her friend amongst a group of locals who had assembled to watch us shoot some b-roll, which I’ll paraphrase as “are those people ever silly, shooting a movie someplace like this…” We also met lots of folks with recommendations of additional places we could shoot, which was always useful, sometimes heartbreaking as our schedule didn’t allow for too many detours to investigate new opportunities.

Chatting with Ga’ermacun entrepreneur Phuntsok (2nd from right), giving us tips for shooting in the region
Given this was a drama with not a lot of dialog, it was fairly easy to rearrange scenes as necessary to take the best advantage of the locations we were getting into. A typical day would have us getting to the next location, and Bo, Kaylynn, and I would immediately scout around as I figured out what I wanted to do with it. Bo would then make his suggestions for lighting and coverage, we’d go back and forth discussing a bit, then I’d do a quick walkthrough with the actors, and based on all that, a plan would be set. As equipment was shifted, Box would run her lines with AD Huan Yang, whose background as an actor and stuntman (and director in his own right) were invaluable in working with Box, who had stage experience as a dancer and performer, but for whom this was her first film. Huan went beyond typical AD tasks, reading off camera lines for actors to play off of, and helping Box learn how to fall correctly during our one stunt scene, in addition to organizing our background talent and assisting in shepherding the crew as usual.

Assistant Director Huang Yang (center, in cowboy hat) as the crew learns to make the “heart” finger gesture for photos
And what locations we had. I can say without hyperbole that we were privileged to shoot some of the most beautiful places on earth. Our project had the support of local tourism boards, which gave us access to so many extraordinary areas. We had to keep reminding ourselves that we were shooting a short, not a feature, and I didn’t need that much coverage of every single place we were, tempting as it was. A result of all this, however, was that this short movie has more locations than any sane filmmaker would ordinarily try to shoot (we travelled something like 804 kilometers/500 miles of locations in 12 days), which adds immeasurably to the epic sweep of the protagonist’s journey.
So Many Locations
We began our shoot in the capitol city of Hezuo, having obtained permission to shoot at both the main city bus station and a bicycle shop. In both places we were able to get actual people to play their onscreen counterparts. At the bus station, we had a ticket-agent play herself. At the bicycle shop, we asked a local businessman we met if he’d be interested in playing the bike shop owner. English speakers won’t be able to hear, but the result was local characters speaking with local accents. Fortunately, I’ve a long history of working with non-actors on my own low-budget projects, so I was prepared for working this way (it requires lots of patience and a slow evolution of each performance). While there was much discussion about casting in advance, and we tried finding local professional actors, there’s really no film industry in that region. The only way we were going to have authentically local detail in the performances was to find and work with local people. It was a bit harrowing at times, not being sure we’d find the right characters in time for each place, but in the end I’m very happy with the results.
We were fortunate in getting permission to shoot at Labrang Monastery in Xiahe, considered one of the most important monasteries in Gānnán, and a place where to my knowledge no one had yet shot a narrative movie. It was a stunning location, and we worked hard to follow the rules and not ruffle feathers. By and large, we succeeded, but it was a challenging place in which to maneuver, and one of our trickiest days of shooting. The next morning we were allowed to fly our drones around the monastery in the morning light, and those shots make for one of my favorite musical montages during the film.

Drone shooting at Labrang Monastery
After that, we found one of the best roads for shooting bicycle footage near Amuquhuzhen. A newer, wider road with wide shoulders and little traffic. Even better, it was right next to an incredibly picturesque flower park, with a monument to the horse-riding peoples who inhabit this land. The whole area is astonishingly beautiful.
One of my favorite locations was the town of Langmusizhen, where we shot the hostel scene. This town has a real backpacker vibe, and is one of the last stops before going to the truly remote areas in the mountains we were to shoot next. Mountain streams were channeled along streets with local hotels, gear and art shops, restaurants, and cafes, and the entire town was ringed with the mountains we’d eventually be traveling through. There was also a notable monastery with surrounding landscapes that had been flagged by scouting, but unfortunately we didn’t have the time to include that region in the shoot.

Scouting Langmusizhen
Upon arriving the night previously, the red-lit signage was so striking we just had to shoot the “late-night arrival” scene there, and the hostel where we shot the next morning was the very image of what you’d expect from a place catering to adventure travelers. A bit of early morning lighting and one of the smoke cookies Bo brought to add atmosphere created another beautiful scene.

Shooting the hostel interiors
Funnily enough, we ended up having some bonus time when a rain storm up in the mountains washed away the road we needed to use to travel to the next location, and we needed the wait out that afternoon for the road to be temporarily rebuilt so we could get through. That leg of the trip was pretty exciting as we went off-road in our coach bus, but that’s life shooting on location. You never know what’s going to happen.

Four-wheeling a coach bus over a temporary dirt road that was built an hour before
From there we made our way to the newly built town of Tewo, where we spent the night drinking beer and eating hot pot to celebrate traversing the valley. While there, we spent the next two days shooting the bicycle accident, driving scene, and the call to home scene at the nearby mountain village of Luohong. The mountains all around us couldn’t have been more gorgeous, and the residents were incredibly helpful and accommodating.

Shooting at Luohong
I’ll always remember beginning to shoot a dialog scene on a narrow mountain road when the sound of Tibetan-language techno music started wafting through the trees; the villagers had an outdoor pavilion where they would eat lunch, and they were playing music on a loudspeaker while cooking. I honestly hated to ask them to turn it down. It’s a memory I referenced for the music that plays in the movie’s restaurant scene.
From there we had an epic drive to Ga’ermacun. In theory we were only there to stay the night on the way to the Yellow River, but that town was such a great example of the kinds of communities you’d see cycling around that region, and it ALSO had some of the best Yak jerky I’d yet had (in an effort to catch up on my sleep, I had more than one late breakfast after the crew finished eating consisting of spicy yak jerky, mango juice, and instant coffee gulped down en route to the next location). I liked the jerky so much I got permission from the woman running the shop to shoot there.

The Yak jerky shop in Ga’ermacun
While leaving town, I spotted a bridge that was perfect for a cycling shot and stopped the crew to shoot it. Because there aren’t actually that many roads in the region where we felt comfortable putting the actress alongside traffic, I was starting to worry that we weren’t shooting enough bicycle footage for a movie that’s about bicycling, so I started pulling us over wherever I saw an interesting shot worth taking. While we were setting up, a group of teenage monks came up to us, and happily agreed when we asked if they’d like to be in the movie (you can never have enough background).

Shooting on the bridge
Afterwards, we made our way to the ninth bend of the Yellow River, which was perhaps the peak location of the entire shoot. We had one day scheduled there, and I knew the weather would decide whether that would be the epic finale to the movie, or an overcast disappointment. Happily, the weather cooperated. The original story that was pitched to me wasn’t specific about the ultimate destination of the main character, just that it was a place that was important to her sick friend. When I posed the question to Producer Zunzheng about what locale would have that kind of significance within the region we’d be shooting, his response was the Yellow River. Further research confirmed that to me as the obvious choice, given it’s widely considered to be the birthplace of Chinese civilization, and is in fact one of China’s premiere tourist destinations (not to mention one of China’s greatest photo ops).

The Yellow River, as seen in the movie
Getting this shot was no easy matter, as the best overlook that Bo and I could find required an hour-long portage of the gear up the same wooden stairs you can see in the movie. Racing the sun, we managed to get everything carried up and situated in time to get every bit of coverage I needed to carefully control the edited drama at the end of the movie, including some spectacular drone footage.

Racing the sunset to shoot the climactic scene
As we’d been shooting for over a week already, the crew had really come together, and being able to make such a challenging day such a great success was a peak moment. There’s nothing like nailing the hero sunset shot after beating the clock to pump a crew up.
The following day we had the pleasure of being able to shoot monastery interiors at Yijilongwa. At most monasteries, we were prohibited from shooting interiors (we could shoot anything outside the walls, but nothing inside). However, here we were given access to every room, which was astonishing. Funnily enough, another crew had lighting gear positioned for shooting they would be doing after us, so we had to avoid getting their instruments in the background. This was probably the most “doc-style” scene we shot, using the extra wide Sigma lens we had and shooting a handheld walkthrough of the actress through the space, and it made for a real moment of wonder in the movie.

The Monastery at Yijilongwa
Another truly affecting location we were given permission to shoot was the prayer-flag filled monument at Waqie’ercun. Towering structures hold numerous cylindrical pagodas, each of which contains the remains of a local monk (believed to protect the area with their presence). These were surrounded by grounds with streams and streams of prayer flags hanging from posts, making pavilions.

Still of Pagoda scene
The logic behind the prayer flag is that each flag contains a page of scripture. Since reading scripture is a way to gain merit in one’s life, the non-literate may gain access to this merit-building by hanging these flags so that each time the wind blows a flag, merit is earned. This is also the rationale behind the prayer wheels that are also seen in the movie. Each cylinder of the wheel contains a page of scripture, so that turning the wheel earns the same merit as reading that scripture. The context of the scene we were shooting, between the character and her mortally sick friend’s mother, made perfect sense in this location that, to area residents, connotes both mindfulness and hope.

Prayer flags at Waqie’ercun
At this point in production, all I really had to fret about was the beginning, which required a picturesque mountain road on which the character’s bus would be seen entering the region. We ended up staying in the town of Aba (where we shot the restaurant scene), and outside of town was a road to a mountain park, which served up multiple types of gorgeous scenery, from the rolling green foothills that we used for the show open, to the streams and rivers seen outside the bus window.

The opening scene from Carry My Heart to the Yellow River
A few more kilometers down the way, the landscape morphed into the craggy mountains seen later in the movie as we follow the lead’s struggle to reach the Yellow River in time. My only real regret from the shoot is that we didn’t have any more time to spend hiking these incredible locations, as we were too busy filmmaking.

Mountain Park near Aba
There were many more locations, too many to mention in the limited space of this article, but suffice it to say that Gānnán encompasses some of the most beautiful scenery to be found anywhere. This last video shows a broad cross-section of locations that really communicates how much work this project was, and how much fun we had.
Postproduction
With the conclusion of the shoot, it was time for post-production to commence. Immediately upon returning to Shenzhen I worked with Kenjing Xiong, this time as an editor, to cut a teaser for the movie. He did the first cut using Final Cut Pro X on an iMac using a set of best-of dailies I’d handed off, but when I took on the next edit to add my changes, I decided for expediency to reconform back to the camera original R3D media in DaVinci Resolve. I was using an HP workstation with an Nvidia RTX6000 card, so I could edit at quarter resolution in real time, and once done I could immediately commence the grade. I started with an HDR grade, as I knew that Producer Zunzheng wanted to show this at BIRTV, and I did a manual SDR downconversion from that for web playback. This workflow went so smoothly that I replicated it later during the final finish.
With the teaser, Zunzheng could immediately see what we had. The footage was beautiful, the narrative was working, and it was clear that we had the raw material to create an affecting short movie. With that in mind, it was easy to push forward. I took it upon myself to be the post supervisor since Davinci Resolve would continue to be the center of my preferred workflow, and worked up a postproduction budget to proceed in the most efficient way I could, planning for a healthy editing schedule, original music composition with orchestral performance, and a surround sound mix. I’d be doing the grading, partially to save money, and partially because there’s no way I was going to let another colorist have all the fun doing an HDR grade of this material!
Editing
At the recommendation of colleague Katie Hinsen, I hired New Zealand editor Chia Chi Hsu to edit the program. Her day job is as an assistant editor, but she’d done enough editing that I felt comfortable working with her, and I liked the delicate sense of editing I saw in her reel. Logistically, she also met this project’s needs in terms of being bilingual, being willing to edit in Davinci Resolve (version 15 at the time), and being fine working with me as a collaborating editor, should I feel I wanted to step in. I understand editors who aren’t interested in this, but I’ve been a hands-on editor my entire career, and while I very much enjoy someone else taking the reins, there are times when it’s just easier for me to make some trims right in the timeline as a pass, as opposed to writing up a page full of notes. Chia was great to work with, and we had a productive collaboration on this project. I wish I had a picture of her to share, but at the time we never met, only speaking over WhatsApp and exchanging project files online.
I used DaVinci Resolve to sync the audio (the dual source audio had timecode sync) and create a set of ProRes Proxy dailies from the 8K R3D source that Chia could edit on her laptop. All dailies were output as 2K clips that matched the source media’s aspect ratio, so that any stabilization or reframing during the edit would scale correctly to the source media’s native resolution. I also output log-encoded dailies with RED’s WideGamutRGB and Log3G10 color science as the output settings of Resolve Color Management (RCM). This ensured that any color adjustments made to the dailies by the editor would also be correctly applied to my preferred color settings for the raw source media during finishing. Granted, the low bit-rate, 8-bit, 4:2:0 media wouldn’t hold up for extreme adjustments, but enabling the Rec 709 settings in RCM instantly produced nice-looking SDR dailies, which could be pushed and pulled just enough to even out small exposure shifts that could distract from the editing. I dislike having editors cutting log footage, as I strongly believe that seeing even an approximation of the intended color will affect shot choices. All of this ended up being a great way to work towards the final finish, even while in offline.
All of these settings also went into the project I created for Chia to use as a starting point, which included having RCM set up correctly, along with having an output sizing preset applied to automatically provide the correct framing that was protected for during the shoot; cropping the full sensor to 2.39 vertically off-center towards the top. This was at Bo’s suggestion, so in the event we ever needed to produce full-frame 1.85 or 1.78 aspect image deliverables, the composition headroom would still be reasonable, with the additional pixels coming from the bottom. For good measure, I inserted the source file name and source timecode as window burns along the very bottom of the frame, to aid troubleshooting reconforms later on, while remaining largely out of frame.

Processing log-encoded dailies in Resolve, the red border is an approximation of the framing used for protecting the image during the shoot and cropping in postproduction
I organized the project and media I was giving Chia to facilitate easy relinking and reconform between the source media and the dailies. I also input metadata, finessing the Scene and Take metadata, and adding character, framing, and location metadata (in the form of keywords), as well as customizing the clip names with metadata-driven variable-based clip names, to make the clips more immediately useful. I then shipped a hard drive with the dailies and project file off to NZ, and kept a clone of that drive and its data for myself, for troubleshooting. This was Chia’s first project using DaVinci Resolve for craft editing, but she was a quick study, and I was on hand to answer any questions and deal with any issues since I know Resolve pretty well.
After an initial conversation about the project, Chia did an unsupervised cut remotely. I’m very happy to let an editor have their time with the material without me pestering them. At this point I don’t honestly remember how long she took for her first cut, but she hit the deadline we agreed on. Once I had a chance to see it, we had another conversation about what I liked and what I didn’t, and she went back and did the next cut. The main thing I failed to communicate earlier was my intention to use jump cuts and rapid-fire editing; the source footage was so languid, beautiful, and deliberate one would be forgiven for thinking that was the intended aesthetic for the movie, but the result was not what I’d planned. I did a quick re-edit of the open to provide a more concrete example, and that put us both on the same wavelength better than any amount of notes I could have given. With a clearer view of my plans, Chia’s second cut was right where I’d hoped it would be, and she did another couple of passes before it was time for her to leave the project for a previously scheduled commitment.
At my insistence, the initial edit was done without music. For a narrative project like this, I’ve come to believe over the years that if a scene doesn’t work without music, then it doesn’t work. Music should make an already strong scene stronger, not be a crutch for adding emotion that a scene doesn’t already elicit. As a writer/director, I feel that if a scene needs a musical cue to work, then I’ve not done my job well. Furthermore, I’ve suffered the slings and arrows of “temp love” in past projects, so I didn’t want to get attached to anything but the story. In retrospect, I feel this approach worked really well for this project.
At that point, taking on the continued evolution of the edit was a luxury. All the hard work was done, and my main task was primarily incremental, to take the 26 minute cut she gave me, compress it down, and add a bit more density to some of the montages. This project was always destined for the film festival circuit, and I wanted to see how short I could get the runtime to improve our chances of acceptance. The low water mark I’d whittled the movie down to was 19 minutes (including credits), and my reviewers and I agreed that at that point the story lost much of its charm, and started becoming a mechanical exercise in storytelling. So, I added breathing room back and the final result came to be 21 minutes. I knew going to the festival circuit with a cut this long was going to make my life tougher (spoiler–it probably did), but this was the cut that told the story I wanted to tell in the way I wanted to tell it, and it worked well with my test viewers, so I decided to take a chance and go with it.
Once Chia came back from her vacation, I sent her my edit to review to get her opinion, along with any specific notes that she had. She gave me some great feedback, and with a couple more passes back and forth to address additional improvements, it was complete. Overall, the one scene I found myself re-cutting the most at this point was the ending. Overall, it was good, but it took watching a few variations with different test viewers to really lock down the version that was most effective. I feel fortunate to have the circle of friends that I have, as this feedback was invaluable.

The Feb 11th version of the timeline, close to locked, seen in Davinci Resolve
Music and Audio Post
The score was by Michigan composer John Rake (soundcloud here), with the exception of the cue that plays while the main character is being driven up the mountain that plays in the pickup truck, “Up the Hill,” which was by written and performed by Lillian Ying. John and I have worked together on four projects, now, and his focus on orchestral work has dovetailed nicely with my goals for a sweeping musical experience on this piece. I wanted to bring him to Gānnán to experience the region and meet some of the musicians I’d met while there for inspiration, but unfortunately the winter was too severe for this to be logistically feasible, so I gave John some topics and musical genres to research in order to get ready.
After seeing a music-free rough cut and discussing the project, he suggested a chamber orchestra for an intimate, yet emotional sound. It didn’t hurt that the budget for a Chamber Orchestra was favorable, so once the edit was far enough along for me to have a sense of how I wanted the music to function, he began writing musical sketches and outputting electronic versions that I could review to give initial impressions. He did his music notation using Steinberg Dorico, and for my review he output MP3 files using the Native Instruments Symphony Series libraries for the Kontakt player. Once I was happy with the approach for any given cue, he would flesh it out and send me updated versions with timing to drop into my edit.
In this way, it was easy for me lay his music into the edit, iterate through editorial and music changes, give notes, and get updated cues to continue the cycle. The last of this was done while I was traveling through Southeast Asia, editing and reviewing from my laptop in hotels in Bangkok and Singapore, as the final recording was to be late-January, to deliver music in time for the audio post sessions which were booked for February. John accommodated countless tweaks and timing changes as the edit slowly assumed its locked state, and the resulting cues fit the movie like a glove.
The final music was performed by the Detroit Chamber Orchestra, conducted by Jherrard Hardeman. They did a beautiful job, and the resulting recordings were edited by John and delivered to Department of Post with plenty of time to spare. After listening to electronic approximations for the last two months, hearing the results of actual musicians performing the work was a revelation; night-and-day better than the previews. I had a tear in my eye when I heard the mixed version in the theater for the first time.

(At left) Composer John Rake watches, Conductor Jherrard Hardeman and the Detroit Chamber Orchestra on stage
After exporting the project via ProTools AAF from Resolve to ProTools (and a bit of troubleshooting owing to issues in Resolve 15 that have since been fixed), sound design and mixing was done by the folks at Department of Post, in New Zealand. Because of my scheduled travels, I was able to attend in person to participate in spotting and mixing sessions, which was a treat in their brand new surround sound mixing theaters. Re-recording mixer Alex Chalcoff, sound effects editor Luana Barnes, and the entire team at Department of Post, including workflow supervisor Katie Hinsen who suggested I give them a try in the first place, did a fantastic job. And it was delightful having an excuse to spend time in New Zealand.

Re-recording Mixer Alex Chalcoff at Department of Post in New Zealand
Finishing
Returning to the United States, it was time for the home stretch of the final finish. This included finalizing the movie’s VFX, subtitles, end credits, and grade.
VFX
Owing to the nature of the project, there wasn’t a lot of VFX. What there fit into two categories, phone screen replacements, and split-screen effects to accommodate a bicycle crash scene, and occasionally to combine two takes into one when the situation merited it. I went ahead and did the relatively simple split-screen effects myself, using the Fusion page of DaVinci Resolve. I was only planning on doing mockups of the necessary shots in Resolve for someone else to finalize later, but the result was so good that I ended up just finessing the Fusion effects and using them in the final.

A Fusion node graph, within DaVinci Resolve, for a composite I created to combine two takes into one, adding some unplanned background activity to a take with a better foreground performance
The phone screen replacements were more complex, however, and I wanted them to be totally seamless. The hectic schedule of the shoot made doing practical phone screens not feasible, so I used an in-house team of artists at Gaiamount in Shenzhen to design the Chinese-language phone app graphics for the texts that the girls would be sending to one another. These multi-layered graphics files were sent to Splice, a Minneapolis-based post house that has done VFX work for many CW, AMC, Netflix, and Hulu shows you probably know (Arrow, Legends of Tomorrow, Walking Dead, Daredevil, and Runaways, to name a few). I used to do a bit of freelance grading there years ago, and I knew their work was great as they’ve done VFX for some of my other projects. And of course they’re local to me, although ironically I never ended up going into their office, as everything ended up being exchanged online.
At my request, all effects were done at 8K resolution to match the source, preserving my freedom to either push into shots or master at 8K (which at one point was discussed, but so far hasn’t been done). By and large most of the VFX weren’t complicated (though there were a couple of shots that were pretty involved), and there were a few shots that needed to be redone to accommodate a last-minute editorial change for clarity. I hate breaking edit lock, as it’s something I try to take seriously to save money (and sanity), but I got some important last-minute feedback from a filmmaker I know in Beijing, which dovetailed with a couple nagging doubts I had. It ended up being a good decision.
Grading
I actually did the HDR grade of the movie in late December of 2018. This was before editing was locked, but I had a window of time during which I could borrow an XM310K from Flanders Scientific over the holidays. Now, the whole reason I wanted to edit in Davinci Resolve was so that last-minute editing changes would easily be accommodated by color grading without the need to re-conform, so I was comfortable grading the project earlier. Hooking up the display in my home grading suite, I created a 4K HDR master and a quickie SDR downconversion that was fine for post (knowing I’d revisit it later). My window of time was limited as I had travel planned for January-March of 2019, but over four careful passes I got the HDR grade of the 21 minute program master done. The XM310K is an absolutely gorgeous 4K display, and grading HDR on it is a pleasure. At 31 inches, it’s also a perfect match for my smaller home color suite.

Grading the HDR master
Dolby was generous enough to loan me a Dolby Vision license to enable the software CMU built-into DaVinci Resolve, so I was able to set up my Linux-based SuperMicro system to output to SDR and HDR displays simultaneously in order to follow the Dolby Vision analysis and trimming workflow. It was great getting my hands on the technology for a narrative program like this while having the right displays for the job, and I did another three passes with this workflow to see what I could do with it. Months later, after returning home from New Zealand, I did a manually trimmed SDR grade using my own methods, for comparison. I find it funny that my SDR downconversion grade is considerably more complicated than my initial HDR grade.
End Credits
The end credits were another task that I was able to begin early, actually starting the process while I was traveling, using Endcrawl. I have to give Endcrawl huge props for making my least favorite thing to do in all of post, credits, actually enjoyable. Starting with a spreadsheet given me by Line Producer Jianlan Li, I was able to share the resulting Endcrawl-linked Google Sheet with my colleagues in Shenzhen, working with them on the translation (I wanted to do bilingual credits), verifying each name and spelling on the list, and tracking down the last few names we needed. Keeping this document dynamic made it easy to regularly update the credits layout at a moment’s notice, no excuses.
The web-based interface made styling the credits a pleasure, and they were very accommodating of making sure that I had a Chinese-compatible font and that I was able to get end-of-credit logos they didn’t have in their database uploaded for my use. Finally, the online rendering system made kicking out new versions with different timings a snap, and paying for 4K rendering made it easy for me to render out separate, properly scaled and timed versions of the credits for each HD, 2K, and 4K deliverable I created. I also appreciate the ability to output the credit scroll at a variety of prescribed speeds; while the recommended speed look gorgeous, I knew this movie would be playing within blocks of other shorts, and I didn’t want to be the jerk with glacially slow credits holding up the next movie. When I master the final release version (for wherever the final release ends up being) I can switch back to the recommended speed, and I had the credits music cue timed appropriately for the added duration.
Overall, it’s a great system that I can’t recommend highly enough, with nice typography and a lot of industry-specific thought put into the details of the layout options. And in the year I’ve been using Endcrawl, they’ve been adding improvements in a steady stream.

Laying out end credits using Endcrawl
Deliverables
In the end, I created a family of deliverables with which to take on the festival circuit, with SDR and HDR versions, at UHD letterboxed, 4K DCI scope, 2K DCI scope, and 1080p letterboxed resolutions, mixed and matched with 5.1 surround and stereo audio mixes. So far, festivals have played only the SDR 2K scope and SDR HD letterboxed versions, in both surround and stereo sound. I have, in my collection, an HDR 4K Scope version that nobody outside of Shenzhen has seen, that I desperately hope can someday find its way to audiences. It’s drop-dead gorgeous. However, that will have to wait until our festival year is concluded and I see if I can interest an HDR-delivering streaming distributor in our character’s epic journey.
Conclusion
When I started writing this article, I had no idea it would break ten thousand words (I guess there’s a reason I’ve put off writing this for six months), but it’s been a huge project with a lot of moving parts for a short movie. It’s been massively rewarding, though, and I’ve enjoyed every part of the process. I couldn’t be more proud of the final result, and of the huge amount of effort that everyone involved has put into it. A director is nothing without collaborators, and I’ve had some great ones. And I have to give one last thank you to Zunzheng Wang at Gaiamount, for having the vision to put this project into motion, and for pulling together the resources to carry it through.
I’ve since directed another project in Shenzhen, giving me the opportunity to learn more about one of China’s most dynamic cities, but that’s a topic for another time. I hope someday to be able to return to Gānnán, simply to travel and take things in outside of the bustle of a shooting day. There’s so much more to experience, we only scratched the surface.
I hope you someday get to see the full movie; I’ll certainly be announcing it here once it’s move widely available.
This is it. After two years of production and post-production, and a year traveling on the film festival circuit, I can finally release my Science Fiction short “The Place Where You Live” free on the web to the general public, available both on both YouTube and Vimeo. It’s been a long time coming.
While the shoot itself went fairly quickly, with two-and-a-half days of principal photography, and another day of pickups a year later, post-production took a good long time for everyone involved. It’s tough squeezing in ambitious VFX composites in-between paid gigs, and even I wasn’t immune as this came during the same year I ended up writing and revising a total of five different books (Adobe SpeedGrade Classroom in a Book, Autodesk Smoke Essentials, the DaVinci Resolve 10 manual, Color Correction Handbook 2nd Edition, and Color Correction Look Book), in addition to the color grading gigs I had that year. Squeezing in my portion of the post where I could was hard, and not a day passed where I didn’t wake up and feel guilt over not being able to get to my film (I’m never writing that many books in a year ever, ever again).
In the end, nothing motivates finishing like a deadline, and an early look at the trailer and a teaser convinced the organizer of the Midwest Sci-Fi Film Festival that he wanted my short in their lineup. This prompted my last and most break-neck month of post-production and finishing, to wrap up the project once and for all, and to embark upon what would become a total of 18 festival screenings, plus one promotional screening (in Beijing, no less). In the process, we garnered six awards for everything from “Best Science Fiction Short” (Big Easy International Film Festival) to “Best Leading Actress” (ConCarolinas Short Film Festival), to a “Special Jury Prize” at the Worldfest-Houston International Film Festival. I travelled to what festivals I could, along the way meeting many talented filmmakers, actors, and film enthusiasts at screenings both in the U.S. and abroad.
Film Festivals are always a great experience; films are meant to be seen by an audience, so it’s gratifying to put the work in front of people, which to me is the the whole point. Happily, we had great audiences who were, on the whole, enthusiastic about the film. And being in the Science Fiction category of a lot of festivals, I have to say there’s a lot of really fantastic work out there right now. “The Place Where You Live” was in great company in every shorts program in which it played.
Please watch the credits, as I can’t thank the folks who worked with me on this nearly enough. Additionally, I want to give a huge shout-out of thanks to Autodesk, who sponsored the project, and develop the software that made it possible (the entire short was entirely edited and composited in Autodesk Smoke). Their support was key to this film’s creation, and helped me to get up to speed with an incredibly capable and deep application. Smoke’s fantastic integration of node-based compositing and editing made it easy to tweak every shot in this movie until the day it was finished. Autodesk 3D Studio Max was also used by artist B.J. West to create the CG effects, so Autodesk Software touches every single frame of this film (along with Adobe Illustrator, Photoshop, and After Effects to create animated graphics elements, DaVinci Resolve Studio to create dailies and do the final grade, GenArts Sapphire plugins to help all along the way, and Avid ProTools to do the sound design and mix). If you’re interested in learning more about the workflow I and the other artists who worked on this project used, you can see a presentation I gave at the 2013 Amsterdam SuperMeet here. In the coming weeks, I’ll be posting a couple more “making of” videos showing preproduction and workflow.
And now, my only appeal. If you like this short movie, please help spread the word among your friends, colleagues, or anyone you know who likes thoughtful Science Fiction. Promotion is one of the great challenges facing independent filmmakers, and word of mouth on social media and in person is one of the best ways you can reward this project if you like what you see.
And so, without further ado, it’s showtime!
Thank you for watching! If you want to read more about our adventures making this film and following the film festival circuit, please check out The Place Where You Live website.
(Updated 9/8/15) This is the last update, as we’ve played all of the film festivals that we were accepted to, and we’re not expecting to hear from any more. At final count, “The Place Where You Live” is up to eighteen festival acceptances, and one non-festival screening in Beijing, with six awards presented, and one additional award nomination. They were all great experiences, and the resulting laurels are a welcome addition to our poster.
The final list is as follows:
- BIRTV screening in Beijing (screened August 26th)
- On the Line Film Festival (screened August 7th)
- From the Beyond Film Festival (screened August 8th)
- 15th Annual Sci-Fi-London International Festival of Science Fiction (screened June 1st and June 7th)
- ConCarolinas Short Film Festival (award for best leading actress) (screened May 30th)
- 48th Annual Worldfest-Houston Int’l Film Festival (special jury award) (screened April 19th, 2015)
- 34th Annual Minneapolis/St. Paul Int’l Film Festival (screened April 12th, 2015)
- Big Muddy Film Festival (screened February 26th, 2015)
- 40th Annual Boston Sci-Fi Film Festival (screened February 7th, 2015)
- Beloit Int’l Film Festival (screened February 28th, 2015)
- Idyllwild Int’l Festival of Cinema (nominee for Best Original Score) (screened January 7th, 2015)
- Big Easy Int’l Film Festival (award for Best Science Fiction Short) (screened December 13th, 2015)
- Chicago Paranormal Film Festival (screened November 30th, 2014)
- Fort Lauderdale Int’l Film Festival (screened November 17th, 2014)
- Wild Rose Independent Film Festival (awards for editing, production design, and VFX) (screened November 7th, 2014)
- Fargo Fantastic Film Festival (screened October 26th, 2014)
- East Lansing Film Festival (screened November 4th, 2014)
- South Dakota Film Festival (screened September 27th, 2014)
- Midwest Sci-Fi Film Festival (screened July 4th, 2014)
The last festival acceptances delayed the public release of “The Place Where You Live,” pushing it to September. Everyone’s been incredibly patient during my film festival adventures, and I apologize for this last push out, but I really hadn’t anticipated the last-minute festival response we got. Still, September is set in stone, and this gives me ample time to prepare its rollout.
As I mentioned previously, my last tour on the festival circuit with my indie feature “Four Weeks, Four Hours” garnered six acceptances, so this is what progress looks like, and I couldn’t be happier.
The scene I shot in December, “An Unwanted Job,” is coming along nicely. In an effort to eat my own dog food, I’m doing as much of the postproduction as I can inside of Resolve, from syncing the timecoded dual-source audio and making offline dailies from the original 4K CinemaDNG media, to editing both picture and sound, editing music and doing simple sound design, through adding visual finishing effects and doing the grade. Eventually, I’ll be sending the audio I edit to someone else for sweetening and mixing, probably in ProTools, probably via exporting xml to Final Cut Pro 7, and out to OMF from there, unless I find a more contemporary workflow.
I used the Metadata Editor in the Media page to annotate the Description, Shot, and Scene for each clip, and then I sorted the Media Pool in list view and organized the clips into logical bins for my use. Overall, the new Media Pool columns and bin organization features have made wading through material much, much nicer then in previous versions. For the smoothest overall experience I created a set of transcoded 1080p ProRes LT media with cloned file names and timecode to work with, making it easy for me to reconform to the original 4K once I start with the grading; I have separate bin hierarchies for the camera original and proxy media, and I can switch back and forth using the “Reconform from bin” command (after turning off “Force Conform Enabled” for each clip in the Timeline).
Assembling my timeline went swiftly. As I edited, I definitely found things that could be improved, particularly in the realm of audio, but I was easily able to accomplish what I wanted, and as I got into the details of the edit I’m happy to say that I like the trimming tools in Resolve as much as an end user as I did when demoing them in front of audiences. There are idiosyncrasies in Resolve 11.1.3 such as audio not playing in reverse (you can hear audio playback scrubbing or moving a frame at a time in reverse, just not at speed), or double-clicking to open a clip into the Source Viewer for trimming not working when the Trim tool is selected (you have to choose the selection tool first), but nothing stopped me, and I’ve passed these tidbits along to the Resolve team. One thing I’ll add is that easy access to Roll edits in selection mode make split edits in dialog ridiculously easy to perform.
After cutting a few different versions of the scene, I “soft-locked” my primary edit a few weeks ago. At the moment, I’m going back and forth on the music cues with composer John Rake. I’ve been deliberately having him compose longer pieces of music that I can cut into the timeline in different ways, which has been forcing me to do a bit of music editing in Resolve. Given that audio cutting isn’t necessarily what Resolve is designed to do at the moment, it’s actually been going nearly as well as it ever did back in FCP 7. I often try to avoid locking the edit until the music is finished, as great cues always make me want to push and pull things around. In this case, it’s a great excuse to push Resolve a little out of its comfort zone.
I’ll post a work in progress probably later in February, but for now I’ve started using examples off of my timeline in a couple of free tutorials that are now available on the web.
I’ve done the first in what is to be a series of “Resolve in Under 5 Minutes” videos for Ripple Training (you can subscribe to their YouTube channel), in which I’ll be showing a different technique or tip in every video. This first one covers image stabilization, which is a useful tool whether you’re an editor, colorist, or finishing specialist. For this, I used one of the first shots in the scene, a 20 foot remote-operated jib shot that was being buffeted by wind on a wintery day. Exactly the kind of shot this tool shines at improving.
I also did a webinar for Imagineer Systems and Boris Effects about how to use Mocha and Boris OFX plugins with DaVinci Resolve to do corner pinned match moving, motion-tracked lens flare addition, lens correction and dead pixel/wire removal, and other techniques that you either can’t do or that are otherwise difficult in Resolve by itself.
It’s time for some tough love.
Since I do both production and post, I’m in a position to observe where efficiencies lie all through the filmmaking process. In speaking with different people out in the industry, and comparing my practices with theirs, I’ve decided there’s a public service announcement I can make to the filmmaking community at large regarding how you can save money. A lot of money.
Rehearse your actors in advance of the shoot, dry run your blocking without running the cameras, and record fewer takes.
Really.
I know. You’re thinking “but digital is cheap,” “I don’t want the scene to go stale,” “why not run the camera in case some magic happens,” and “I need to get through those takes to find the scene.”
Bullshit. Digital is not cheap. Hard drives are expensive. Backups are expensive. Archiving camera cards takes time, and having a ton of cards because you want to shoot like a drunken sailor costs in either expendables or rentals. Generating dailies and logging all of your crap takes consumes hours and hours of your editor’s time. Dealing with Terabytes of unused data in the finishing process takes time. Time is money. Time is also frustration, which makes post folks not want to give you a discount. Less media is less hassle, and less hassle makes editors more inclined to maybe cut you a break.
Rehearsing in advance, assuming you have capable actors, will not make your scene go stale; centuries of theater give the lie to this way of thinking. What advance rehearsal will do is let you work through the scene in the abstract, without the necessary distractions of the cinematographer’s queries or your schedule running behind or what scarf should the lead wear or any other of the hundred things you need to weigh in on that have nothing to do with the actor’s actual performance.
In exploring the scene with your actors in rehearsal, I guarantee they’ll find nuances in performance that might otherwise be missed, and you’ll have time to try things out and make adjustments you need for consistency with your overall vision. All of this will let you know where there are moments to emphasize and trouble-spots you’ll need to correct in the performance. Ultimately, you’ll be better prepared for what’s to come. Come shooting day, you and the actors will both know what the goal is, and you’ll be less at risk forgetting about a key moment, gesture, or intention because you were distracted by a lens change. And, in the rush of production, there’ll be more then enough energy to hype up both you and the actors to keep things fresh, since you’re likely in the location for the very first time.
Running the camera while you’re rehearsing your blocking is a colossal waste of storage, unless you’re chasing a sunset or some other time critical element. Whether you’re doing jib, crane, dolly, gimbal stabilizer, or steadycam work, or just panning and tilting a camera on sticks, there is no magic while you and your actors are fumbling your way through the on-set blocking with a camera operator who’s seeing the actor move for the first time. Save your editor the heartbreak of watching four unusable takes and just rehearse the blocking without recording. The actor will be more at ease to experiment, and you’ll have more psychological freedom to change your mind and explore different ways of executing the move with your actor, cinematographer, and operator.
Regarding multiple takes, I am firmly of the belief that if you’ve had the opportunity to discuss and rehearse the scene with your actor in advance (even if it’s in advance of the rest of the crew arriving for a day’s shoot), there should be no reason to ever go through more then 4-5 takes, unless there’s something physically specific you’re needing (I once did eleven takes trying to get a coin to fall on the ground in the right place for a closeup, what are you going to do?). There are plenty of stories of directors pushing an actor through 99 takes to wear them down, which is more strategic cruelty and not so much about trying to get a good read, and that’s fine if you’ve got 100 million dollars. Myself, I’d rather work out what I need in advance through appropriate casting and rehearsal, and then get the scene in three takes and move on to have another setup. Back in my film school days, a production professor told us that shooting twelve takes was probably a waste of time, since you’ll probably be unable to tell the difference between six of the takes later on when you start editing, and I’ve generally found this to be accurate.
So now you’re thinking, “okay, smart-ass, so what’s your shooting ratio?” My most recent project, which was one day’s shoot with over twelve camera setups with some additional alts spread among two locations recording to 4K CinemaDNG raw, ended up totaling about 500 GB of media for 50 clips in all for a generously covered 3 minute scene. Going back to my short, “The Place Where You Live,” four shooting days recording to 4K R3D raw resulted in a total of 487 GB of media. Usually when I mention this, people ask me what went wrong, and what I did about the lost media. Then I say that was all the media.
I started out shooting 16MM film, and being a broke-ass filmmaker I had all too many days of having pages to get through on two 100-ft rolls. Those experiences instilled in me an economy that serves me well even today. And so, I try to be careful about casting. I rehearse in advance whenever possible. I block the scenes with the actors without running the cameras. Then at that point I try to get out of any particular camera setup in 3-5 takes, sometimes altering the framing of any takes I want “for safety” just to squeeze in another push-in. Obviously if an unexpected challenge comes up, I’ll do more takes to get what is needed, but I try really hard to be prepared enough in advance to avoid that.
The result is that I never have to debate whether or not I want to shoot uncompressed RAW based on available storage, my DITs are usually bored, logging the footage is a breeze, and as a result the edit goes quickly. Backing up the project media doesn’t break the bank, and moving the project around for finishing is resultantly easy.
So that’s my advice. Save everyone some hassle and take a page from the theater—rehearse in advance. You’ll get better results dramatically, you’ll get more out of your time during the shoot without going over schedule, and you’ll have a project that should be noticeably cheaper to post.
Anyone who knows me knows I’ve got two main opinions about gear. First, don’t buy gear, rent it. Today’s awesome stuff turns into tomorrow’s laughably obsolete curiosities. Second, I could care less about cameras. I’m a director, not a DP, and as long as the DP likes whatever camera we can afford to use, and the resulting image data is gradable, then I’m happy.
So it’s with some reluctance that I admit I’ve started buying camera accessories to have in reserve for the increasing number of small projects I seem to be directing. Starting with my next directorial excursion, a scene rather then a fully realized movie, designed to create some nicer material to use for my next book, video training, and presentation projects, and in the process work with another great local Minneapolis crew to create something very different from my previous two movies for my director’s reel, which by god I’ll actually put together one of these days.
Today was all about prepping the aforementioned camera equipment. DP Michael Handley, AC Brian Suerth (pictured later), and I poured over the three Blackmagic Design cameras we’ll be using, a brand new Ursa for most of the coverage, a Production 4K that we’ll be using with a Ronin gimbal stabilizer to fly around one of the day’s two locations, and a Pocket Cinema Camera for POV shots in tight spaces. I’ve been wondering if I’d find utility in the three different form factors of cameras that Blackmagic now offers, and I now appreciate that it’s really nice to have different sized camera bodies for different tasks, each of which can be prepped simultaneously with different rigs. A far cry from my days of having a single CP 16 film camera to work with.
The Ursa itself is a beefy camera, but resultantly quick to set up thanks to an attached battery mount plate (extra), built-in rails mounts, and a built-in handle; I really, really liked the speed of setup. The editor in me wants as many angles of coverage as I can shoot in a day, and I hate feeling like I’m waiting for a camera to be rebuilt from setup to setup.
Since I usually prefer to have the camera on support rather then handheld, given the type of coverage I tend to go after, the Ursa’s weight (16.5 lbs without lens/etcetera) doesn’t really bother me—we’ll be using a jib, dolly, and slider to move things around when necessary. Of course, that’s easy for the director to say, I don’t have to move the camera from setup to setup, but nobody on the camera crew has had any complaints so far.
Incidentally, the 10″ swing-out screen is pretty awesome. As are the two other touch-screens on either side of the body that switch between UI and monitoring for the assistant. Brian mentioned he still may use his own display for working the focus, but more because it’s the display he’s used to, which makes sense to me.
We toured the menu system, and were pleased to find it pretty straightforward. So, at least so far as setup goes, the Ursa seems to be a no-drama camera. And, pointing the camera at random things at Tasty Lighting’s Acme stage, the EF mount Rokinon cinema lenses I’m using coupled with the Ursa’s Super35 sensor made the kitchen area and random lighting instruments positioned here and there look delightfully dramatic framed in 2.35.
So far so good. I’m looking forward to seeing how it performs on location.
I’ve been having an enormous amount of fun flying out to some of the film festivals we’ve gotten into, and meeting other truly independent filmmakers who are tilting at the windmills of this crazy industry of ours. While I’m generally just happy to have the opportunity to screen my work in front of actual human beings, I’m thrilled to announce that “The Place Where You Live” won distinctive achievement awards for Editing, Visual Effects, and Production Design at Des Moines Iowa’s Wild Rose International Film Festival.
It was my second festival in two weeks, and while audience response continues to be really positive, this kind of additional recognition is icing on the cake, and a nice bit of validation for all the folks who’ve worked so hard to make this impossibly ambitious project come to life. This is especially true as the Wild Rose International had an impressively strong lineup of films to show, including a pleasingly high number from other Minnesota filmmakers (shout-out to the Twin Cities!).
VFX
Huge congratulations to everyone who pitched in with me on the VFX, most of whom were tragically left off of the certificate (for reasons solely of length). However, I can amend that here by giving a huge shout out to Brian Mulligan, Aaron Vasquez, Joel Osis, Christopher Benitah, B.J. West, Brian Olson, Patrick Burke, and Marc-André Ferguson for his organizational talents putting the original Smoke-based VFX crew together. I couldn’t have done this without this incredibly talented team of artists, and if I were you I’d hire all of them.
Production Design
I’m also excited that Kaylynn Raschke’s contribution as Production Designer has been recognized. An industry veteran stylist with over two decades of experience in commercial styling for print and broadcast, set dressing, and wardrobe, she went above and beyond with limited resources to design and assemble a fantastic pair of environments for the movie, each of which had a lot going on. Production design is all too often neglected in smaller productions, and I’m proud to say that’s not a problem we had.
Editing
Lastly, I’m very pleased to be recognized for the editing of this piece. While I’ve not had my shingle out professionally as an editor for clients since the late nineties, I’ve continued practicing the craft through cutting my own work, that of my wife Kaylynn (a filmmaker in her own right), and in doing the occasional bit of surgery on projects requiring finishing in addition to grading. It’s nice to see that I’ve still got it.
More festival screenings are coming up; go on over to whereyoulivethemovie.com for the latest listings and updates!
Nina Ashton, a professor of physics, is abducted by her counterpart from an alternate dimension—one in which her husband has died. As her doppleganger takes her place, Nina struggles to rebuild the machine and reopen the gateway between worlds in order to regain the life that should be hers.
I’m very pleased to present a preview of the first two minutes of “The Place Where You Live,” my new science fiction short that’s working its way through postproduction, shot by fantastical shot.
We’re aiming for a May release, and I couldn’t be more thrilled with how it’s turning out thanks to the fantastic cast and crew, as well as the incredible talents of designer and animator Brian Olson, compositors Brian Mulligan, Aaron Vasquez, Joel Osis, and Christopher Benitah, and 3D artist BJ West.
Kelly Pieklo has begun working on the sound design and mix, which can be heard along with John Rake’s wonderful score. I also need to thank Autodesk for their sponsorship of this project (the entire program is being edited and composited on Smoke 2013), as well as Splice in Minneapolis for their hands-on support.
If you want to learn more, I’ve blogged about the production, and I’ve also blogged about post.
And keep your eyes peeled for my next major announcement, once the whole 12 minute film is ready for viewing!
It’s been a while since I’ve posted an update about my upcoming science fiction short, “The Place Where You Live.” In the months since the initial two-and-a-half day shoot, I’ve edited the whole thing together, and after several passes of polish, the final runtime comes to 12 minutes, excluding end credits.
That’s a bit longer then the now quaintly optimistic 8 minutes I was estimating up front, (the shooting draft of the script itself is 9 pages). Having shown it to a few early audience members, it’s a tight 12 minutes that moves along briskly, and I’m pleased. The cut is always the last draft of the screenplay, and being the writer and the editor really hammers that home.
Once I finished the first cut, composer John Rake started putting together the music cues, seven of them in all, so I had something to play off of the visuals as I started my fine cutting. It was a great process bouncing cuts and cues back and forth as we zeroed in on the final timings, and I’m really happy with the score, which has a retro nod to some of the synth-oriented scores I’ve loved from the ’70s and ’80s.
Once I had enough of the edit done to know where I needed to add some narrative space, and how I wanted to handle the scene transitions, I did one last half-day shoot with DP Eli Ljung and AC Erica Wollmering to get some second-unit style driving, hallway walking, and videophone conversation shots accomplished, which allowed me to finish the cut once and for all.
As I cut in Smoke 2013, I took advantage of the integrated compositing to assemble rough comps to identify the timings of each of the VFX plates, and to help test viewers out.
For example, there are a number of shots that visualize heads-up-display technology for all of the computer screens. While I didn’t want to take the time to comp in a whole UI, I did have the reverse half of a videophone conversation that I needed to edit together, which I was able to easily rough in with a picture-in-picture effect using Smoke’s 3D transform environment, using Smoke’s Axis timeline effect to quickly motion track the window to the background for a true “floating window” effect. This is a level of VFX detail I’m not used to having in an NLE, and made it a lot easier for my test audiences to pay attention to the story, and not the effects-in-progress.
Of course, using my primitive compositing as a reference, I was then able, using Dropbox and with compositing supervisor Marc-André Ferguson’s help, to organize and hand off all of the plates to the team of artists and compositors who are remotely creating the final VFX, including the actual HUD graphics (graphics design by Brian Olson at Splice Here, compositing by Aaron Vasquez).
Another compositing artist, seasoned Smoke veteran Brian Mulligan, has been creating the “doorway between dimensions” effect used throughout the piece, as well as rocking some of the more challenging digital duplicate shots of main character Nina and her doppleganger from another reality.
Meanwhile, 3D artist BJ West has been creating the set extension for the lab using 3D Studio Max, building what he’s been referring to as “La Machine.” First, illustrator Ryan Beckwith’s finalized his concept art for the machine.
With that finished, BJ has been elaborating on the initial design, making modifications as I’ve been coming up with changes based on the needs of editorial.
BJ’s challenge has been to fit the geometry of everything so that it matches the space of production designer Kaylynn Raschke’s lab set. My goal is for a seamless digital set extension, and we’ll be sweating the details.
At the moment, all of these VFX shots (57 of ’em) are still in process, but I’m aiming to get one segment in particular finished to the point where I can preview it during interviews at NAB. The rest of it will be completed by the end of April (I’ve just handed off the audio tracks to sound editor Kelly Pieklo at Splice Here, so we’re on our way).
So that’s where the project is now. It’s far and away the most technically challenging piece I’ve ever directed, but all of the elements are coming together beautifully, and I can’t wait to share the final product once it’s done.
It took a little while for the dust to settle, but I wanted to share a little more about the narrative shoot I directed a couple of weeks ago. It’s been five years since my last narrative project has been in front of audiences on the film festival circuit, the feature “Four Weeks, Four Hours.” In that time, I’ve been hard at work developing other projects, none of which got to the point where I was behind the camera.
Given that my last project was a character-driven survival story shot on location in brutal desert landscapes with a distinctly verité aesthetic, I’d been wanting to do something a little more effects and action-oriented for my next project. In casual conversation with folks at Autodesk during an event, I was lucky enough to pique their interest in putting up a bit of financing for a narrative short in exchange for use of some of the footage in a book I’m to write for Wiley about Smoke. Shocked at getting a yes after so much time laboring in solitude, I quickly shifted gears and got back into production mode on relatively short notice.
I kicked out the first draft of “The Place Where You Live” at the beginning of October. Showing it around to my usual suspects, it elicited an immediately great response, which gave me the confidence to put it forth as the project of interest, and to start putting together a production plan even as I refined the script through October. Happily, it was good enough to attract some great Twin Cities talent as I started assembling the cast and crew, the first two members of which included cinematographer Bo Hakala and actress Dawn Krosnowski.
The story is that of a professor of physics who is abducted by her counterpart from an alternate dimension–one in which her husband has died. Her doppleganger changes places with her in order to get her husband back again, leaving our hero struggling to rebuild the machine that opens the gateway between dimensions to regain the life that should be hers.

“Ninja Nina” shooting her counterpart with a tranquilizer dart
Note: All grades have preliminary offline color
The story demanded two different sets that intersect via a “dimensional doorway.” My original idea, of securing a large enough stage so we could actually build two physically intersecting sets, ended up being impractical as I couldn’t afford the appropriate time with the necessary space. Searching for alternate solutions, I found another venue with two smaller stages that would suit the two sets I needed to create, but this would necessitate greenscreen compositing to join the two locations together. On the other hand, this more effects-driven two location approach would give me the freedom to do some crazier visuals, and the lower cost would give us more time to build the sets, so the answer was clear.
Moreover, a cheaper stage would allow us to secure it for a longer time in order to take the art direction farther. My wife Kaylynn Raschke is a stylist and set decorator (as well as actress and playwright) with over twenty years of experience who did wonders on my last film, so I naturally drafted her to slip into Production Designer mode to create the “high-energy physics lab” and “college professor office” sets. Given her additional background in narrative, Kaylynn brings a story-driven approach to her styling that I really appreciate. She also has amazing ways to stretch the ridiculously low budgets I have for art department expenses.
Working with a crew of builders and assistants over a week and a half, she created a pair of very distinct spaces that looked fantastic on camera.
While the sets were being built, I divided my time in late November and early December (with the shoot scheduled Dec 8-10th) filling holes in the crew, keeping on top of the details and logistics of key props and equipment needed, and working through the previsualization that would be critical for me to be able to direct the lead actress against both herself and her body double on two different sets within any single given scene.
Once the sets were underway, I modeled them with accurate dimensions in Google’s Sketchup 3D application, and then fit them together as they would be in the movie, as superimposed locations joined by a “doorway.” This diagram let me put together my shooting diagrams, and start figuring out how I wanted to use this dual location approach in my storyboards.
Previs using 3D models in Sketchup proved to be invaluable in letting me and Bo keep all of the differently joined angles in mind as the lighting and camera crews set up each position. Given the spaghetti-like order of the shot list we were using to maximize time, the four passes I spent putting the boards together myself ended up making it much easier to keep my director’s mind on the ball as we did a shot from Scene 2, then a reverse from scene 6 in different costume, then another shot from scene 8 in yet another costume, and so on during the two days of shooting on our sets.
The week before the shoot was also the week I found the body double, Emily Muyskens (special thanks to Moore Creative Talent in Minneapolis) who would substitute for the lead actresses alternate character in closeups. With both actresses now known quantities, Kaylynn put on her wardrobe hat and outfitted both women with matching costumes for the various stages the character and her doppleganger go through in the story. As a director/colorist, I really appreciate Kaylynn’s ability to keep the color choices for both set and costume in mind, an important consideration when you’re trying to create an overall look for a project.
Friday before the shoot was prelighting day (lighting and grip equipment was provided by Tasty Lighting Supply, with Michael Handley working the shoot as Gaffer). Much as I was struggling to keep the budget down, Bo wisely convinced me to spend the money and take the time on Friday to do some preliminary lighting setups. That also ended up being the day the big greenscreen was put up on the lab set, so it was a full afternoon, with Kaylynn working late to apply the final touches to the dressing of the lab set.
The giant green screen in the lab would facilitate a nice chunk of CG set extension to visualize “the machine,” the design of which had already been preliminarily worked out by New York-based illustrator Ryan Beckwith (with whom I’ve been laboring on Starship Detritus). Ryan does a lot of professional storyboarding for commercial spots and features as well, so he’s uniquely qualified to create set-friendly designs.
Day 1 of the shoot, Saturday, was lab set day, which was challenging for a variety of reasons. Much of the script takes place in the lab, and scenes with the “dimensional doorway” all look into the office set, so the camera setups had to be rigorously measured and kept track of so they could be aligned with matching plates to be shot the following day.
An additional complication was the need to balance the camera setups I wanted against multiple costume changes for each setup, since the actress was playing against herself in all scenes, and the double only worked in closeups that framed her face out. Miki Sautbine did a great job quick-changing hair and makeup, with Kaylynn doing double duty as wardrobe.
Molly Katagari also served double-duty as both Script Supervisor and Assistant Director, having done a masterful job of taking my shot list and hammering it into a daily schedule that allowed us to pack an incredibly ambitious amount of work into two long days.
With my previs boards to guide us, the majority of the day saw us slogging through all of the finicky effects shots in the lab, with Bo pulling out an amazing assortment of creative lighting techniques to bring Kaylynn’s set to life. I’ve never worked in lighting or grip (PA-ing in San Francisco didn’t really count), so my notes to Bo came from my colorist background as we discussed pools of light, where I wanted areas of shadow, and the general characteristics of the visuals that I wanted. Bo then took all of that five steps further utilizing an impressive variety of lighting instruments. I love being surprised, and Bo constantly presented me with visual options that contributed loads to the atmosphere.
We were shooting with a RED ONE MX. Not the most cutting edge choice, but when we discussed camera packages versus budget (it sucks to be both the director and the bean-counting producer at the same time), Bo suggested going for a more affordable camera in order to free up funds for better lenses. Having graded RED ONE MX footage for clients, I was comfortable with the choice, and definitely in favor of the clarity better glass would provide, in our case a set of Zeiss Super Speeds (the whole camera package was provided by CineMechanics).
I made it clear that I liked to shoot wide, and I’m a fan of composing shots with subjects at multiple levels of depth. We were on the same page there, and Bo used a set of 14mm to 85mm primes to great effect.
On top of that, I wanted to do one or two tricky shots. I obtained a chroma-green face mask in order to shoot plates with Dawn’s double for doing a head replacement. Honestly, it’s a brief moment and I wasn’t sure how well the composite would work, so I made sure to cover the same moment of dialog and action in a more conventional way as a closeup against Emily the body double. However, if it works, this’ll be a cool shot.
There were four lab scenes in particular; two involving effects, and two that were simply within the environment (albeit with the giant greenscreen that will be replaced with the CG “big physics machine”). As the shots trickled in, I kept saying as encouragingly as I could that things would speed up once we got out of the effects thicket, and it was nice to be proven right. After hours spent on collections of individual shots, we slid right through the non-effects scenes with some fantastic dolly work and nice overlapping angles of coverage at the end of the evening.
I started directing on 16mm, and there were plenty of times when we were down to a single 400′ reel, and every shot had to count. Those experiences, and my background editing video in the 90s and being given boxes of tapes to wade through, drilled the need for specificity and economy into me, so that even now, with stock effectively “free” thanks to endlessly swappable digital memory cards, I tend to keep the number of takes I shoot as low as possible, and I don’t generally let the camera run. Sure as hell makes logging and editing easier later.
That also requires a terrific camera crew (AC Chris Hadland, Key Grip Joe Gallup, with DP Bo Hakala operating were fantastic) and excellent talent, and I have to give a major shout out to Dawn Krosnowski for giving me the most one-take shots I’ve ever had on a project. As confusing as the shot ordering could be, she took my notes and nailed moment after moment. Between the excellent camera work and performances, after three days of shooting I ended up with only 10 reels and 400GB of RED .R3D media. I admit, I took a quiet joy in giving DIT Dmitry Futoryan little to do.
On day two we finished the lab shooting with the very last of the effects, some mirror shots that let us virtually pull the camera back to match its position in the office set, a very nifty bit of geometric trickery suggested by Bo weeks before. Since the green screen in the lab set was right against the wall, the only way to achieve the distance from camera to subject necessary for the matching office shot was to shoot an angled reflection, for which I had a 4′ by 7′ mirror custom-made the week before. It worked great, although matching the actress’ eyelines to material we’d not yet shot was challenging.
With that concluded, we moved into the Office set, which was being prelit and dressed even as we wrapped the lab. While there were more shots in the lab, we were aided by the fact that now we had actual matching plates to reference, and camera height/distance/angle measurements we could use, but still the finicky effects work consumed much of the day.
An added benefit of the Office set was more dialog. The Lab scenes involved few lines. Most of the conversations take place in the office, with the character chatting with people on heads-up video displays (to be added in later, that’s why she keeps pointing at the air). Production recordist Tom Colvin came equipped with a fantastic audio set-up, I wanted to shoot dual-system sound to keep the camera free of entanglements, and Tom did a great job using combined wireless and boom mics as necessary to capture ideal sound in our unusual environments.
I was up front that our stages, not being sound stages, were pretty poor acoustic environments, not least because we were in a band rehearsal area, and while the owner was fantastic and encouraged everyone to take the weekend off, there were still one or two bands that popped up at awkward times. However, the bands in attendance were lovely about giving us some space, and after reviewing the audio, it’s astonishingly usable, not the lease because of Tom’s efforts, so I’ve high hopes the need for dialog replacement will be minimal. I absolutely love having a dedicated sound professional on set.
Again, once we hit the “non-effects” scenes, things went much faster, but by then much of the day had been spent, and I was between a rock and a hard place in terms of being forced to go for a second long day with a crew that was already going the distance, and giving me low rates on top of that. I hate forcing long days, and I especially hate it when I feel like I’m not really paying for it. On the other hand, the producer in me needed to get those scenes, so as soon as I knew we’d be going long, I made sure to have a chat with the whole crew to see if there was anyone who wouldn’t be able to go along with the schedule.
Happily, everyone was incredibly professional and had a fantastic attitude, and a few pizzas made it possible to continue through the evening. However, not wanting to be a complete jackass, I got down with my boards between takes and started weeding out unnecessary coverage in order to make time without losing scenes (I’d cut the script down to the bare essentials in my fourth draft, so losing anything now would mean sacrificing story).
I managed to collapse some angles together and mentally edit a path through the remaining two scenes that would need only five shots, including close-up inserts necessary for my “Twilight Zone” style ending. What I didn’t know at the time (Kay mentioned it when I was reviewing my footage) was that, while I was cutting shots, the DP was stealing insert shots he knew I wanted in-between camera setups. I owe him a bottle of something nice.
Wrapping the office scene and packing up the grip truck ended up going even later than I’d anticipated (note to part-time producers, factor in how long it takes to load the grip truck!). It didn’t help that it started snowing that morning and it didn’t quit all day, which is one of the many benefits of shooting in Minnesota in the winter. Consequently, I punted the early call the following morning to let folks get a bit more sleep before the final on-location shoot.
The next morning, I got up early, checked my budget, grabbed my binder, and headed to the location to let the owner of the business we were shooting at know that the crew would be coming an hour later. Rewarding myself for getting through the effects scenes with a nice café mocha, I waited in front of the business. And waited. And waited. A few phone calls later, I was convinced that I somehow screwed the pooch with the owner on following up about the shoot, and gave some quick thought to how to change the scene to shoot in a new location. Luckily for me, Kaylynn’s and my house was just a few blocks away (in fact, the actresses for that day were already there), so as crew started showing up, I redirected everyone to the new location, and Kaylynn arranged for some heavy-duty snow-blowing to make a path in our yard through the previous day’s blizzard.
I later found out that the business owner’s phone had fallen into a snow drift the evening before, and he was subsequently snowed in that morning, so while he wanted to come and let us in, he was trapped at home and had no way of reaching me. I felt bad for him, but was pleased to learn that it wasn’t ultimately an oversight on my part! At any rate, by the time Bo arrived, I had my new plan of coverage for the scene, and added a few lines of changed dialog to account for the difference.
Honestly, the new location (our living room) once Kaylynn got done re-dressing it, ended up working much better for the project, lending a more intimate vibe to a scene between friends. And Bo and I were both relieved to be able to shoot a real scene with no effects nonsense dragging us down. Dawn was joined by Lana Rosario, and we wrapped the scene and the shoot after an honest half-day.
After that, there was much packing and writing of checks, and I was left with ten reels of fantastic footage that are crying out for editing and compositing, and a set that needed striking the following week. Ah, the glamour of independent filmmaking.
So that was our shoot. There’s still work to be done, in particular I’ve got a handful of establishing shots with the actress that I need to arrange, and I had to punt the reverse part of her conversation with the husband to another day (probably after the holidays), but the bulk of the project is in the can, and now the postproduction begins.
Update
This movie has long since been finished, with a successful festival run. It’s now available on YouTube to watch. If you want more information about the postproduction process, check this out.
Those of you who’ve been following me on Twitter have undoubtedly been noting my now constant stream of preproduction tweets, so I figured it was time to stop being such a tease and share a bit of what’s going on. I’m producing and directing a short subject I’ve written called “The Place Where You Live.” I’m not going to spoil the plot, as you’ll have an opportunity to see it soon enough, but here’s a clue…
The headshot shows our lead, Dawn Krosnowski, who’s heading up a cast of three in this tightly scripted “Twilight Zone-esque” excursion into speculative fiction. Kaylynn Raschke, art director extrordinaire, has been overseeing construction of our two sets for this project.
We’re saving money by shooting in a non-traditional space, in this case, a pair of stages usually reserved for band rehearsals. The tradeoff is that they’re odd spaces, but the advantage is that Kaylynn has had more time to work on the sets, and we haven’t needed such a huge crew.
The last time I had a set built was 1991, since then it’s been all on-location shooting for me. However, it’s nice to be back in a mode where things are more tightly controlled. While not a feature, this is easily the most ambitious project I’ve worked on, with dual set compositing, lots of VFX, and a terrific crew headed up by cinematographer Bo Hakela.
So that’s what all the fuss is about. After six years of being in development with two other projects, it’s nice to be shooting something again. I’ll be posting updates once principal photography is finished, and more as we shift from production into post, and the post specialist in me gets to rue decisions that the director in me just had to make on the set.
I received some fantastic news this week from my collaborator, illustrator Ryan Beckwith, regarding our long-term project, Starship Detritus. He’s been laboring for months on the art for our pilot episode of this animated science-fiction series. This being a side-gig for both of us, his work as a commercial storyboard artist kept interrupting (damn you for being so successful, Ryan!), but getting the news that he’s finished is the biggest leap forward since I finished writing all 13 episodes of the first season.
Of course, now it means I need to get off my backside and start scheduling some After Effects character animators to put these images into motion. Ryan’s been creating high-resolution, multi-layered Photoshop comps (in conjunction with his assistant Ryan Zalis who aided with flatting and other assorted tasks). Working with our first animator, Steve Rein, the artwork has been constructed to accommodate skeletal and puppet-tool animation in After Effects.
Being an illustrator and not an animator, Ryan has gone in a much different direction with the artwork then in most animations. From the very first color tests he did, I was impressed with the texture and detail he brought to the world I’ve written, and it’ll be exciting to see the scenes come alive.
It’s a bit poignant; I used to work with After Effects every day back in the late 90’s, but having been focused on color correction for so long, at this point I’m so rusty that I’d rather work with faster artists to bring these characters to life. I’ll stick to animating the camera and framing of the final comps for rendering out the finished shots.
Of course, as the writer/director/editor, I’ve a few other things to handle. The very first thing I did, after Ryan and I storyboarded the first episode, and he created the first complete set of roughs, was to record a group of temp actors reading the script, and edit together an animatic in order to get the timing of the show right. This has been our reference going forward, and as soon as I get my hands on the full finished set of artwork, I’m looking forward to updating the animatic with the color art.
Which will take a bit of doing. The original animatic was put together in Final Cut Pro, but given this is such an After Effects-heavy project, I’m planning on moving the entire edit over to Premiere Pro in CS6, to take advantage of its AE integration. I’m hoping this creates some efficiencies. Besides, it’s an excuse to learn a new piece of software by doing something real, which I find is always the best way to learn.
Additionally, since this process has ended up taking far, far longer then it was supposed to (par for the course), I’ve begun novelizing this first season. As fun as the 13 episode, ten-minute-per-episode structure I used for the scripts has been, there’s additional story that my chosen format simply won’t accommodate. Prose has been a perfect outlet for the added bits, and the idea of telling this story across different platforms is tremendously appealing to me. At this point I’m 11,000 words into the novelization, and having tremendous fun with it. Alas, now my day job is interrupting, since working on the new version of the DaVinci Resolve 9 manual is proving to make scheduling creative time challenging.
Moving forward, there are plans within plans, and I’ll be sure to share more when there’s more to share. It’s easy to get caught up in the day-to-day grading and tech-writing work that I do, but creative projects like this are what brought me into post-production in the first place, and it’s gratifying to be making progress on my biggest creative project to date.
- 1
- 2