
The shoot for my goofy little rant, “The Importance of Color Correction,” came on the heels of some promos that Steve Martin wanted me to record for my newest Ripple Training titles for DaVinci Resolve 12. I figured, since I’m there on a stage, why not have a bit of fun with it?
A confession – I suffer from incurable impatience between a shoot and the beginning of the cut, so once home I immediately fired up Resolve 12 and got to work. I was determined to do the entire thing inside of Resolve, to test the workflow of grading, compositing, cutting, and finishing a green-screen intensive project, all within Resolve 12. Since I knew I wanted to edit a series of dynamically changing backgrounds that reacted to what was being said, my first order of business was to grade the clip, and create transparency from the green background for compositing within the timeline.
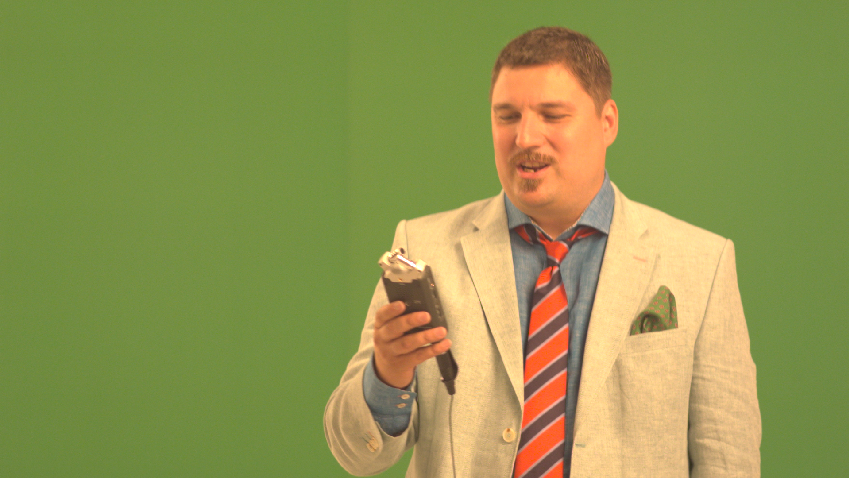
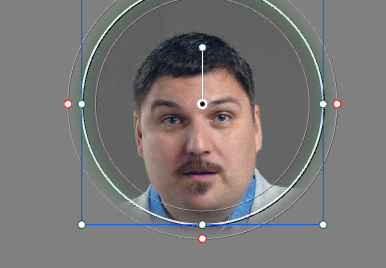
I shot with the BMD Production 4K camera, but I made the decision to record to ProRes HQ, instead of raw, as I wasn’t sure how many takes I’d burn through, or how much space I’d ultimately need. This meant that, although I recorded a log-encoded image, my camera settings were burned into the files. The result, owing to a combination of camera color temperature settings and shooting through the glass of the teleprompter I was using, was the following image (after normalizing to Rec. 709 using Resolve Color Management):
After a relatively straightforward grade, this was easily turned into:
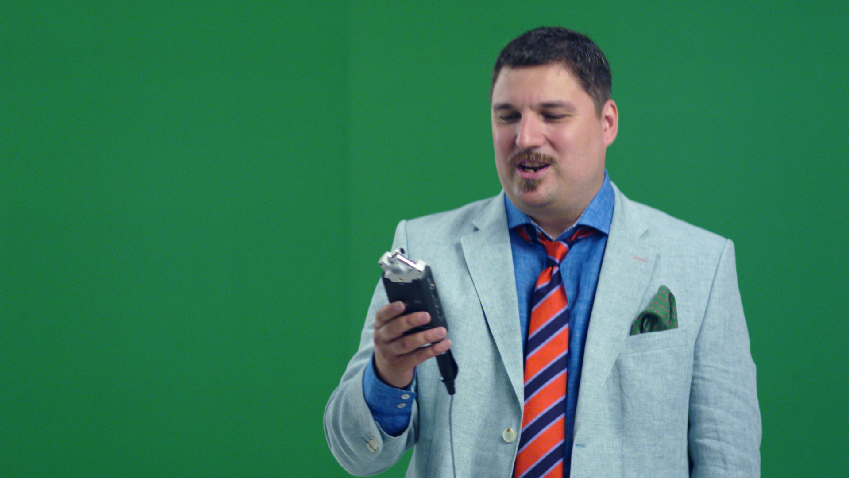
This took two nodes. It could’ve been one, but I like keeping my HSL curves separate for organization.
This was the original grade, but since I rendered out self-contained graded clips to hand off to Ripple, I ended up re-importing the graded media and using it as the basis of my next few adjustments and the edit. This wasn’t necessary at all, it just seemed like the thing to do, since I had the media and all.
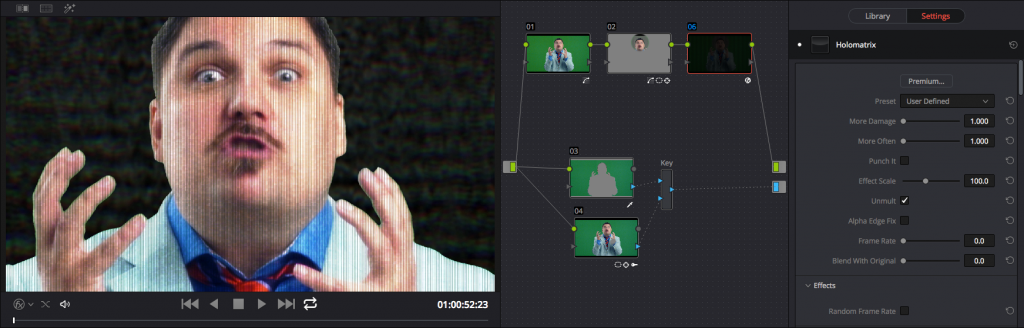
With the grade accomplished, it was time to create transparency, which I did using the blue-labeled Alpha Output in the Color page’s Node Editor, connecting a matte I created using a combination of techniques (nodes 3, 4, and the Key node), while the color adjustment nodes (1 and 2) connected to the RGB output.
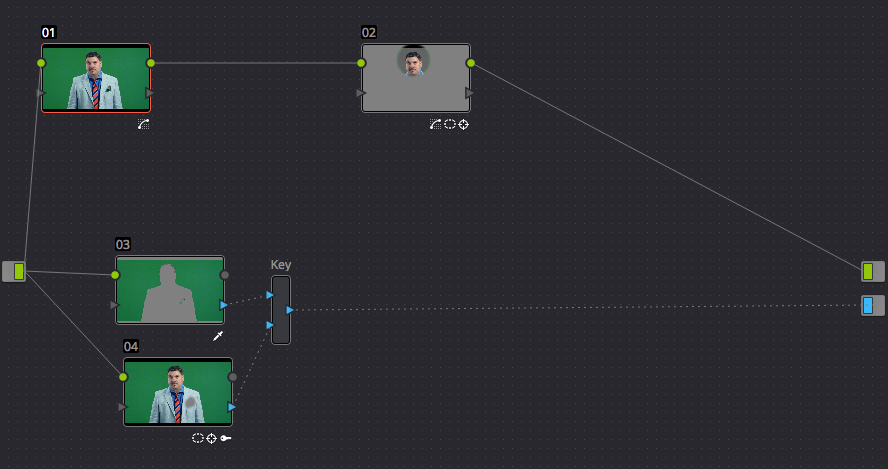
In particular, since some idiot I rolled out of bed and threw on a green jacket with a green pocket square without thinking before rushing over to the stage, I needed to be a bit clever with how I created the matte. Although, being faced with this kind of issue, I was kind of glad to have an interesting test of the new 3D Keyer’s capabilities for green-screen compositing in a slightly awkward situation.
Turns out, the 3D Keyer (in node 3) did a fantastic job of specifically keying the green screen background while omitting the slightly different green of my jacket, while retaining nice edges without too much crunchiness, so big props to the 3D Keyer; it only took one sample of the background green and a second subtractive sample of the foreground jacket to do it (along with very slight application of the Clean Black and Clean White controls).
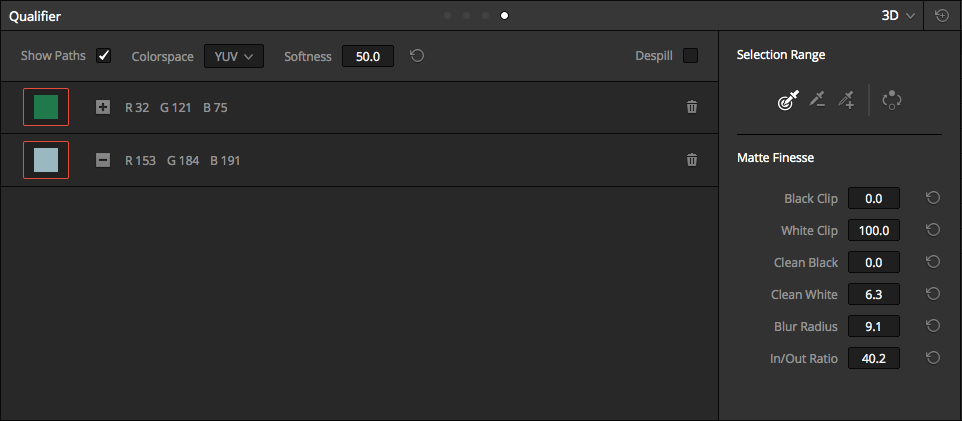
However, no combination of samples would also omit the green pocket square, which was just too similar to the background. This required me to divide and conquer, using the Key mixer to combine the 3D Keyer matte with a second matte generated by a tracked window to cover the pocket square.
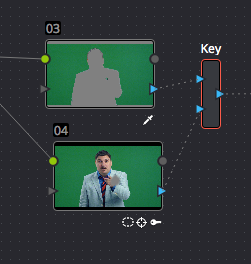
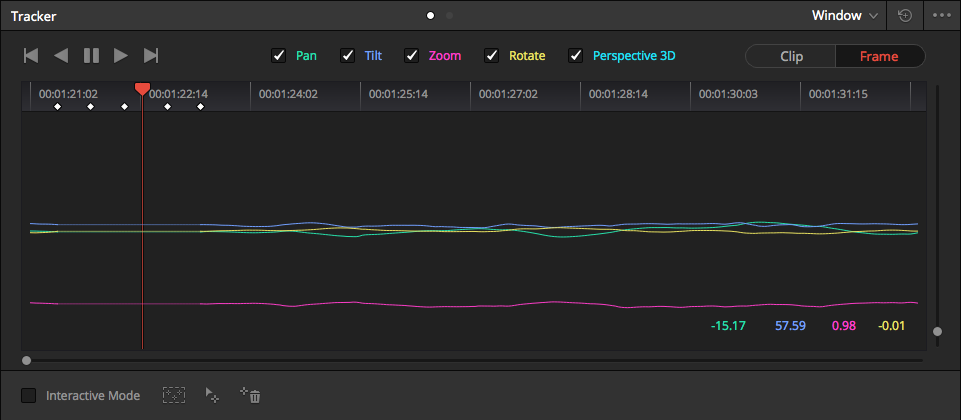
The window itself was easy to make and track, except for the part where some idiot the “talent” decided to wave his arms around.
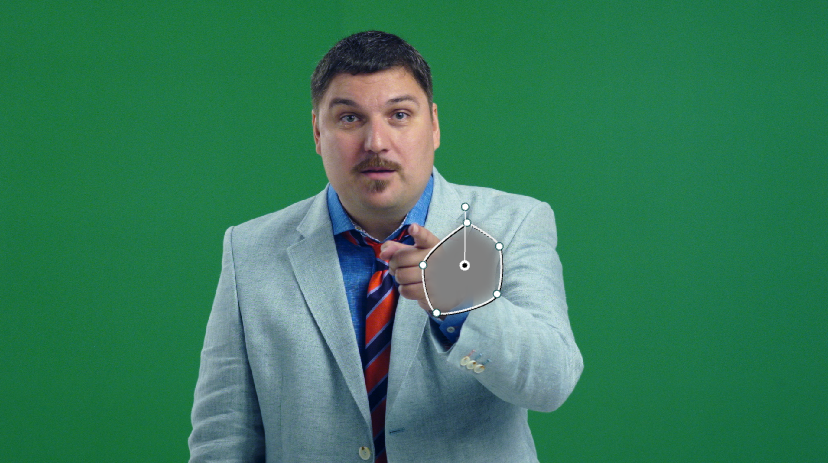
The hand completely screwed up the track, but my body motion was so irregular that just deleting the disrupted part of the track and letting Resolve automatically interpolate between the areas of the clip that had good tracking data wouldn’t cut it (although that was the first step). So, I ended up using yet another one of Resolve 12’s new features to solve the issue, the new Frame mode of the Tracker palette, that makes it easier to auto-keyframe manual alterations to a window’s shape and position (i.e. a bit of rotoscoping). Five manual adjustments (and keyframes) later, and the hole in the tracking data was nicely filled.
Inverting the 3D Keyer matte in Node 3 (using the Invert button within the Keyer Palette) and letting the Key Mixer node add the two mattes together from nodes 3 and 4 gave me the overall matte I needed, which, when connected to the Alpha Output, punched out the background nicely.
Now, however, I needed to deal with the green spill that was figuratively (possibly even literally) hitting me in the head. Sadly, while the Despill checkbox that’s built into the 3D Keyer works wonderfully in situations where the person being keyed isn’t wearing fucking green, in my case I couldn’t use it without leeching all the color out of my jacket. So, time to go back to the old ways, isolating my head using a tracked circular window in node 2, and using the Hue vs. Sat curve to selectively desaturate the greens that I didn’t want contaminating my face.
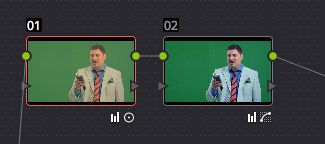
With all that done, I could now go back to the edit page and cut together the varied mix of backgrounds behind the foreground clip. While I was at it, although the entire rant is a single long take (thank you teleprompter), I wanted to chop it up to punch up the rhythm by rippling out a few pauses, masking the jumps with push-ins made using the Zoom controls of the Edit page Inspector. Thus, at the end of the edit, I had a timeline that looked like this:
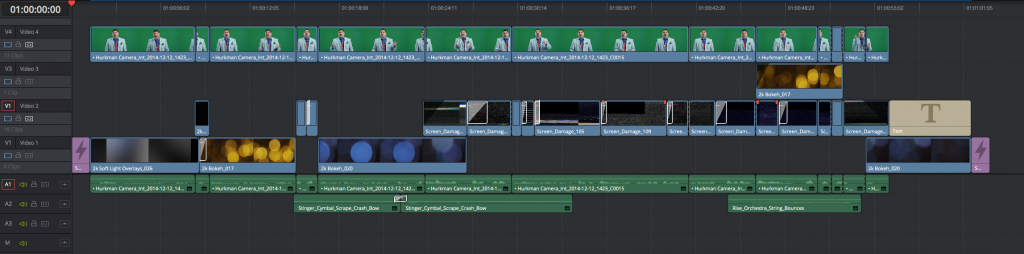
For the backdrops and audio cues, I used clips from the THAT Studio Effects collection of HD resolution effect clips (licensed from Rampant Design, which offers 2K–5K resolution media). The cut went smoothly, pretty much in real time on my 2010 Mac Pro with Nvidia GTX 770 GPU. (I can’t believe how much life I’ve gotten out of that five-year-old machine.)
However, I had one last problem. Because I had decided to record to ProRes HQ at 1080 resolution, some of my more aggressive push-ins started to look soft, softer then I liked going out the door. Mulling over how to deal with the issue, I thought it would be funny to try and emulate the effect of zooming into a televised image, such that you’d see the pixels of the TV. Red Giant Universe to the rescue, I used their Holomatrix OpenFX filter to add vertical scan lines (hey, why not) to the zoom-ins, stylizing them to the point where the softness is irrelevant.
And that, as they say, was that. A composite-heavy green-screen promotional piece graded, composited, edited, and finished entirely within DaVinci Resolve. I did the mix as well, but that was nothing to brag about as the first version I uploaded to Vimeo had all of my dialog mixed to the left channel (there’s a reason I send final mixes for my projects to dedicated audio professionals). Still, I fixed the problem, tuned the mix, and completed the program, which you can see in the previous blog post.
All in all, it was a great experience, and while I’m the first to say I’m biased since I work with the DaVinci design team, I’m also being completely honest when I say that I’ve been really enjoying editing in Resolve 12, and using the hell out of all the new grading features, to boot.