
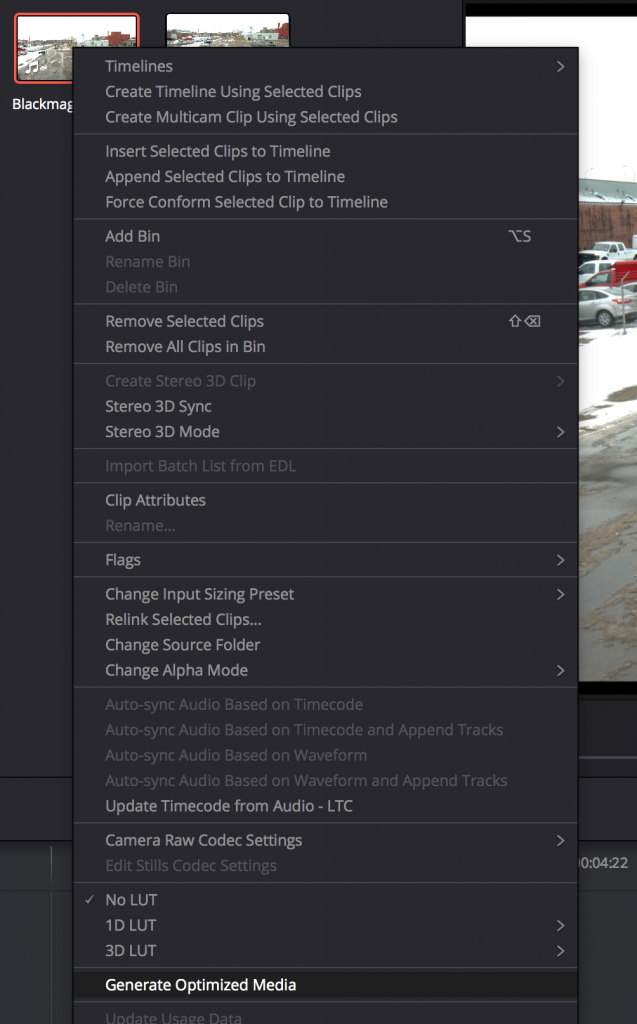
Here’s an important tip when using “Optimized Media” in DaVinci Resolve to spare yourself the processing overhead of debayering raw media. This same tip also works for avoiding highlight clipping when you use the render cache. For those of you who don’t know, you can right-click a selection of clips in the Media Pool that are in one or more formats that are processor intensive to work with (camera raw clips, H.264, other intensive-to-decode media types), and choose “Generate Optimized Media” to have Resolve automatically create an alternate set of media files that let you work faster.
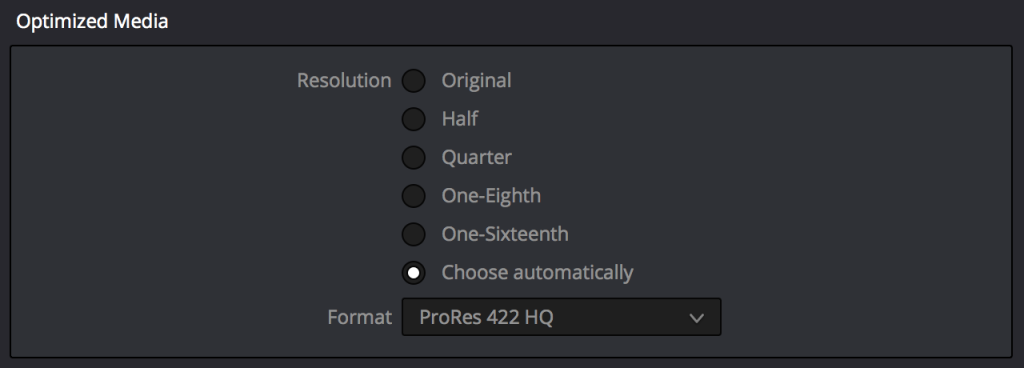
All Optimized Media you generate is compressed using whatever setting is currently selected in the General Options panel of the Project Settings. The default media format is ProRes 422 HQ.
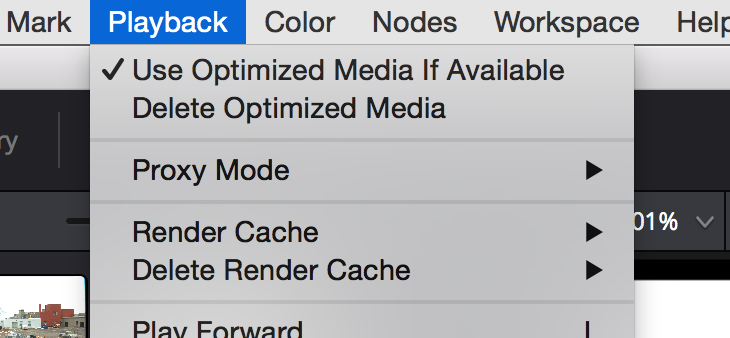
Once you’ve generated optimized media for a set of clips in a project, the Playback > Use Optimized Media if Available setting determines whether or not you’re using Optimized Media, or the original media files that you had imported into the Media Pool.
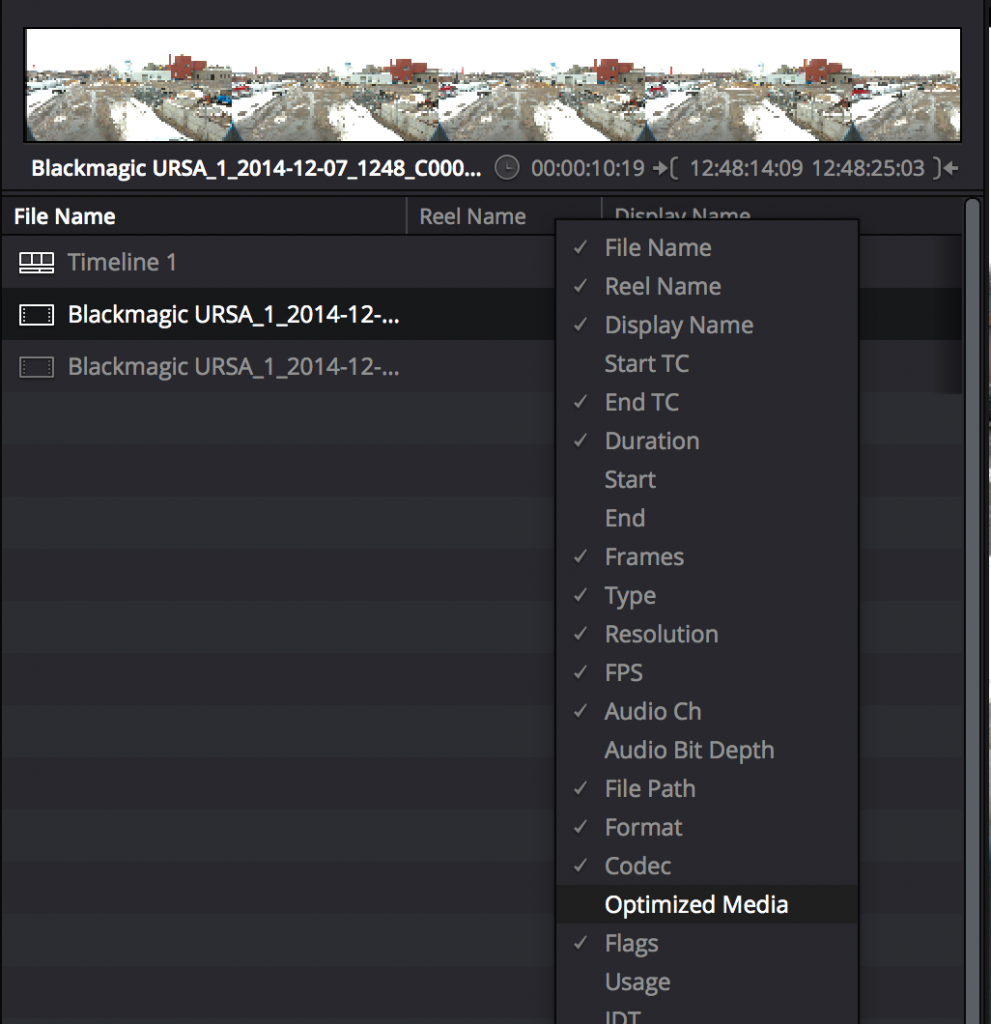
When using Optimized Media, you can also reveal an additional column in the Media Pool’s list view, which lets you see which clips have been optimized, and which clips haven’t.
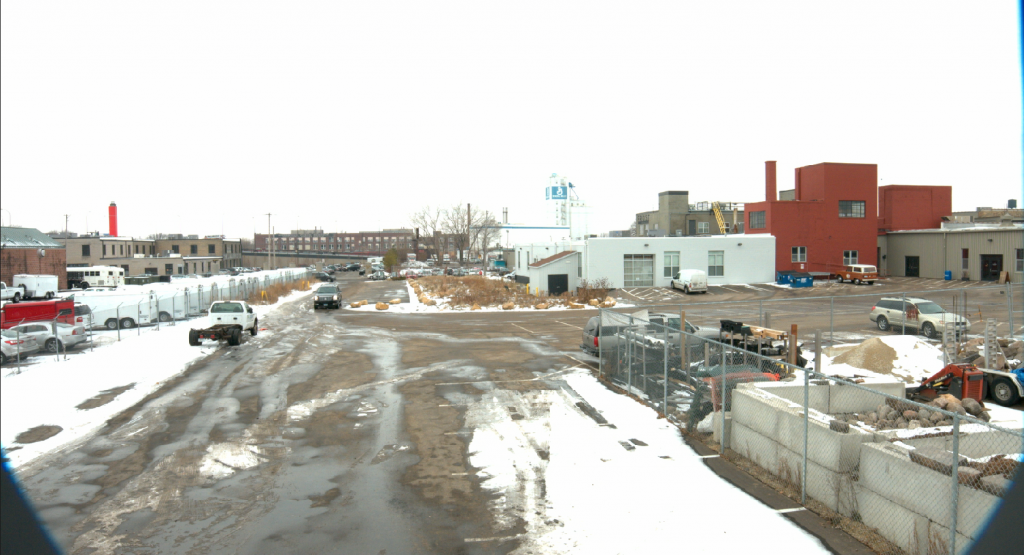
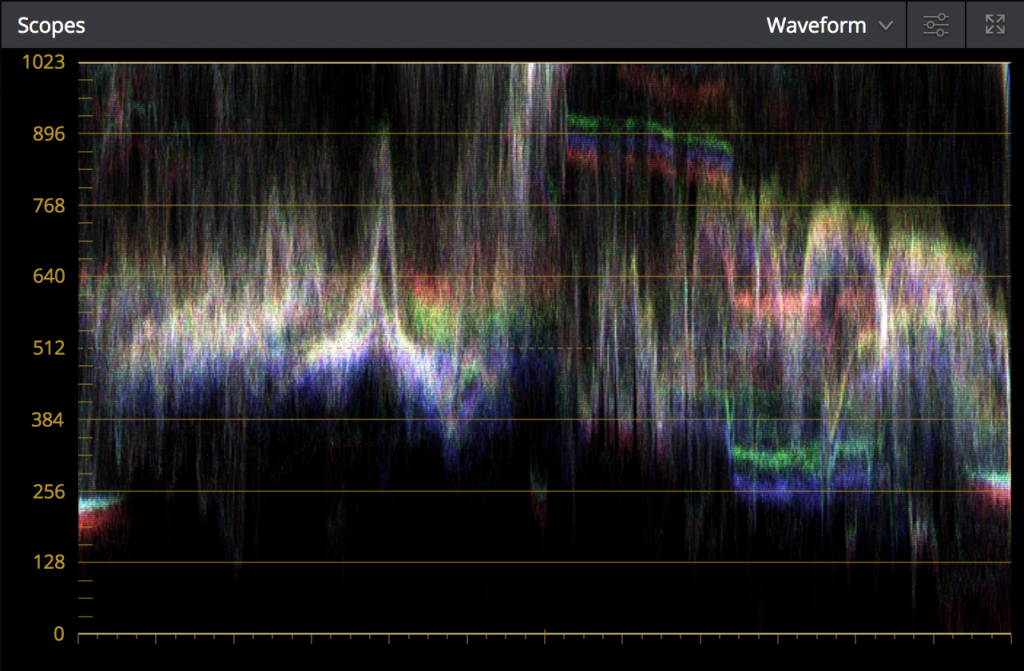
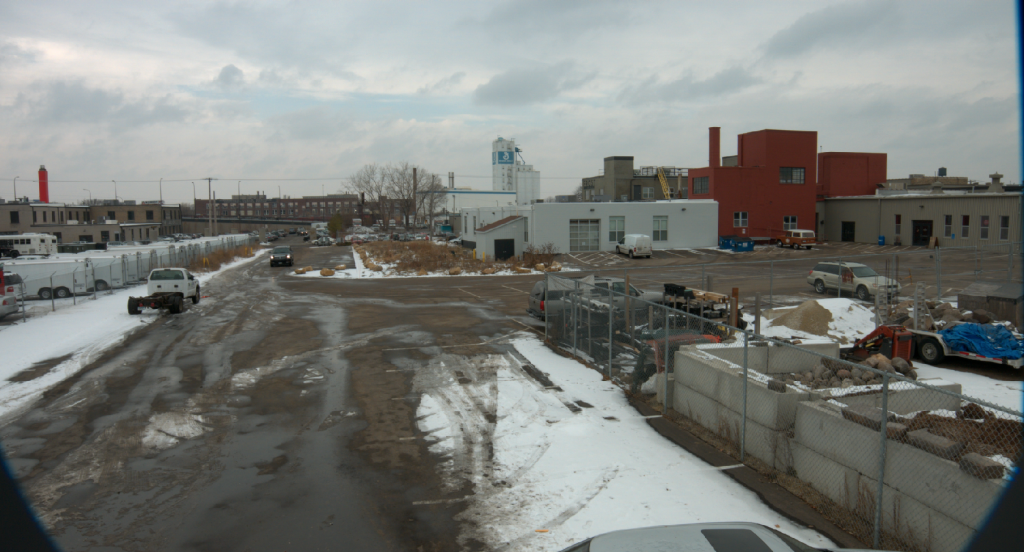
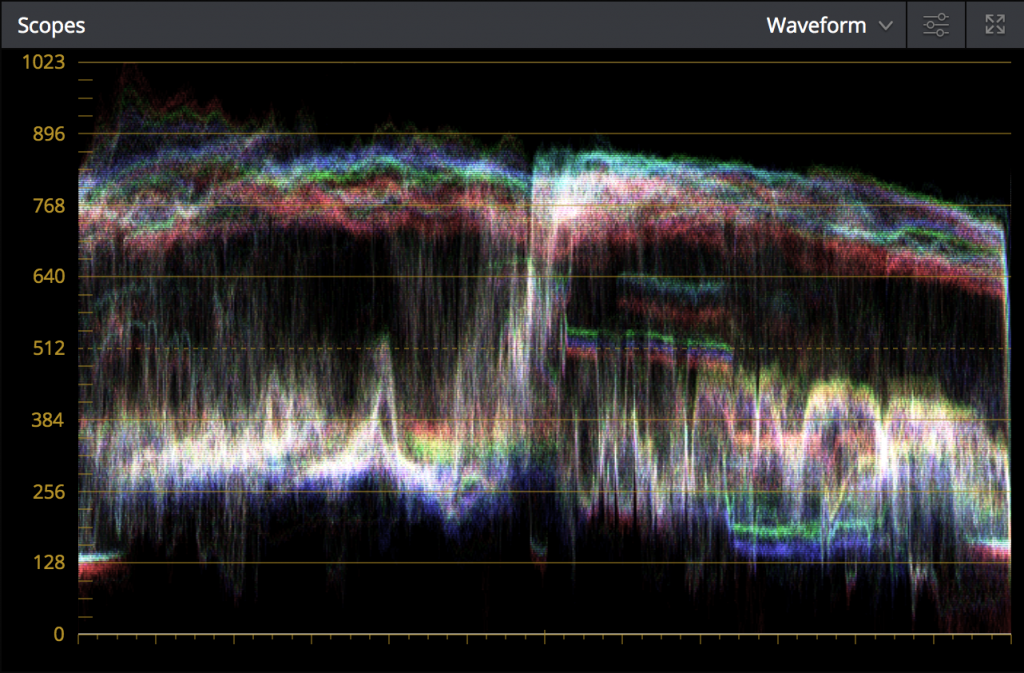
However, there’s a potential problem with using Optimized Media, which can be seen in clips with high dynamic range; the highlights of any image data with levels above 1023 become clipped. In the following screenshots, you can see the winter exterior has plenty of levels above 1023, as evidenced by the waveform below.
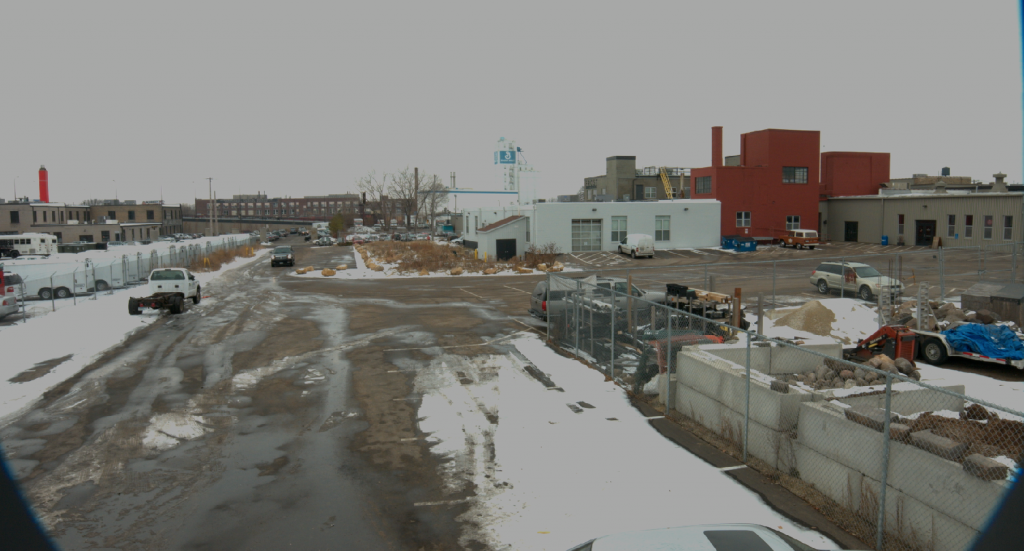
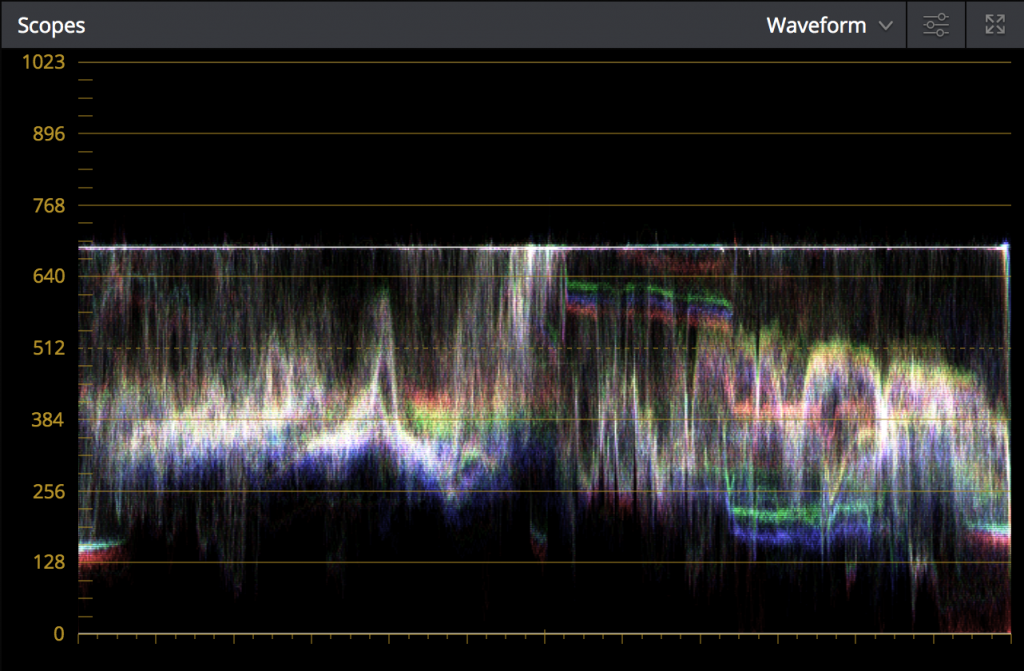
However, after optimizing these CinemaDNG raw clips, any attempt to retrieve the highlights above 1023 by lowering the Gain or Offset controls results in flat, clipped highlights, which can also be seen as a flattening in the waveform.
This, of course, defeats the whole purpose of shooting camera raw media in the first place. However, there’s a way you can generate optimized media that actually preserves these highlights, and that’s by changing the format used for optimization in the General Options panel of the Project Settings to “Uncompressed 16-bit float.”
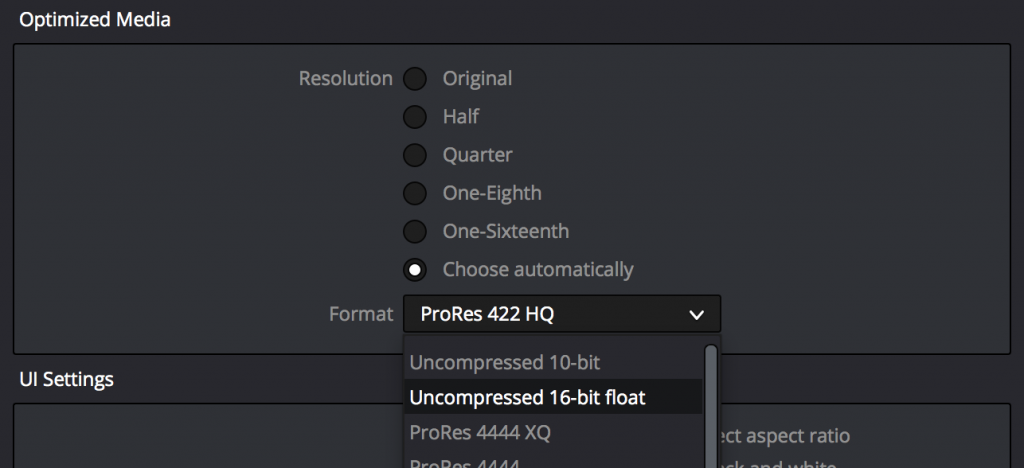
Uncompressed 16-bit float is a proprietary DaVinci image format designed to preserve out-of-gamut floating point image data. The only downside to this is that by using Uncompressed 16-bit float to generate optimized media, you create larger optimized media files. However, you still spare yourself the processor overhead of having to debayer your camera raw media, and you preserve high dynamic range image data for grading. So, you might need to make sure you have fast hard drive storage, but you’ll still work faster.
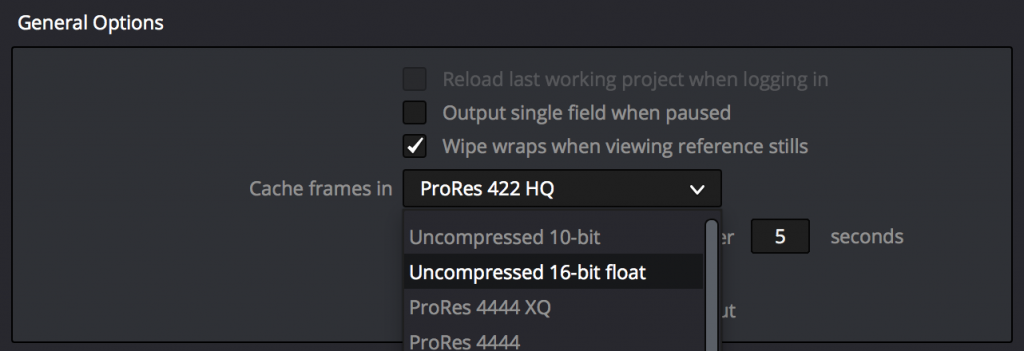
Incidentally, the exact same issue occurs when using the Smart Cache, which generates cache media for timeline and grading effects that are too processor intensive to play back in real time, except you’ll need to change the “Cache frames in” pop-up in the General Options panel of the Project Settings to Uncompressed 16-bit float, instead.
Optimized Media and the Smart Cache are two of Resolve’s best features for letting you grade higher quality media on systems with lower processing power. If you’re careful about what media format you use, you can preserve the quality of high dynamic range media, and you can even use Optimized Media for finishing and final output.
12 comments
Alexis, do I unberstood right that this make sense only if your dealing with any type of raw material? And if I want to optimise h.264 files, the usual 10 bit format like prores or dnx can hold all contained information without any issues?
This makes sense for any media format that has “out-of-range” data, usually above maximum white, that will be clipped. This very well could include video range H.264 clips with overshoots above 1023, where that small range of clipped highlights can be retrieved so long as you don’t eliminate it at the source. So this is valid for almost any media. The main exceptions is log-encoded image data, which for obvious reasons won’t have this problem since the entire range is compressed to fit between the minimum and maximum signal boundaries.
THANKS
Ah! That is why my render cache is going a little nuts with RCM. Its because it comes in already normalized and “clipped”, technically, if you dont use 16b float? HUGE tip and many thanks for sharing it.
Does this mean that the moment you generate optimised media/cached media influences what you see?
I mean if you generate them before/after bringing the overshoots back in the 0-1023 range, they appear clipped/ok in the image.
Is this correct ? Thanks
Yes, once you generate optimized or cached images, if the source has any out-of-bounds data, it may be clipped if you don’t use a floating-point format, and you’ll see this as you grade. If there is no out-of-bounds data and you choose a codec with enough bandwidth, you may not notice any difference at all. It all depends on your source.
Would ProRess 4444 or 4444 XQ be a viable alternative. Just curious as that is what I had been doing for a long time. I’ll do some tests.
I’m sure you’ve found the answer to this already, (I’m answering ALL of my correspondence dreadfully late this year), but Resolve 12.5 added the ability to use both ProRes 4444 and 4444 XQ for generating Optimized Media that won’t clip, which is really nice. It’s labeled “- HDR” to make it clear.
Any clue about why those optimised clips that, once created and after a cupple open/close of the program, flow away by their own?
I couldn’t tell you, bummer to hear that’s happening, though.
I’m seeing clipping also when highlight pull-down is applied (at Full Data Levels) via 10-bit 422 optimized media (typically DNxHR HQX) to UHD/4K AVC (8-bit 4:2:0) footage from DSLR/MFT and lower-end pro-line camcorders that record with so called ‘extended range’ luminance i.e. ‘limited/broadcast’ Rec709 range (as flagged) but permitting specular overshoot into the super-white range. What’s interesting is that the clipping is only seen on the timeline and does not appear when the optimized media is rendered out. Why is that ?
In the current version of Resolve (this article is a bit out of date), all formats that preserve out-of-bounds image data are labeled with HDR (I’m sure you’ve seen this, but I mention it for other readers). In the timeline, everything above 100 percent is hard clipped, but in general even the non “extended-range” media formats are capable of some limited overshoot preservation, which means there’s usually some small amount of highlight detail that can be manually dialed back into the image via an image adjustment. Hope that gives a bit of an answer?