Admittedly, it’s been a month since my last blog entry, but in my defense I’ve been a bit busy what with completing my new color correction book (which is at the printer as I type this) grading a pair of programs, and random other varied projects.
However, there’s a topic I’ve been really wanting to show, as it’s one of the things that Resolve’s nodal approach to grading allows that’s quite nice, and that’s how to combine multiple mattes in different ways. Combining mattes is an extremely powerful technique that any compositing artist should be familiar with. The general idea is that you can add two mattes together to create a more complicated matte, or you can subtract one matte from another to “carve out” elements you don’t want to be included.
To begin with, we’ll take a look at one of the most common examples of matte intersection, which can be accomplished within a single node.
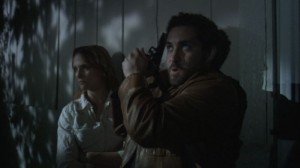
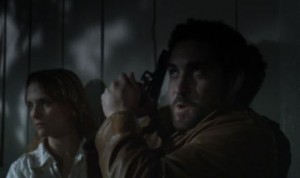
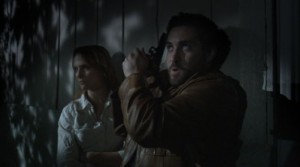
The following ungraded night shot is generally lit the way the client wanted it.
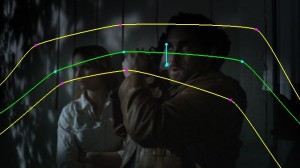
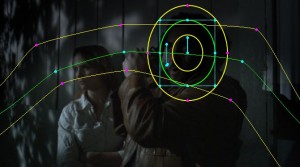
I suggested cutting down the amount of ambient light above their heads to focus the lighting more on the actors, while portraying a “darker” night as a result. The quickest way to do this is using a custom shape (or PowerCurve to use DaVinci Resolve’s terminology), to isolate an arc above the actors heads, within which I can then use the contrast controls to darken the background.
The result, while pleasing in terms of how the environment looks, unfortunately also darkens the man’s face. This is not helpful at all.
One solution would be to alter the shape of the “darkening” Power Curve to exclude his head, but thinking ahead, the man is going to be moving later in the shot, and animating the whole shape is going to be a pain in the neck. Instead, I’ll use Resolve’s ability to combine multiple shapes in different ways to subtract a Circular shape from the one I’ve already created.
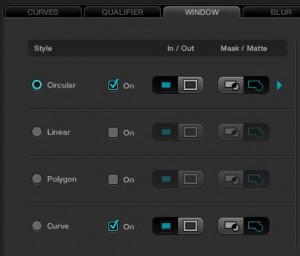
First, I turn on the Circular shape in the Window tab. Each node in Resolve can have up to four shapes applied within, one of each type of window, Circular (oval), Linear (rectangle), Polygon, or Curve (bezier-based shape). To combine shapes, you merely need to turn on the ones you want, and in the case of the Polygon or Curve, draw them.
Next, I position the resulting oval shape to cover the man’s head, which I don’t want to be included in the large shadow I created at the top of the frame.
At this point, the default behavior is for all the windows to be added together, so that the grade is applied to the total intersection of every shape you’ve positioned. The practical result is the opposite of what I want, and in fact the man’s face is now completely obscured in shadow. To create the effect we really want, we need to flip the appropriate “switch.”
Each of the four shapes in the Window tab has a Mask/Matte control at the right of the other onscreen controls. The default setting is Matte, which adds each shape you turn on to the rest. However, when you set a shape to Mask, that shape instead subtracts from the other shapes you’ve turned on.
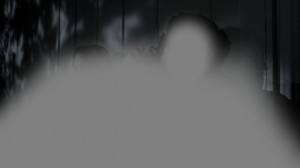
With the Circular window set to Mask, we can now see that the man’s head is subtracted from the original darkening matte.
The practical result is that the man’s face is no longer darkened.
The other advantage of this arrangement is that, as the man moves his head, we can now motion track the Circular window using DaVinci Resolve’s ridiculously fast, simple, and accurate tracker, and the “facial protection” window will move through the background shadow like we’d expect it to.
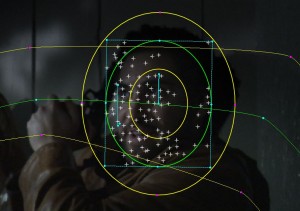
Motion tracking the man's face so that the Circular window follows him as he moves through the background shadow we've created.
So that’s the simple example. In part II, we’ll see the more complicated example, showing how to to do the same thing, instead using multiple nodes rather then multiple shapes, an even more flexible technique.
Good grading!
Special thanks to Director Bill Kirstein for clips from Osiris Ford.

3 comments
Alexis,
Sweetness. Powerful stuff. I can’t wait to see the tracker in action for myself.
– patrick
Sweet! I must admit that Resolve will be making our lives easier and our clients happier.
Less of a pain to do cool things. I’m all for that in post.
[…] the image from Part I, we’ll recreate the same effect, this time subtracting an HSL-qualified key in node 3 from a […]