I finally got my hands on the new Flanders LM-2461W thanks to Dan Desmet, owner of FSI. Alas, being in the middle of a move and with many obligations at NAB this year, I didn’t have as much time to work with the monitor as I would have liked, but I still managed to fire it up, run a few scenes on it, do a bit of grading, and get a solid sense of the monitor’s performance.
If you’ve been reading my blog for a while, you’ll remember I gave this monitor a shout out in my “What (Inexpensive) Display Should I Buy?” article. I made the recommendation mainly because of glowing reviews I’ve gotten in conversation with Robbie Carman, who’s a satisfied owner of the previous model, and from more positive written reviews from another FSI monitor owner, Walter Biscardi. Between that, and glimpses of various iterations of this display at past NAB shows, I was comfortable recommending it even though I didn’t have hands-on experience with it.
Well, now I have. But before I go into what I found appealing about the Flanders display, I want to make it clear that in today’s world of competing monitor technologies, display selection is a very personal thing. No two hi-fi enthusiasts are going to like the same speakers, and no two colorists are necessarily going to like the same display. Different display technologies have different characteristics, making them more useful for some applications then others. Some people find high-end LCD appropriate for their needs, while others prefer plasma, and still others are better off with a projector setup. I’ll address what I think the Flanders is most suited for later on.
My most basic advice is to never, ever buy a monitor without evaluating it in person first, in a reasonably suitable environment with appropriate lighting. This year at NAB Flanders had set up a proper, shaded viewing booth, appropriately shielded from ambient glare, and backlit to provide a suitable surround. That’s how you want to view the monitor, as it’s the only way to really see how its black level and contrast stack up in a real-world suite.
I’m going to start with my overview of what I found appealing about the Flanders 2461 display from the outside in.
Connectivity
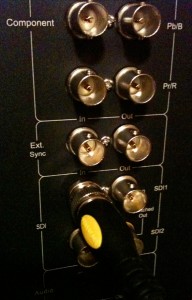
First off, FSI does the right thing by providing a host of connectivity options. Where other companies have traditionally made you pay a premium for SDI or HD-SDI inputs, Flanders includes SDI, HD-SDI, Dual Link, and 3G (now standard with the 2461) digital inputs, as well as Y’PbPr (for you analog holdouts). There’s even DVI in if you want to use the FSI as a computer monitor (although keep in mind that DVI is limited to 8-bits-per-channel). That makes the FSI monitors incredibly flexible for just about any postproduction application.
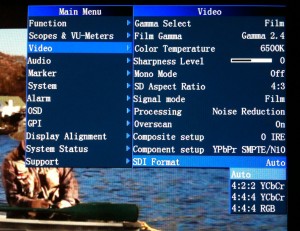
Given the built-in support for single and dual link HD-SDI (or either via 3G), corresponding settings supporting 4:2:2 and 4:4:4 monitoring (either Y’CbCr or RGB, depending on your signal path) can be found in the menus. Again, dual link 4:4:4 support was once a quite expensive option, so having this built-in makes any shop able to accurately monitor high end HD and digital cinema signal paths.
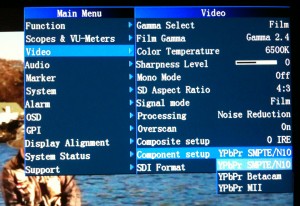
If you’re monitoring via Y’PbPr (the analog signal standard, as opposed to Y’CbCr, which is the digital signal standard), there are also all the options you’d want for analog monitoring, including SMPTE/N10 (with now standard 0 IRE setup, or black level), Betacam (with its now non-standard 7.5 IRE setup for North American analog Betacam output), and MII (with a 7.5 IRE setup similar to Betacam, but slightly different saturation levels).
As a side note (and I can’t stress this enough) if you’re monitoring for eventual output to analog NTSC Beta SP, then you’d use the Betacam setting. If you’re monitoring to eventually output via the SDI or HD-SDI outputs to any other format, or if you’re simply using the Y’PbPr connection for monitoring a digital signal, then use SMPTE/N10. Its 0 IRE setup is the standard for any application other then analog NTSC Beta SP.
Commensurate with the wealth of video inputs, this is very much a multi-format display, with support for SD, HD, and 2K formats of all standard frame rates, frame sizes, and interlacing standards. I’ll let their technical specs link speak for itself. Bottom line, you shouldn’t have a problem monitoring any format of digital or analog video with the 2461.
Power
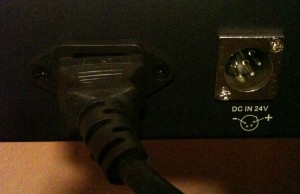
I don’t typically discuss the power connectors of post gear, but in addition to the standard three pin computer power plug, the Flanders display also supports 24V DC portable power for field use. In conjunction with other features I’ll discuss later, this makes the FSI a flexible display for a wide variety of production situations as well.
Color Fidelity
One of the main points of buying a monitor like this is that it can be properly calibrated to the required video standards.
Flanders takes a unique approach to monitor calibration, which is to carefully precalibrate each monitor that leaves their warehouse to be ready for you to use, as is. At a later time, they offer recalibration on demand, with you shipping your monitor back to them for the service whenever necessary (monitor recalibration is free for the life of the monitor, except for the cost of shipping). However, I’ve been assured that the panels are very stable, so Flanders only recommends full recalibration every 18-24 months.
However, the luminance of the Fluorescent backlighting can diminish very slightly over time with regular use (a matter of months). Before sending your monitor in for recalibration because of the backlight, there is a DIY calibration option that’s designed to account for this using an inexpensive colorimeter (the X-rite i1 and i1 Display 2 probes are approved). You must have first calibrated the probe to your brand new FSI monitor when you first received it, then you can use that probe to periodically check the luminance level of the monitor (Dan Desmet recommends every two months), using the monitor’s backlight setting to compensate for any aging of the fluorescent backlighting tubes.
When the time comes to send your monitor in for an overall recalibration, I’ve been told that turnaround is about 24 hours, depending on the method of shipping you decide to use. Flanders own calibration is done using a Minolta CA-210 or 310 (itself calibrated by FSI using an even more precise spectroradiometer), the results of which are used to generate a 3D calibration LUT that’s loaded directly into the display, accounting for any shifts within the panel or backlight that occur over time. Interestingly, the Flanders color engine is designed to use 64x64x64 LUTs. According to what I know about calibration LUTs, this is overkill, but hey, there’s nothing wrong with overkill if it doesn’t cost you anything extra, and the extra precision should make anyone sleep better at night.
Flander’s calibration service is a significant selling point, as the cost of purchasing your own high-quality colorimeter (to measure the display’s color characteristics), software for measurement and LUT generation, and an outboard video processor to apply the results (were you to use a different type of display lacking onboard LUT processing) could easily run you from $8K to $16K (USD) depending on the vendors you use (I’ve written an overview of the LUT calibration process here). Flanders takes this burden upon themselves so you don’t have to, and that’s a pretty good deal in and of itself.
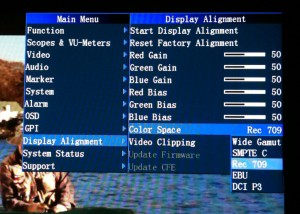
The panel of the 2461 has a wide enough gamut to support a variety of standardized color spaces. These include:
- Wide Gamut — The uncalibrated, native gamut of the panel used in the 2461.
- SMPTE C — The gamut of the phosphors used by broadcast CRT’s (such as the Sony BVM series).
- Rec 709 — The published gamut standard for HD video
- EBU — Another gamut defined by CRT phosphors that was standardized by the EBU. It’s similar, but not identical to, the SMPTE C phosphor gamut.
- DCI P3 — The gamut defined by the Digital Cinema Specification, for digital distribution and projection in theaters. Flanders says the 2461 supports 97 percent of the overall P3 gamut, being shy primarily in the most saturated greens. This is similar to the HP Dreamcolor’s stated 97 percent support of the gamut, and is pretty good. However, I suspect most users of this monitor will be most interested in the Rec 709 setting.
All of these are available via a convenient on-screen menu.
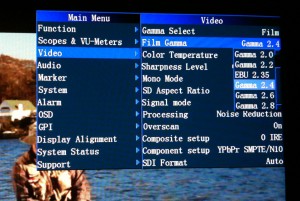
Gamut is only one characteristic of professional display adjustment. Another is Gamma, which is a whole other topic. Suffice it to say the current thinking of some prominent industry experts is that, despite some disagreement between postproduction professionals in different segments of the industry, the preferred standard for the gamma of monitors displaying Rec 709 is 2.4 (when backlit and with subdued lighting). This has apparently been ratified by the International Telecommunications Union (ITU).
The most appropriate gamma to use also depends on the display’s color space. The published gamma standard of a display calibrated to DCI P3 is 2.6 (in a blackout theater environment). Apparently, audience testing has shown that higher gamma values look better in darker viewing environments, while lower gamma values look better in lighter viewing environments.
However, opinions still vary. For example, the EBU seems to have standardized on 2.35 for consumer displays (see the EBU TECH 3321 document). Flanders takes the high road by providing adjustable gamma anywhere from 1.0 to 2.8. Why so much adjustability? Well, if you wanted to use this monitor as a computer display, you could set it to the current 2.2 gamma standard of Windows or OS X.
I neglected to get a picture of the menu, but there’s also a selectable color temperature option. Most folks will likely be monitoring at 6500K (the North American and European standard), but this is also adjustable if necessary, with settings for 3200K, 5000K, 5600K, 6500K, and 9300K (the broadcast color temperature standard for many Asian countries).
Interlacing
Much as it pains me that interlacing is still firmly entrenched in the HD postproduction world, it’s still very much in use by producers and broadcasters worldwide. As a result, it’s still critical to be able to get a true look at the field order of a video signal, and this is another area where the Flanders excels. Incoming interlaced images are displayed properly, with sequential fields presented in order so it’s apparent if, for example, an effects shot has had the interlacing reversed accidentally. A conventional computer display that deinterlaces everything wouldn’t necessarily show this problem as obviously.
You can control how the 2461 handles the display of an interlaced signal, but the menu settings are not obvious. The Video menu has a Processing submenu. When set to Normal or Fast, an interlaced video signal is displayed with properly resolved discreet sequential fields on the FSI monitor. When set to Noise Reduction, interlaced video signals are deinterlaced.
Manual Controls
Now, while carefully calibrated standards are important, it’s easy to forget that displays in a broadcast environment are simply evaluation instruments, and often manual adjustments to abuse the signal are useful for finding odd problems that won’t reveal themselves in normal use. For example, a shape-limited correction may look fine with ordinary calibration, but give itself away horribly on a display that’s a bit too bright. By temporarily cranking up the brightness on your monitor, you can see what your graded image will look like on a display that’s mis-calibrated (good to do if you’re working on a project destined for the wild west of the film festival circuit).
For this purpose, the Flanders monitors also include a host of manual controls for phase, chroma, bright, and contrast.
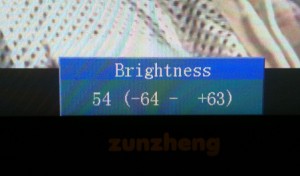
Unlike the “center-click-for-détente” potentiometers of traditional monitors, the Flanders display uses infinite rotary controls with an onscreen digital readout. It’ll take a bit of getting used to for old-school monitor users, but this is a digital monitor through-and-through, and it gives you the comfort of seeing when your setting is completely and accurately at 0 détente.
Furthermore, there are all the traditional controls you’d expect for over/underscan, H/V Delay, Blue Only, and Monochrome only (found in the menus).
This is also an interesting time to point out that the LAN jack on the back of the monitor will eventually support an application that can, via your network, control the monitor and adjustment settings of the Flanders remotely. Furthermore, Flanders sells a customizable monitor remote unit (with a whiteboard face for easy relabling) that can be used to control various features of your choosing via the GPI interface (connectable via CAT5 cable).
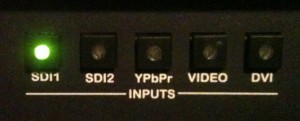
On the topic of instrument controls, the front panel has convenient pushbuttons for each of the video inputs. It’s a small thing, but I love that I don’t have to go clicking through menus or up/down button sequences to get to the input I want; one click and I’m there. Hooray!
Tools for On-set Use
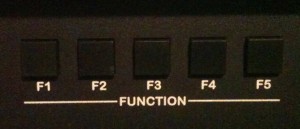
There’s also a series of user-programmable Function buttons (F1-F5).
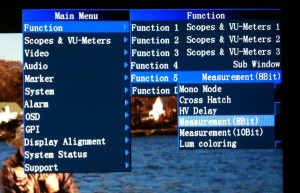
By default, these are mapped to useful utilities like video scopes, windows, measurement, and false color analysis (more on these later), and you can customize these via an additional set on onscreen menus.
As a suite colorist, these options are of limited use to me, as I’ve already got a set of video scopes, and frankly I want a pure, unvarnished look at the image I’m supposed to be making improvements to. The last thing I need is stuff superimposed over the picture, distracting me from what I need to be paying attention to.
However, all of this is incredibly useful for an on-set crew, and to that purpose there are some options I’d like to call your attention to.
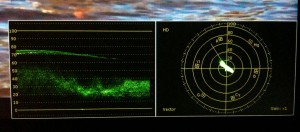
First, there’s a comprehensive set of video scopes available, visible up to two at a time, including a full suite of waveform scopes (Luma, Parade, Y’CbCr parade and overlay), Vectorscope, Histograms, audio meters, and more.
These are a real convenience on the set, but if you’re in the studio I wouldn’t get too excited. In use, I noticed that the framerate of analysis was less then realtime, which is not useful if I’m sweating the QC on a broadcast show. Furthermore, popping onscreen scopes on and off via the F-buttons is great when you’re adjusting exposure on your camera, but as I mentioned I don’t want anything superimposed over my image when I’m trying to color correct a scene. This monitor is no replacement for a set of dedicated video scopes in a postproduction environment.
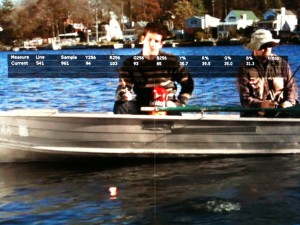
There’s also a really interesting pixel analysis tool. If there’s an element in the scene that you absolutely have to have a numeric analysis for, it’s here.
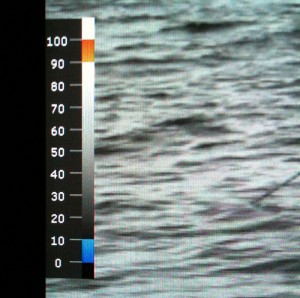
Another great feature for setting lights and exposure is a false-color mode for showing regions of maximum and minimum Luma.
The zones are adjustable, but by default are set to show you which areas of the image are falling into the upper and lower 10 percent of image tonality, as an aid to help you avoid overzealous clipping.
There are many more features targeted to the on-location crew, including pixel zoom, focus assist (with a different false-color red overlay showing which areas of the image are analyzed to be in focus), timecode display, alarms, VU meters, and onscreen markers for Title Safe, Background, Center, etc, with settings for whatever frame aspect ration you may want to view.
Finally, Flanders provides the ability (new in the 2461) to display two inputs side by side.
You can also wipe either horizontally or vertically between inputs to compare cameras, view dual channels of a stereo rig, or whatever else you need to do.
Viewing Angle
But enough of the bells and whistles. Getting back to the grading suite experience with this monitor, I’d like to talk about viewing angle. Most LCD-panel based displays lack a wide horizontal viewing angle, which is a liability when you’ve got multiple clients in the suite, and the one who’s sitting at the end of the client area is looking at an image that’s darker then the one who’s sitting in the “sweet spot” behind you. This is one area where Plasma displays have an advantage.
The Flanders, in my opinion, has a suitably wide viewing angle for two to three people sitting in a typical triangle about the display (colorist in front, clients to either side, but not too far away from one another). Flanders claims 178˚ (which seems about right in my informal “head-swinging” test). In this configuration, everyone will be seeing pretty much the same thing, which is what you want. That said, it’s still a 24″ monitor. While that was once considered luxury for midrange grading suites seven years ago (when a 24″ Sony BVM would run somewhere around $30K), these days clients have been so spoilt by facilities using calibrated 60″ plasma displays, or projector-based mini-theaters, that a 24″ display might seem a bit meagre in a multi-client environment (I’m talking five agency clients sitting in a room).
Also, keep in mind that the current recommendation for ideal viewing distance from your eyeball to an HD screen is 3-4 times the vertical height of the display. For the Flanders (with a screen height of 12 3/4″), that means that the ideal viewing distance is approximately 36″-49″ (3′-4′).
Black Level
Another issue to keep in mind is that, being based on backlit LCD technology, the black level is not as deep as either the CRTs we were once used to, a properly configured plasma, or the newfangled OLED monitors that are coming on the market (though for OLED it’ll cost you). For some, this may be an unconscionable liability. For others, the stable color and noiseless shadows of LCD makes it superior to Plasma, which is the other cost-conscious alternative.
This, in the end, is purely a matter of user preference, and is one of the reasons I recommend you evaluate any display you want to purchase in person. Certainly it’s true that as far as black level goes, you can do better, though you’ll likely pay considerably more for the privilege (the Dolby PRM-4200 has great blacks, and it’s only around $50K).
However, I would point out that the Flanders monitors does well in a standard, backlit video suite configuration. Perceptually, a dim, backlit environment is going to provide the best appearance of good contrast for any monitor (one of the main reasons for a proper viewing environment when using any display). Once used to the black level of these displays in relation to the numerical black of one’s video scopes, I don’t think anyone would have a serious problem grading their shadows predictably and well on the 2461.
Conclusion
As far as image quality goes, when I fired up the 2461 and loaded some projects I had previously graded on my calibrated JVC RS2 projector (calibrated to Rec 709), there were no surprises. Granted, this was not a probe-driven numerical analysis, but everything looked exactly as I’d expected it to, and the range of color and contrast that presented itself was absolutely suitable for professional work. The material looked right, and a series of test images that I loaded revealed nothing improper. Colorimetrically speaking, I’m impressed.
Based on the size and viewing angle, I’d say this is the perfect monitor for a shop with smaller suites designed to accommodate 2-3 people, or situations where colorists are working largely unsupervised and the Flanders is their hero display. It’s also an excellent solution for editorial environments where there is a desire for the editing displays to match the grading displays in the hero suite, preventing the unwanted surprise of a program looking different as it travels from room to room.
So that’s my final analysis. Solid color fidelity, low-cost calibration for the life of the display, and simple, flexible connectivity and video signal support make this an easy monitor to integrate into any postproduction environment (from out of the box to grading with my DaVinci rig was about 7 minutes). The size and viewing angle of the Flanders make it most suited for smaller suites, and the pricing brings a high-quality display instrument within reach of smaller shops needing color-critical monitoring. Furthermore, if you’re a “preditor” that engages in production as well as post, the Flanders provides you terrific options for field use. If you’re in the market for a new monitor in this size, I’d recommend getting a demo to see if it’s for you.



4 comments
Hi there,
First id like to say I am a big fan and really appreciate all you are doing in the field of Color Grading. I have read your book and it has been of great help and a huge inspiration really. Thank you for that.
And thank you for this very detailed review. We just got one of these monitors to use with DaVinci. As we have a i1 Display2 probe in our studio i wanted to follow your advice and calibrate our new FSI monitor for future reference. I have googled around but Im still having a real hard time working out exactly how to go about it. Not even sure if i need to use “i1 Mach 3” software or not…
I’d really appreciate it if you could just point me to the right direction with this.
Best Regards
Boris
…I meant to say that i wanted to calibrate the i1 probe to the new FSI monitor. The monitor itself is obviously properly calibrated and i woudn’t be messing with it.
Thanks again
Boris
Honestly, I don’t know the answer to your question. You might try calling their support line, on this page.
Thanks for your reply. I will do as you suggest and get in touch with FSI support.
All the best!
Boris