NAB was great fun this year. Lots of new announcements for the color grading crowd, and a visibly big jump in attendance from previous years. As always, it was good to catch up with colleagues from around the world whom I only see at either NAB or IBC, especially at after-hours events like the Media Motion Ball (made sweeter by my winning a copy of Sapphire plugins for AE and all, apologies to Scott Simmons who was eyeing it from the next place in the winners queue).
At any rate, now that I’ve settled into my new house and have had a chance to more or less unpack my home office, I thought I’d share a few experiences I had at the show, as well as some interesting details of what was announced, from the colorist’s perspective. My apologies to the many companies I didn’t have time to chat with, at this point even four days is hardly enough time to see everything and talk to everyone I’d like.
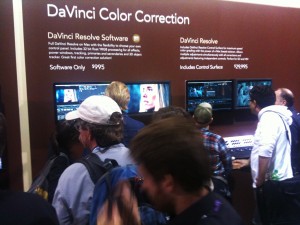
Full disclosure, DaVinci invited me to spend some time at their booth, and I’ve been doing a bit of writing for them, so I had ample time to see the new features they unveiled on Monday. While there’s been plenty of chat about DaVinci’s various announcements, including XML import (with support for transfer modes and 12 different types of video transitions), multi-track timeline support, hue curves, RGB mixer, limitable noise reduction, improvements to 3D left/right eye color and contrast auto-matching, and 3D left/right eye auto geometry matching, what I find most interesting are the tiny implementation details of many of these features that shows they’re really listening to what colorists want in their day to day work.
For instance, the hue curves can be used from the DaVinci control surface, with the primary and secondary colors being mapped to knobs on the panel, and the fourth trackball being useful for moving selected curve points around on the surface of the curve. For the mouse users out there, holding the Shift key while clicking on a curve places a control point without adjusting the curve (great for locking part of a curve off from adjustment), while a small button underneath reveals bezier handles if you want to go nuts with custom curve shaping. My favorite implementation of the hue curves, however, is the ability to sample a range of color by dragging within the image preview, in order to automatically place control points for manipulating that range of color using any of the hue curves, or the Sat vs. Lum curve. Oh yeah, and the Sat vs. Lum curve is a welcome addition (especially given the control panel implementation). Film Master and Quantel have had this feature for years, it’s nice to see it available to Resolve users.
The RGB mixer is really interesting. Its default mode lets you mix any amount of R, G, and B into any channel, but you also have the option to subtract any amount of R, G, and B from any channel. I played around with subtracting bits of neighboring color channels (subtracting G and B from R, then subtracting R and B from G, then subtracting R and G from B) while adding to R, G, and B by the amount I subtracted from the other channels, and the resulting subtle “color purification” boosted saturation, but in a wholly different way then using the Sat knob. And of course since it’s a standard tab within every correction node, it’s fully limitable. I’m sure there will be many crazy as well as utilitarian uses of this tool. An additional grayscale mode lets you mix the R, G, and B channels together to create different monochrome mixes, a welcome feature as I’d never quite figured out how to do this in prior versions of Resolve.
Sigi Ferstl (Company 3) was demoing the new 3D toolset on the show floor to keen audiences. I haven’t yet been required to do any amount of 3D, but the auto color and geometry matching features for making the left and right eyes align and match properly are welcome additions, as are various new monitoring modes for comparing the two eyes on one screen.
Speaking of 3D, it’s time to give Quantel some love. Speaking with David Throup, and with a great demo from Sam Sheppard, I got the lowdown on some of the new color-grading and 3D features that Quantel has come up with for Pablo.
Quantel has introduced improved auto fix tools for matching color and geometry between the left and right eyes in Pablo. There are also superimposed left/right eye vectorscope and histogram graphs (color coded per eye), which look to be a huge help when making those last few manual tweaks to parts of the image that just won’t auto-match (I’ve seen left/right eye demos on several grading systems now, and sadly there’s often a stubborn region that just won’t match, requiring manual fixing).
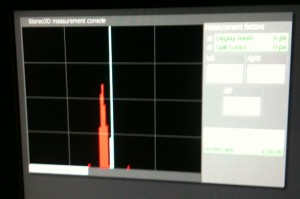
Most interestingly, two new measurement tools have been added for evaluating convergence. A “Depth Histogram” analyzes how much of the picture projects forward and backward from the center of the screen. As you can see in the image below, a center line represents the screen itself, and a histrograph analysis shows quickly and precisely how much of the image is projecting forward, and how much is projecting backward. This is a really handy tool for quantifying the disparity within your image.
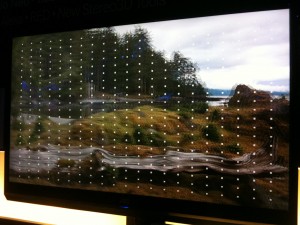
Additionally, a user adjustable “Curtain Delimiter” places a square pattern in 3D space to serve as a visual indicator of your chosen limits for stereo disparity. This is key as broadcasters add disparity limits to their QC guidelines (I was told the BBC has implemented Vince Pace’s recommendations for disparity limits of no more then 1% forward and 2% back of the screen for home viewing). Both this and the depth histogram really take the fear out of convergence adjustments, as far as I’m concerned.
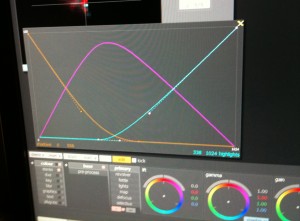
Quantel’s big new feature for color grading is a set of customizable “Range Controls” for the lift/gamma/gain color balance controls. Three curves let you set custom tonal ranges of influence for each control, which are fantastic for post-primary adjustments that need more influence over the image then a secondary, but finer-tuned control then the standard lift/gamma/gain overlap. That, and the results are clean at the edges due to the mathematical joy at work. And one other thing, customized range controls can be baked into a LUT in a way that HSL qualifiers can’t, which is an interesting approach to creating even more customized looks via LUTs. Overall, a very nice addition.
I also got a better understanding of Pablo PA. It’s a full software version of Quantel Pablo that runs on Windows 7, requires Nvidia Quadro GPUs, and sells for $14K. It’s not feature-limited as far as the on-screen experience goes, it’s got all the editing, color, and 3D tools of the full Pablo, and can handle all SD, HD, and film resolutions. However, there are hardware limitations. There’s no video output, so all monitoring must be done via your computer display (possibly an HP DreamColor monitor being fed via DisplayPort for a calibrated look at the image). Also, there’s no support for control surfaces. However, the main point of this software is to serve as an assist station for a Pablo-using post house, so I suppose that’s not a huge bother. I’ll be very curious to see if this software’s capabilities grow over time.
Over at Filmlight’s suite at the Renaissance, I spoke with Mark Burton, who showed me the insanely wonderful new Blackboard II control surface. At $62K, I have no problem saying this is something I’ll likely never own. On the other hand, I also have no problem saying that, to date, I consider this to be one of the most significant advancements in control surface design that I’ve seen. And it’s not just because of the hand shaped wooden top. Take a look at the video below:
[vimeo video_id=”22777705″ width=”400″ height=”300″ title=”Yes” byline=”Yes” portrait=”Yes” autoplay=”No” loop=”No” color=”00adef”]
Filmlight is patenting their method of placing a flatpanel display underneath banks of buttons, with individual lenses (one for each button) projecting each part of the screen at a different button. The result is that every button on the panel can have custom labeling for every single mode of the Baselight software. Furthemore, buttons aren’t limited to mere text, they can display icons, images, even motion video. All the while, they’re still physical, touchable buttons that you can find with your fingers (and muscle memory) and press without taking your eyes off the screen. I found the layout to be logical, with banks of knobs (okay, one quibble, there could have been more knobs), additional displays that can be used for UI, both a “virtual” keyboard (two button banks to the left can be remapped to be a QWERTY keyboard) and a “real keyboard” that can be flipped up from the bottom of the panel, and finally a touchpad for mouse navigation and graphics tablet pad for drawing round out the available controls.
It’s also worth pointing out that the Baselight grading software itself has just undergone a huge under-the-hood rewrite. At the moment, the biggest new thing being shown is a three-up monitoring UI layout, but more goodness to come was implied. I’m curious to see how the already impressive Baselight software continues to evolve, especially with such a flexible control surface.
I also took a look at one of the buzziest things at the show, the Baselight for Final Cut Pro plugin. Those who know are aware that Filmlight has had a Mac version of Baselight for a while, they just haven’t been interested in releasing it. This is their answer to folks wanting Baselight goodness on their Macs; essentially a version of Baselight that works inside of Final Cut Pro. It’s limited to four layers, but those layers can do everything that Baselight layers can do, and with exactly the same image quality. Of course, the real news is that with the Baselight plugin, exported XML from FCP to Baselight translates the “offline session” grades directly and precisely into Baselight grades for getting a start on the session. Of course, I don’t know how many colorists I’ve heard say “I don’t want the editor telling me what to do,” and I myself have blown away plenty of editor-created grades prior to creating my own take on the program. However, this would be a real boon for integrated shops where multi-disciplinarians can move from task to task, not having to worry about losing the work they’ve done.
The plugin they showed at NAB was still a work in progress (they’re planning on releasing at IBC in September), so I won’t comment on performance as it’s still being tuned. However, it’s an interesting development and a great option to have, and when they continue on to develop a Nuke version of the same plugin, and possibly plug-ins for other major NLEs as well, Filmlight will have created a remarkably smooth grading pipeline for Baselight-using facilities.
Thanks to Sherif Sadek I got to see the new features in Assimilate’s big release of Scratch 6. Among the announcements are Arri Alexa and RED Epic media compatibility, a new Audio Mixer allowing you to grade within context of audio tracks, multi-track video support (After Effects style, where additional tracks go down, not up), multiple shapes per scaffold (letting you do more with fewer scaffolds), blend modes that work with superimposed images, as well as additional blend modes that are useful for combining alpha channels and masks (a cool feature for the compositing minded). Also, proper AAF/XML import (although no XML export).
But that’s not all. Scratch 6 sports a bicubic grid warper that’s animatable (have an actor that needs to look a bit thinner?).
They’ve also added a dedicated Luma keyer (a convenience, really, as you could do this before by turning off the H and S of HSL), and a brand new chroma keyer for high quality green and bluescreen keying. Now that there are multiple tracks, Scratch is heading down the path of letting you do more compositing work directly in your grading app (you got your chocolate in my peanut butter!). The new chroma keyer is nice, the plates they were keying were fairly challenging, and the wispy hair detail that was preserved, as well as the built-in spill suppression, were all very impressive.
One interesting new feature for those doing digital dailies, an “auto sync” feature that was described to me as a “clap finder.” Once you find the visual clap frame in a clip, you simply move the paired audio clip’s clap close to it in the timeline, and then one command auto aligns the peak of the clap to the clap frame, saving you a few moments of dragging and adjustment. Of course, the ability to auto sync matching timecode between video and Broadcast Wave files is included for productions that are more organized.
Assimilate was also showing their new version of Scratch for Mac OS X (finally!), available for $18K. In addition to full feature parity with Scratch 6 for Windows, there is full support for ProRes output (Scratch on Windows can import ProRes files, but not export). That’s the good news, the bad news is that there’s no video output, although like Pablo PA you could always use an HP DreamColor monitor to view the image and UI in a calibrated manner. I also saw a Scratch configuration in the Panasonic booth, outputting both image and UI to a calibrated plasma display, which is an interesting way to work. You’re also limited to the NVidia Quadro 4000 (when oh when will NVidia and Apple make the rest of the Quadro line available for Mac users?). Still, this is a good start, and may be a useful option for Scratch shops that need an assistant station or two.
Finally, Assimilate announced Scratch Lab, their on-set grading application. I didn’t see this in person, but was told it consists of Primary/Source/LUT/Curve controls only, no secondaries, no compositing tools. It’s designed to run on a Macbook using NVidia graphics (yes, you’ll need to buy a used one), and costs $5K. This actually interests me quite a lot, as I’ve been intrigued by the role of on-set colorists. Nice to see another tool available.
And yes, I went to the Apple event at the Supermeet. No hard feelings about being bumped as a speaker, honestly this was far more interesting. Many new things were shown, and I look forward to hearing what folks think once they get their hands on the newy newness of Final Cut Pro X. Although I’ll take a raincheck on endless speculation about what the new app will and won’t do until release, thank you very much.
I had a great chat with Mike Woodworth at Divergent Media, who showed me the new video analysis tools of Scopebox 3. While this software is also capable of digital capture for field recording, all I had eyes for were the new scope features, which are impressive. New gamut displays let you see out of bounds errors with composite and RGB analyses. A unique new “envelopes” feature highlights the high and low boundaries of excursion in the waveform monitors, making it a snap to see peaks (including a peak and hold display) without having to crank your WFM brightness up to 100%. I’ve longed for something like this in other scopes for years, it’s great to see it here. Alarm logs are available for QC environments, and it’s also worth mentioning that Scopebox does 444 analysis if your video interface supports it. All for the new low price of $99. Mike laughed when I told him for that price, I’d buy one for my living room TV. I wasn’t joking. I look forward to stacking Scopebox up against my Harris Videotek, as well as against Blackmagic’s Ultrascope, to see which I prefer.
On a lark, I had a conversation with George Sheckel at Christie (the projector company). I was curious about the total changeover of projector models that almost made my Color Correction Handbook obsolete before it went to print (I updated it). It turns out that on Dec. 31st, 2009, all projector companies made the shift from Series 1 projectors to Series 2, primarily to add additional layers of hardware security demanded by the major film distribution companies. This is serious, using the National Institute of Standards and Technology (NIST) Federal Information Processing Standard (FIPS) security for physical protection of the encrypted video stream. At this point, for DCI playback, an encrypted stream is sent by the playback server, over dual, quad, or even octuple-link (is that even a term?) HD-SDI, to the projector. This stream is not decrypted until it’s inside the projector, just before being sent to the TI DLP chipset that literally reflects the light to the screen. Any attempt to physically tamper with the internals of the projector results in the loss of the DCI key that makes decryption possible. This is serious encryption.
On a lighter note, Christie took the opportunity to add 4K resolution, as well as some other small improvements. I inquired which projector models were being recommended for 2K projection in a postproduction environment, and was told that Christie’s current best post projector is the CP2210, or the CP2220 if you need a color wheel for Dolby 3D. Both require 220 volts AC, with 20 amp circuits.
Alas, I hadn’t enough time to spend at the Panasonic booth to get all my questions answered, however I did get to stand in awe of their unsanely ginormous 152″ 4K plasma television. That’s 3D ready. It’s the TH-152UX1, if you’re planning on going to Best Buy to pick one up. However, like the Christie projector, you’re going to need to feed this beast 220 volts and 20 amps.
I also had a nice chat with Steve Shaw of Light Illusion. On Tuesday of the show I did a seminar on “Color Management in the Digital Facility,” during which I demonstrated monitor calibration with 3D LUTs using Steve’s Lightspace software, driving a Klein K-10 colorimeter (thanks to Luhr Jensen, CEO of Klein Instruments, for loaning me the K-10 for my class). It was a great three-hour session (I only went over by 9 minutes, a personal best), and was so fun to do I hope to have the opportunity again sometime.
Anyhow, the Light Illusion software works well, and Steve mentioned a new utility he and his team have developed called Alexicc, that essentially lets you batch convert Alexa media using Log-C gamma into Rec. 709 QuickTime media (ProRes, if you do that sort of thing), cloning timecode and reel number for later conforming to the original media. You can also convert into DNxHD if you’re an Avid sort of person. You’re not limited to a Log-C to Rec. 709 LUT, you can do other LUT conversions using additional tools. It’s a streamlined utility, available for £220 ($363 USD as of this morning), that you might find useful.
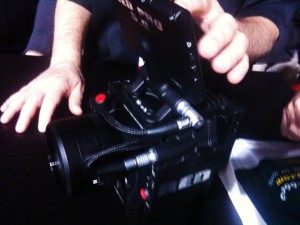
After years of correspondence with Graeme Nattress (I’d interviewed him for my Encyclopedia of Color Correction, and he was my technical editor when I wrote for Edit Well), I finally had the pleasure of chatting in person at the RED booth. While there, Ted Schilowitz was showing off an honest to goodness working Scarlet camera.
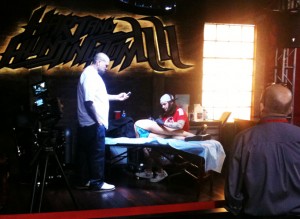
RED definitely won the “over the top camera demo” award for the live tattooing of a model on stage. I’ve seen models in camera booths working out (on a treadmill all day?), lounging, getting their hair cut, all kinds of wacky things, but this was definitely a first.
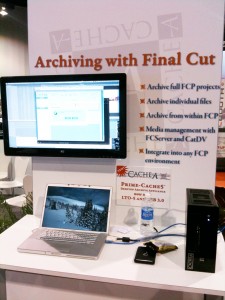
Shane Ross has already blogged about Cache A as a solution for LTO tape archival, so I’d direct you to his blog.
One thing Shane didn’t mention that I thought was really interesting is the SDK that Cache A has developed, that enables their tape storage hardware to be used directly by software such as Media Composer, Final Cut Server, and Assimilate Scratch (though I’m not sure if Scratch support is coming or already available). With this kind of support, applications can directly request specific media for retrieval from tape backup. One example that was described to me was the ability to, during reconform, use an EDL to request only the media files used by that EDL for retrieval, rather then having to retrieve everything associated with that project. This is fantastic functionality that I hope more grading applications jump on board with in today’s world of terabytes of tapeless media.
Lastly, I was told that the entire Cache A product line is now compatible with the open source Linear Tape File System (LTFS) format. This means that each tape is self contained, and can be unarchived by any application and operating systems with LTFS compatibility. More information on this can be found on a handy Cache A press release.
