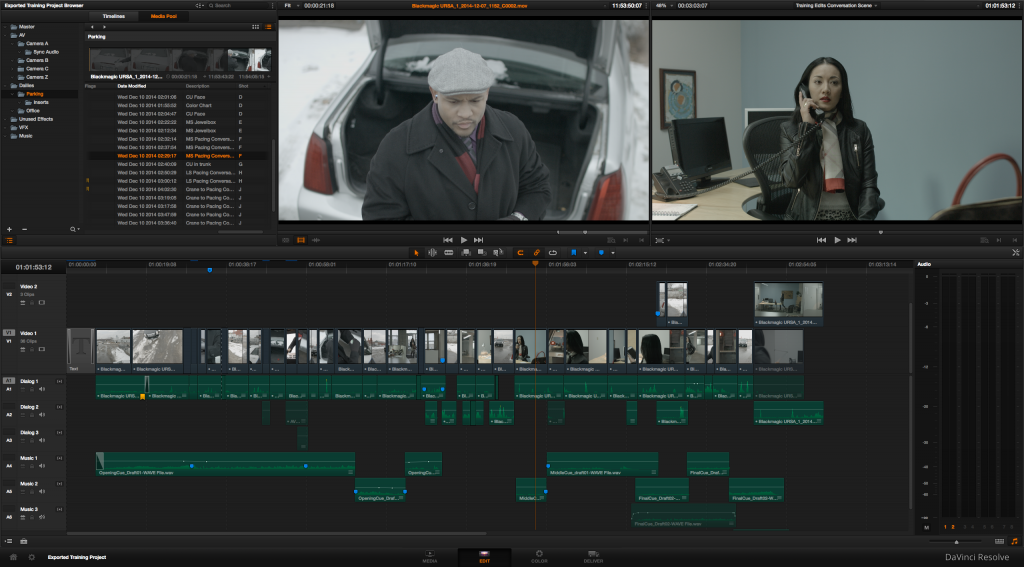
The scene I shot in December, “An Unwanted Job,” is coming along nicely. In an effort to eat my own dog food, I’m doing as much of the postproduction as I can inside of Resolve, from syncing the timecoded dual-source audio and making offline dailies from the original 4K CinemaDNG media, to editing both picture and sound, editing music and doing simple sound design, through adding visual finishing effects and doing the grade. Eventually, I’ll be sending the audio I edit to someone else for sweetening and mixing, probably in ProTools, probably via exporting xml to Final Cut Pro 7, and out to OMF from there, unless I find a more contemporary workflow.
I used the Metadata Editor in the Media page to annotate the Description, Shot, and Scene for each clip, and then I sorted the Media Pool in list view and organized the clips into logical bins for my use. Overall, the new Media Pool columns and bin organization features have made wading through material much, much nicer then in previous versions. For the smoothest overall experience I created a set of transcoded 1080p ProRes LT media with cloned file names and timecode to work with, making it easy for me to reconform to the original 4K once I start with the grading; I have separate bin hierarchies for the camera original and proxy media, and I can switch back and forth using the “Reconform from bin” command (after turning off “Force Conform Enabled” for each clip in the Timeline).
Assembling my timeline went swiftly. As I edited, I definitely found things that could be improved, particularly in the realm of audio, but I was easily able to accomplish what I wanted, and as I got into the details of the edit I’m happy to say that I like the trimming tools in Resolve as much as an end user as I did when demoing them in front of audiences. There are idiosyncrasies in Resolve 11.1.3 such as audio not playing in reverse (you can hear audio playback scrubbing or moving a frame at a time in reverse, just not at speed), or double-clicking to open a clip into the Source Viewer for trimming not working when the Trim tool is selected (you have to choose the selection tool first), but nothing stopped me, and I’ve passed these tidbits along to the Resolve team. One thing I’ll add is that easy access to Roll edits in selection mode make split edits in dialog ridiculously easy to perform.
After cutting a few different versions of the scene, I “soft-locked” my primary edit a few weeks ago. At the moment, I’m going back and forth on the music cues with composer John Rake. I’ve been deliberately having him compose longer pieces of music that I can cut into the timeline in different ways, which has been forcing me to do a bit of music editing in Resolve. Given that audio cutting isn’t necessarily what Resolve is designed to do at the moment, it’s actually been going nearly as well as it ever did back in FCP 7. I often try to avoid locking the edit until the music is finished, as great cues always make me want to push and pull things around. In this case, it’s a great excuse to push Resolve a little out of its comfort zone.
I’ll post a work in progress probably later in February, but for now I’ve started using examples off of my timeline in a couple of free tutorials that are now available on the web.
I’ve done the first in what is to be a series of “Resolve in Under 5 Minutes” videos for Ripple Training (you can subscribe to their YouTube channel), in which I’ll be showing a different technique or tip in every video. This first one covers image stabilization, which is a useful tool whether you’re an editor, colorist, or finishing specialist. For this, I used one of the first shots in the scene, a 20 foot remote-operated jib shot that was being buffeted by wind on a wintery day. Exactly the kind of shot this tool shines at improving.
I also did a webinar for Imagineer Systems and Boris Effects about how to use Mocha and Boris OFX plugins with DaVinci Resolve to do corner pinned match moving, motion-tracked lens flare addition, lens correction and dead pixel/wire removal, and other techniques that you either can’t do or that are otherwise difficult in Resolve by itself.

1 comment
[…] Because DaVinci Resolve can work with Open FX Plugins, a whole slew of third party apps, widgets, effects and more are accessible inside of Resolve. In this hour long webinar replay from colorist Alexis Van Hurkman, you can learn how to use both Mocha and Boris FX inside of Resolve to finish up your shots to do “corner pinned match moving, motion-tracked lens flare addition, lens correction and dead pixel/wire removal, and other techniques that you either can’t do or that are otherwise difficult in Resolve by itself.” Alexis gives a little bit of detail of his recent Resolve work in this post. […]