This year’s IBC conference was a busy one, and since I was neither speaking or teaching this time around, I had a lot of time to check out what the current state of grading software was among most companies. There’s never enough time to see everything, but I got a good overview of most of the things that interested me.
I’ve been asked by a few people what, in my opinion, the “theme” of this year’s IBC was. For me, it was workflow. Everyone seems to be looking to make managing the media and metadata from on-set through post more streamlined, or to integrate effects, grading, and finishing in different ways. Refinement also seems to be the name of the game, with most grading apps I saw having polished their UI, and added small but useful features such as composite mode blending of multiple layers (a feature that every single grading application now seems to boast). Incorporation of compositing and effects tools into grading applications continues to happen at a rapid pace, with features such as high quality motion estimated speed effects finding their way into more and more grading applications.
The first booth I visited was that of Filmlight, makers of Baselight. A preview version of Baselight was shown with new composite mode blending of different layers, but it seemed that Filmlight’s major news was more related to workflow integration. Now that they’re shipping Baselight plugins for both FCP 7 and Avid Media Composer/Symphony, with a plugin for Nuke right around the corner, Filmlight is in a position to offer a unified and consistent means of handing off comprehensive grading adjustments from NLE through compositing to grading and finishing. Their web site touts this as “Filmlight at every stage,” and they’re working hard to achieve this.
Filmlight also introduced the Flip, a sort of “Baselight in a box,” in order to bring Baselight goodness to the on-set crowd. The Flip is a self contained Baselight system—simply plug in a monitor and a control surface (the Tangent Element panels are supported) and you’re in business. The front of the Flip has buttons with dynamically updating labels (similar to the Blackboard 2), a touch-sensitive display, and a single trackball/ring control that allows simple adjustment even in the absence of a surface.
The idea is that, in addition to being able to use CDL-compatible tools to apply and manage simple primary grades from on-set through post, you can use the Flip to apply full Baselight grades while on-set, previewing them live on your camera’s output, and linking them to your captured media. Once the media/grade relationship has been defined, Baselight’s BLG file format (Baselight Grade File) is used to exchange grading data, with optionally embedded before/after wipe frames of the media files, and the option to even embed the full resolution media itself (as OpenEXR frames of the raw pixel data). At minimum, you can exchange media-less BLG files that contain all of the full multi-layered Baselight grades that correspond to your project’s media among the Flip, FCP 7, Avid, and Nuke Baselight plugins, and a full Baselight workstation. Very cool, from a workflow perspective. (A video about the BLG file format is available here).
Speaking of Tangent, their new Element panels seemed to be everywhere at the show except the Quantel booth. Currently Resolve, Lustre and Flame Premium, the Filmlight Flip, Scratch, Mistika, and REDCineX all support the Elements, along with numerous other applications and utilities. Tangent’s main news was a set of new Pelican case foam inserts for folks needing portability; I could have sworn I took a picture, but alas I did not (they’re black). Pricing information is not yet available, but the foam inserts are designed to fit the relatively slim Pelican iM2370 case, and the larger iM2500 (a wheeled case which is capable of fitting both the panels and a 15″ laptop). I’m looking forward to picking one of these up for my on-location gigs.
After a few years of not having time to check out SGO’s Mistika software, it appears I picked a good year to get a comprehensive demo, as Mistika now sports a brand new color correction interface. Known for being an integrated editing, compositing, and grading environment with an excellent stereoscopic toolset, it’s nice to know that they’re not resting on their laurels, and that they’re continuing to develop and refine their toolset.
I was unfamiliar with their previous color correction interface, but the new UI has everything you would expect, with lift/gamma/gain three-way controls, multiple layers of primary or secondary correction (called Vectors) embedded into each “timeline layer” of grading, printer light controls, white/black “manually sampled” auto-correction, tracked shapes, qualification, etcetera. All of this is compatible with up to six Tangent Element panels; in fact Tangent tells me that Mistika supports more simultaneously mapped Element panels then any other application right now, making good use of the Element’s expandability.
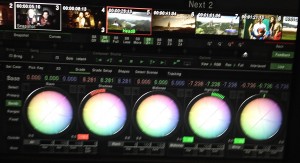
One unique feature is a mode of “five-way” correction, with five color balance and contrast controls for lift/shadows/gamma/highlights/gain adjustment, simultaneously presented. This is an interesting variation that I can see being quite useful.
Mistika’s grading and compositing is layer-based, and one aspect of this is the concept of a single layer grade being able to encompass multiple clips (similar to track effects in Symphony, or track grades in Speedgrade). What’s unique in Mistika is the ability to “route” key data from one layer to another in the stack, which provides functionality similar to DaVinci’s node-based key and RGB routing. Since Mistika is as much a compositing tool as a grading tool, this provides many node-based advantages while retaining the familiarity of a layer-based interface.
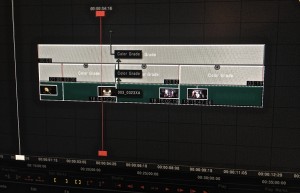
One touch I like in the “trackless” timeline is the resizable playhead, which lets you change its height in order to control how many composited layers you want to preview as you play. A taller playhead that intersects all layers shows the full composite, whereas a shorter playhead that only intersects two of the layers results in only those two layers being composited during playback.
Though not new, I wanted to get a look at the stereoscopic 3D tools that I often hear folks rave about, and I wasn’t disappointed. SGO has implemented a real-time optical flow engine that enables real-time slow motion and format conversion processing. However, it also enables automatic pixel by pixel geometry and color matching between challenging left and right-eye stereoscopic media, making short work of clips where differences in paint reflectivity and sky polarization cause other auto-matching tools to fall short of an overall match. Furthermore, knowing that optical flow processing can produce visual artifacts in clips with overlapping elements in motion, Mistika’s full compositing toolset can be used to isolate and manually repair sections of the odd clip where optical flow artifacts happen to appear.
One of the things that really impressed me, though, is Mistika’s tool for using optical flow processing to alter the interocular distance of elements in the scene at a particular range of depth. SGO refers to this as “depth-discriminated interocular adjustments,” and this lets you stretch or squeeze selected regions of the picture to come forward or move back in postprodution. This is a level of detail that made the film-maker in me rejoice; I was very impressed.
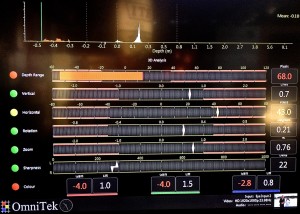
Speaking of stereoscopic work, Omnitek was showing off their tools for stereoscopic analysis and quality control. Formerly developed to run on PC computers, Omnitek now offers their scopes in familiar, self-contained form factors—a rasterizer pizza box (the OTM 1001) and a more traditionally “back-to-the-70s” handled box with a screen (the OTM 1000). Both form factors contain exactly the same hardware, and in fact cost the same, so it’s simply a matter of convenience.
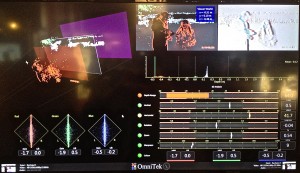
Getting a walk through the different displays, I definitely got the sense that this option is valuable for shops doing lots of stereoscopic work. For example, a multi-planar depth scatter graph shows the overall range of positive and negative parallax in an easy to grasp visual manner, with indicators for the outer acceptable range of depth, and shows which parts of the image correspond to what depth. This display corresponds to a depth histogram at the right.
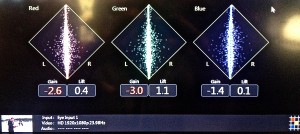
Below that, discrete RGB channel left/right eye exposure comparison scopes show discrepancies in exposure via a horizontal bend in the offending channel’s otherwise vertically oriented graph.
A series of bar graphs show left/right eye discrepancies in depth range, vertical and horizontal position, rotation, zoom, sharpness, and color, with unambiguous center indicators for each property.
Now that these scopes are self-contained, and I’m told pricing starts at $4K (the stereo options are extra), Omnitek is definitely worth a look if you’re in the market for a dedicated set of outboard scopes.
While I was looking at outboard gear, I took the time to speak with someone at Snell about the Alchemist video signal convertor. I’ve long heard that the Alchemist is one of the premier boxes for format conversion from NTSC to PAL and back again, and was curious to learn more about this somewhat obscure piece of equipment. Unlike other solutions that rely upon optical flow analysis, the Alchemist relies upon a technique called “phase correlation motion estimation” to do its magic. I’m told that the Alchemist’s success at conversion is due in part to years of careful refinement of this method of processing, stemming from customer issues and requests. It’s nice to hear about this kind of evolution in a product.
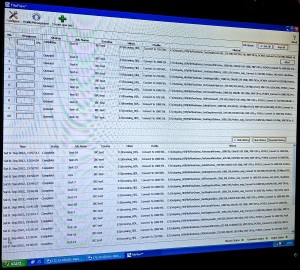
Interestingly, even though the Alchemist hardware continues to be designed for moving SDI/HD-SDI signals in and out, Snell has come up with a way for both new and existing customers to process video in file-based workflows, using something they call their FileFlow server. It’s basically a computer that can be connected to an existing Alchemist via the HD-SDI inputs and outputs, which itself can be connected to your facility’s network. Video files in supported formats can be uploaded directly to the server, managed via a list-based interface, and converted using the Alchemist hardware.
When I inquired about this somewhat indirect add-on approach, they wanted to develop a solution that could be added by the substantial existing customer base, instead of requiring everyone to purchase a new box.
This brought me to the area of the conference center that showcased monitors, among other dedicated bits of hardware. I had a nice chat with Bram Desmet at Flanders Scientific about the new 12-bit XYZ monitoring option which is available as a firmware update to all existing customers. The 24-inch 2461W was already a well-regarded, flexible display, but this makes it even more useful in a wider variety of postproduction situations.
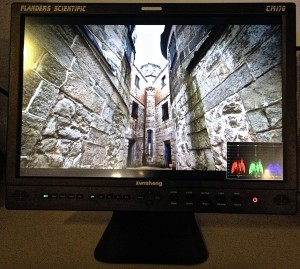
However, what I was really interested in was Flanders’ 10-bit CM170. Even though this 17-inch display isn’t exactly new (it was announced at NAB) this was my first look at it, and I liked what I saw. While these days it’s really too small for a room with five clients in it, given that Flanders has designed it to be a full-resolution, color critical display, at $3,295 it’s probably the best bang for the buck that’s available as a grading monitor for a small one-colorist unsupervised suite.
Additionally, the fact that it’s compact, accurate, and full resolution makes this an especially attractive monitor for on-set work. For that purpose there’s an external DC power input and screw holes for battery attachments. Nice.
Just a few booths away, I also checked out the Penta Studiotechnik HD2 range of color-critical displays. I was previously unaware of this company’s offerings, and while the show floor is a terrible place to do a proper evaluation, Steve Shaw of Light Illusion spoke highly of them, and has worked with the company to make Lightspace available as a calibration option.
Pentax Studiotechnic offers a range of LCD displays under the HD2 Pro brand, in a variety of sizes. The 32″ and under displays use ND filters to control light output and improve blacks, while the impressive-looking 55″ panel is claimed to offer 187 degrees of viewing, with a glossy screen that doesn’t need ND filtering. If you’re researching different displays, it’s another company to look into.
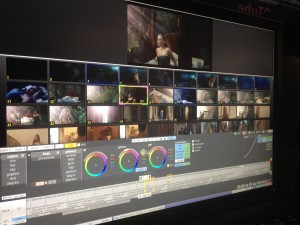
Getting back to grading software, Quantel was showing off their new Pablo Rio. Building upon the features of the Pablo, Rio offers all that and more in a new, hardware agnostic version. Quantel is relinquishing their dependance on dedicated processing hardware, and embracing GPU-based processing. What they were showing on the floor was a Windows-based solution using two Nvidia Tesla cards to do all of the real-time magic one would expect from Quantel. For video input and output, the Rio still uses a Quantel I/O card, but they have plans to support the Atomic I/O card later. Alongside more flexible hardware support, there’s a new ability to soft-mount all supported media formats (and it’s a long list) from any connected volume.
In addition to shedding proprietary hardware, Quantel has updated the grading side of things as well. The UI has seen some tidying up, and a pop-up has been added to switch the three way color balance and contrast controls among shadows, mid tones, and highlights, allowing for “nine-way” adjustments that are similar to what Speedgrade and Lustre colorists are used to.
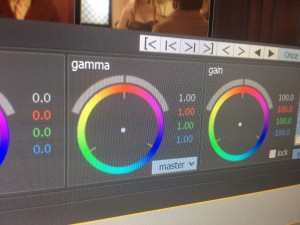
Pop-up for switching the three way controls among master, shadows, midtones, and highlights tonal ranges
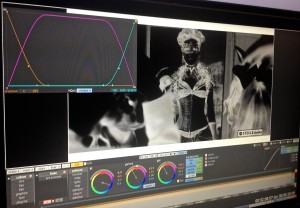
Additionally, a new ability to customize the overlapping ranges of influence of the lift/gamma/gain controls has been added, via overlapping curves.
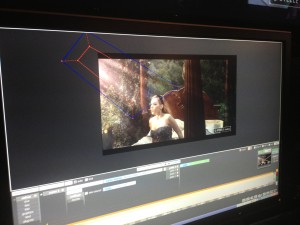
In another surprising example of opening up, Quantel has licensed the Mocha planar tracking toolset, incorporating it directly into Rio, where it can be used for tracking shapes in secondary operations.
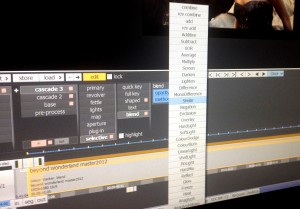
Keeping with one of my unofficial themes of the show, Rio adds the ability to recombine secondary operations (referred to as Cascades) using composite modes. While I ordinarily wouldn’t include a screenshot, the sheer number of composite modes available to choose from is unexpectedly massive.
Furthermore, Quantel is supporting third party filters, with the ability to apply one per cascade (they were demoing the peerless Sapphire plugin set on the floor). Rio also boasts a new higher quality sharpen filter; given the endless parade of soft-focus HD material found in run and gun projects, a better sharpen filter is always welcome.
Finally, Quantel was showing SynthIA, which offers optical flow-based image processing for stereoscopic 3D media similar to what Mistika does—altering a range of interaxial depth. However, unlike Mistika, Synthia does this via a separate application, so it’s not otherwise integrated with the full Rio toolset. I was told this was done to make Synthia available to folks who are focused only on stereoscopic processing, so they don’t need to spend the money on a full Rio license, but I imagine users would like to see those features get rolled into Rio down the road.
Seemingly eager to shed a reputation as one of the most expensive grading solution on the market, Quantel was quick to discuss pricing; available as software only, the Rio comes in at $47K (with an additional 40% off at the moment), while a full turnkey solution with software and hardware costs $130K (with an additional 30% off at the moment). Yes, I know, that’s still not exactly cheap, but it’s a heck of a lot less expensive then what was previously available from Quantel, and you get all of the real-time multi-format conversion, integrated editing, compositing, paint, and grading that previously cost a mint, so it’s progress.
Stopping by Dolby’s booth, I was truly impressed at the Phillips glasses-free auto-stereo television being shown. It’s a 4K display that shows each eye at a full 1080 HD resolution, the viewing angle was impressive (though front-on was still optimal), and there were plenty of “sweet spots” as far as the lenticular front of the display went; I only needed to move a couple of inches to the left or right to jump from one sweet spot to the next, and each sweet spot had a wide range.
“Dolby 3D,” in addition to handling the stereoscopic to auto stereo conversion, also touts “adjustable depth,” basically embedding a per-pixel depth map into the video signal stream so that, with a single control, viewers can adjust and collapse the depth of the stereo being presented from the full default, all the way down to no depth at all, depending on one’s comfort level.
I was also lucky enough to have a chat with the Bob Frye, the product manager for the Dolby PRM-4200. With the recent price drop from $50K to $30K, this display solution has gone (for me) from completely unattainable to merely unaffordable, and I wanted to have another look just to make myself jealous. In particular, I was curious to learn where it excels the most over more affordable Plasma and LCD solutions. The real draw seems to be its shadows reproduction. I’m told the tonal reproduction in the blacks is very smooth, with every code word drawn without clipping; it certainly looked good to me. I’m also told that at a recent “shoot-out” of different monitoring technologies and how well they could be made to match cinema projection, the 4200 was one of the best-regarded matches, so there’s that. With support for 12-bit XYZ right now (ACES support is being looked into), this seems to be a high-quality solution for cinema grading in smaller suites, and for a yearly fee, Dolby will send a calibrator to you to make sure it’s always in tip top calibration for those $200 million tentpole jobs. So now I just have to convince Michael Bay that he needs to grade Transformers 4 here in Saint Paul with me.
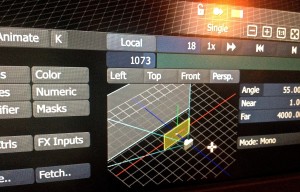
Assimilate Scratch is another application that I hadn’t had a chance to check out at NAB, and I was quite pleased to see that they’ve taken pains to refine the onscreen UI, and have been making strides with greater integration of grading and 3D compositing. New features include a “Pre” track for inserting operations at the beginning of the Scratch image-processing pipeline, and nested scaffolds for precomping multiple scaffolds inside of a single scaffold’s worth of operations.
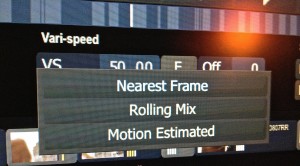
Scratch has also incorporated motion estimated speed processing, making high-quality slow motion the rule, rather then the exception, as of this year’s crop of grading applications.
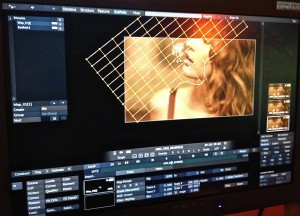
Stacking together these features along with features such as their mesh warper and other compositing and effects tools really starts to show off the kinds of work that Scratch is becoming capable of.
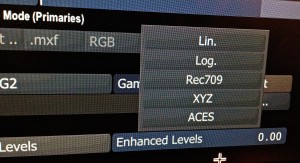
Scratch is also adding to their workflow story, with support for watch folders to do automated image processing, Mocha integration via the import of Mocha tracking data, and a new Nuke round trip workflow that supports the exchange of primary grades, framing info, edits, and LUT data via a scratch node available inside of Nuke. Lastly, ACES support has been added alongside the previously supported colorspaces.
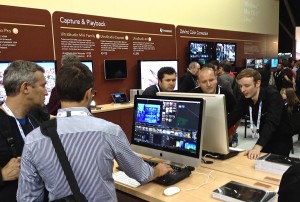
Last, but certainly not least, Blackmagic Design shipped the final version of DaVinci Resolve 9, as well as announcing their new DeckLink 4K Extreme 4K video interface, with support for 10- and 12-bit RGB or YCbCr signals input and output at 4K resolutions via dual-link 3G-SDI. The UltraStudio Thunderbolt interface offers 10-bit RGB or YCbCr input and output at 4K resolutions, so there are two new Resolve-compatible video interfaces for the emerging 4K crowd.
I was also pleased to note that they’ve announced that the reengineered Teranex processors are now shipping, as is the Blackmagic Cinema Camera (an upcoming passive Micro Four Thirds version was also announced).
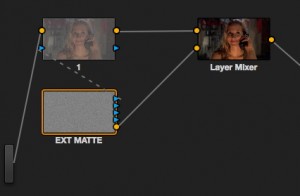
Catching up with the Resolve engineering team, the shipping version of Resolve 9 had some last minute new features slipped in, including a new RGB output in the Ext Matte node that’s useful for adding grain or distress stock video to a clip’s grade via one of the composite modes in the Layer Mixer node; short clips of grain will even be looped endlessly to match the duration of any clip. You do have to take the added step of opening the Media page and adding your grain or distress layer as a matte to the clips you want to use them with, but this ensures that you can render grain or distress into clips in “Render timeline as: Individual source clips” mode.
Another improvement is that the currently selected clip in the Lightbox can now be graded using your control surface, making the Lightbox into a way of quickly browsing and grading clips of a scene.
There’s also a functional alteration of a control that had already been available in the public betas. The contrast control in log mode has been changed so that there’s now a smooth rolloff at the highlights and shadows, an automatic S-curve, so detail won’t be clipped.

Increasing contrast using the Log mode’s Contrast parameter now creates an S-curve adjustment, seen in the waveform of a formerly linear ramp gradient.
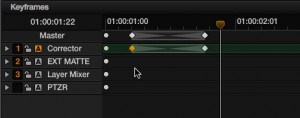
The Keyframe Editor has been updated, with a new look for keyframes (static keyframes are round, dynamic keyframes are diamond-shaped) that makes them easier to select and drag.
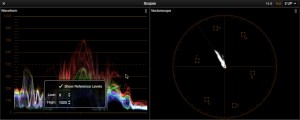
Lastly, the video scopes have even been updated, with an optional skin tone indicator in the Vectorscope, and optional minimum and maximum reference level lines (yellow) in the Waveform.
So there you go. Honestly, this year’s IBC is probably the most fun I’ve had at a trade show in years, and it was really illuminating to see demos of nearly every major grading workstation on the market, side by side. As I tweeted during the show, each grading application has something that’s particularly special, but no one grading application does everything. That said, we’ve got more tools available to us then ever before in the history of this crazy profession. Now we’ve just got to figure out what to do with them.

3 comments
Hi Alexis
thank you for your comments : very instructive. I’m impressed to see new features for RESOLVE 9 coming so fast !
Regards
Hi Alexis,
Thank you for your feedback.
Do you know if a deinterlace function is planed to be implemented in a near version of Resolve ?
It would be awsome.
Thanks.
Alex.-
I’m not privy to anyone’s future development plans, so I have no idea when Resolve will incorporate more sophisticated retiming and deinterlacing functionality, although I certainly hope it’s on the development team’s mind.