The Diamond brothers approached me last month about a music video they were about to shoot for Jackson Harris, and while I always enjoy grading music videos, another big draw was the fact that they had just taken possession of a RED EPIC, and I was eager to see how the media would handle.
When the media drive arrived and I loaded the project into Resolve (I used the Resolve v8 beta for this project, with zero problems), I had a phone chat with Josh Diamond to discuss their visual goals, and then jumped straight into the grade on a handful of shots to see what I could get away with before sending some test stills back for early approval.
The video was shot at 5K, with cinema prime lenses (I was told but I forget which ones), and excellent lighting, so the source material was great to start out with. The brief was for a look that both flattered the singer and kept him front and center during the entire video.
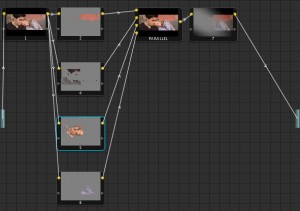
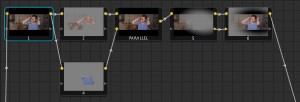
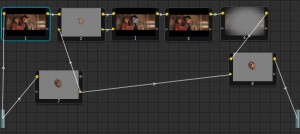
Ordinarily I don’t go cuckoo for secondaries, but this was a project that benefitted from tight saturation control of specific elements throughout the scene, so I let myself go. The potential issue was the fairly subdued palette of the art direction throughout the piece. This was by design, but I really wanted to, as best as I could, create a subtle but distinct separation between the talent and the environment.
This was where the EPIC R3D media really shined. In general, I found that if I could click something, then I could key it, even shots with the actors skin tones against an orange background. And not only could I key such small differences between analogous hues, but I could key them cleanly.
While I’m usually an advocate of trying to take care of as much business in the initial primary grade as possible, I’ll freely admit that for this project I keyed every single skin tone throughout the entire video. And in just about every shot, the result was a solid, controllable matte. On top of that, I did a lot of selective manipulation of luma within secondary grades. Again, this is something I rarely even attempt if I’m working with highly compressed media, the results usually expose too many compression artifacts to be worth trying. With the EPIC R3D footage, despite the fact that it is a compressed source format, I was able to get away with pretty much any isolated adjustment I wanted to. It was tremendously freeing.
Other things I could point out would be a significantly higher latitude in making contrast adjustments; this wasn’t HDR media, I just had the one exposure to work with but I was able to make pretty much whatever adjustments to image lightness I wanted to. There was low, virtually nonexistent noise in the shadows. And the color I was drawing out was consistently rich and free from artifacts.
So that was my EPIC experience. Having a RED ROCKET card certainly made things easier, but I disabled the card to see what the performance would be on my 8-core 2010 Mac Pro, and with quarter-rez debayering selected in the Source tab, my performance was perfectly acceptable. Of course, with the RED ROCKET turned on things went much faster, especially when it came time to render the final result.
One last funny tidbit. I was so eager to take a look at the media when I first got the hard drive via FedEx, I loaded the project straight from the bus-powered LaCie FireWire 800 drive I was sent. Unexpectedly, it turns out there was plenty of bandwidth to work in Resolve at real-time via my RED ROCKET, even though it was EPIC media and the R3D files were somewhat larger. Bandwidth was fine as long as I was only reading a single stream from the drive; when I tried to render back onto the same drive, my performance dropped precipitously. I eventually copied the media onto my local array, but it was actually pretty great knowing I could just work off the drive in a pinch.
Without further ado, here’s the video.


4 comments
Hey Alexis, how long did the video take to grade? I imagine pulling all those keys for each shot must’ve been time consuming versus doing just primaries. I’m just curious what the time/cost difference is for a project like this when trying to achieve that “extra” level of perfection.
Cheers,
For this project, counting time spent grading alone, my first pass took about 5 hours including finding the initial grades for each angle, getting approvals, and then rippling those grades out among all the other shots in the project, balancing everything out, retracking all the windows that needed it, and making all the little individual tweaks that certain shots demand. After that, miscellaneous revisions took another hour. Happily, for this project budget wasn’t an issue and I could take the time to work each grade as far as I thought was appropriate, without being in a screaming hurry.
As you say, if there were budget constraints and less polish was required, I would have relied on a more primary-centric approach, and I probably could have accomplished the entire grade inside of 3-4 hours depending on how much of a hurry the client needed to be in. Of course, the couple of hours saved in the process would’ve meant less polish, fewer secondaries (with all the necessary tweaking), and less experimentation, but that’s always the trade-off. And, at the end of the day, it all depends on how detail-oriented the client wants to be, within the limits of their budget.
The one pressing question i have is did you use davinci’s audio playback capability durring the grading? 😉
Actually, I didn’t use audio playback while grading this. Personally, unless there are specific audio cues that I need to hit with specific grades, I find audio playback to be distracting, especially while matching shots. Once the majority of the grading was completed, then I played the program through with audio, but at that point I was dealing with small tweaks and revisions.
If this had been more of a narrative piece, then checking each scene’s grade against the soundtrack is potentially good to see how the visuals match the tone set by the audio, but even then I usually work in supervised sessions, and the director knows the vibe s/he wants (this scene should be creepy, that scene should be romantic). Besides, 8 times out of 10, the final audio isn’t finished or is in the process of being mixed when I start grading, so I only get the rough mix.
Where audio playback becomes essential is during final supervised review sessions; I find it’s impossible for most clients to take in a grade’s true contribution to the program as a whole without audio, even if it is a rough mix.